Open Kitchen Shelving Layout: Spacing, Reach, and Storage
Plan open kitchen shelves with practical heights, depths, spacing, safe mounting, everyday storage, cleaning access, task lighting, and visual order.
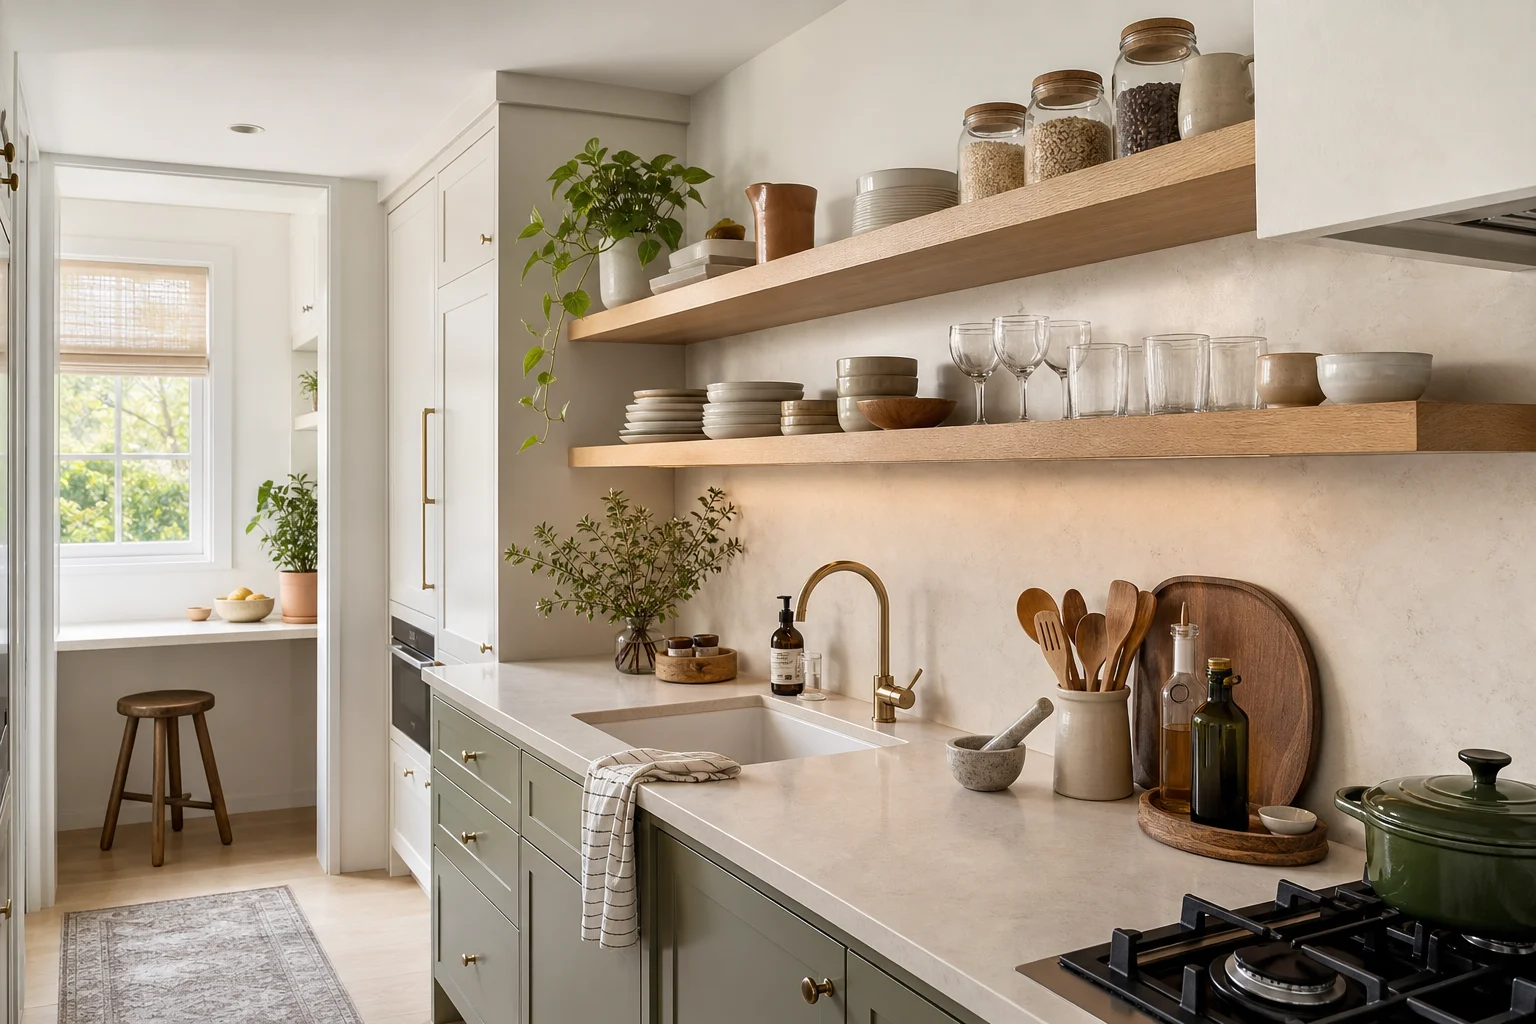
Open kitchen shelves trade closed volume for quick reach and a lighter visual wall. They work when the stored items are used often, fit the shelf depth, and can be kept clean. They fail when the lowest shelf blocks counter tasks, the top shelf requires unsafe stretching, or heavy dishes depend on decorative fixings. Design the contents, support, and cleaning routine together.
Inventory What Will Actually Be Open
List everyday plates, bowls, mugs, glasses, oils, spices, jars, cookbooks, and serving pieces. Measure their height, diameter, weight, and quantity. Frequently used dishes tolerate exposure because they are washed often; rarely used items collect grease and dust.
Keep food in appropriate sealed containers and consider light and heat. Oils, spices, and some foods degrade near sun or cooking heat. Do not choose open shelves simply to display ingredients in unsuitable conditions.
Choose Shelf Depth From the Contents
A depth of about 20–25 cm can hold many plates, bowls, and mugs without projecting heavily over the counter. Larger platters, appliances, or canisters may need 28–30 cm or more. Use measured objects rather than a standard dimension, and include any front lip or rail.
Deep shelves mounted near eye level can hide the work surface and create a head-strike hazard. Shallow shelves may look elegant but leave large plates overhanging. Mock up the depth with cardboard at full scale before ordering material.
Set the Lowest Shelf Above the Work Zone
Measure countertop appliances, faucet height, backsplash outlets, task lighting, and the hands using the counter. The lowest shelf must clear a coffee maker lid, mixer bowl, and tall pot where those tasks occur. A common starting range may be roughly 45–60 cm above the counter, but actual equipment, users, and local rules determine the result.
Avoid running a shelf through the visual and physical space above a tall faucet. At a preparation zone, preserve room to lift a cutting board or use a blender. Shelf height should support the task below, not merely align with a nearby cabinet.
Space Tiers for Reach and Visibility
Group objects by height and add comfortable hand clearance. Stacked bowls need room to lift the top item without striking the shelf above. Glassware benefits from enough space to see and grip each piece. Equal spacing may waste volume if one tier holds mugs and another holds tall pitchers.
Reserve the easiest shelf for daily items. Put decorative or light occasional pieces higher, but avoid a top tier that encourages climbing on counters. Use the reach of the shortest regular user as the primary test.
Keep Shelves Away From Heat and Grease
Open shelving immediately beside or above a cooktop receives grease and heat. Maintain clearances required by the appliance, hood, combustible-material rules, and local codes. A shelf that conflicts with extraction or hood capture is not worth the storage.
The wall near a sink receives splash. Use water-compatible materials and keep vulnerable books or unsealed timber away. Locate open shelves where everyday items are reachable from the prep or cleanup zone without crossing the cook's path.
Engineer Supports for Real Loads
Ten ceramic plates, bowls, and glass jars are heavy. Select brackets, concealed rods, wall anchors, shelf material, thickness, and span as a complete rated system. Fix into appropriate structure and account for the wall construction. A shelf that looks thin in a rendering may deflect in use.
Have qualified installers verify support, especially for masonry, hollow walls, tiled surfaces, or long floating shelves. Include the shelf's own weight and uneven loading. Never assume decorative drywall anchors can carry dish storage.
Integrate Lighting and Outlets Safely
Under-shelf lighting can improve the counter below, but it needs glare control, appropriate electrical installation, heat management, and service access. Conceal wiring in a planned channel rather than draping a cable behind jars. Do not block countertop outlets with shelf brackets.
Choose a color quality that renders food and finishes accurately. A shallow front-mounted light often spreads illumination better than a point source at the wall, but test the selected fixture and shelf depth.
Create Visual Order Without Fake Minimalism
Group items by task and frequency, not only color. Daily plates near the dishwasher, mugs near drinks, and bowls near preparation reduce movement. Leave enough empty space to grip items and absorb new purchases. Overfilling every centimeter turns quick access into careful unpacking.
Use closed cabinets for mismatched packages, cleaning products, and rarely used equipment. Open and closed storage work best as a system. If all upper cabinets are removed, calculate whether the base cabinets can accept what should not remain exposed.
Test the Shelves in the Whole Kitchen
Model shelf depth, tiers, brackets, jars, plates, faucet, appliances, and open cabinet doors in the Aedifex room planner. Use the 3D demo perspective at the users' eye heights to check reach, head clearance, and whether shelves make a narrow aisle feel tighter.
Simulate unloading the dishwasher, making coffee, chopping, washing a tall pot, cleaning the shelf, and replacing the heaviest stack. If the layout needs a stool every day, revise the tier heights.
Open Shelving Checklist
- Inventory item size, weight, frequency, and storage conditions.
- Choose depth from the largest regular item.
- Clear faucets, appliances, outlets, and counter tasks.
- Set tier spacing for lifting and gripping, not visual symmetry.
- Keep shelves outside unsafe heat, grease, and splash zones.
- Engineer brackets, anchors, material, and span for full load.
- Plan task lighting, wiring, and cleaning access.
- Balance open display with enough closed storage.
After the storage logic works, compare materials in the interior planner and register to save the selected kitchen wall.