Sewing Room Layout: Cutting Table, Light, Storage Plan
Design a sewing room around fabric movement, cutting-table dimensions, machine ergonomics, pressing safety, task lighting, storage, and clear workflow.
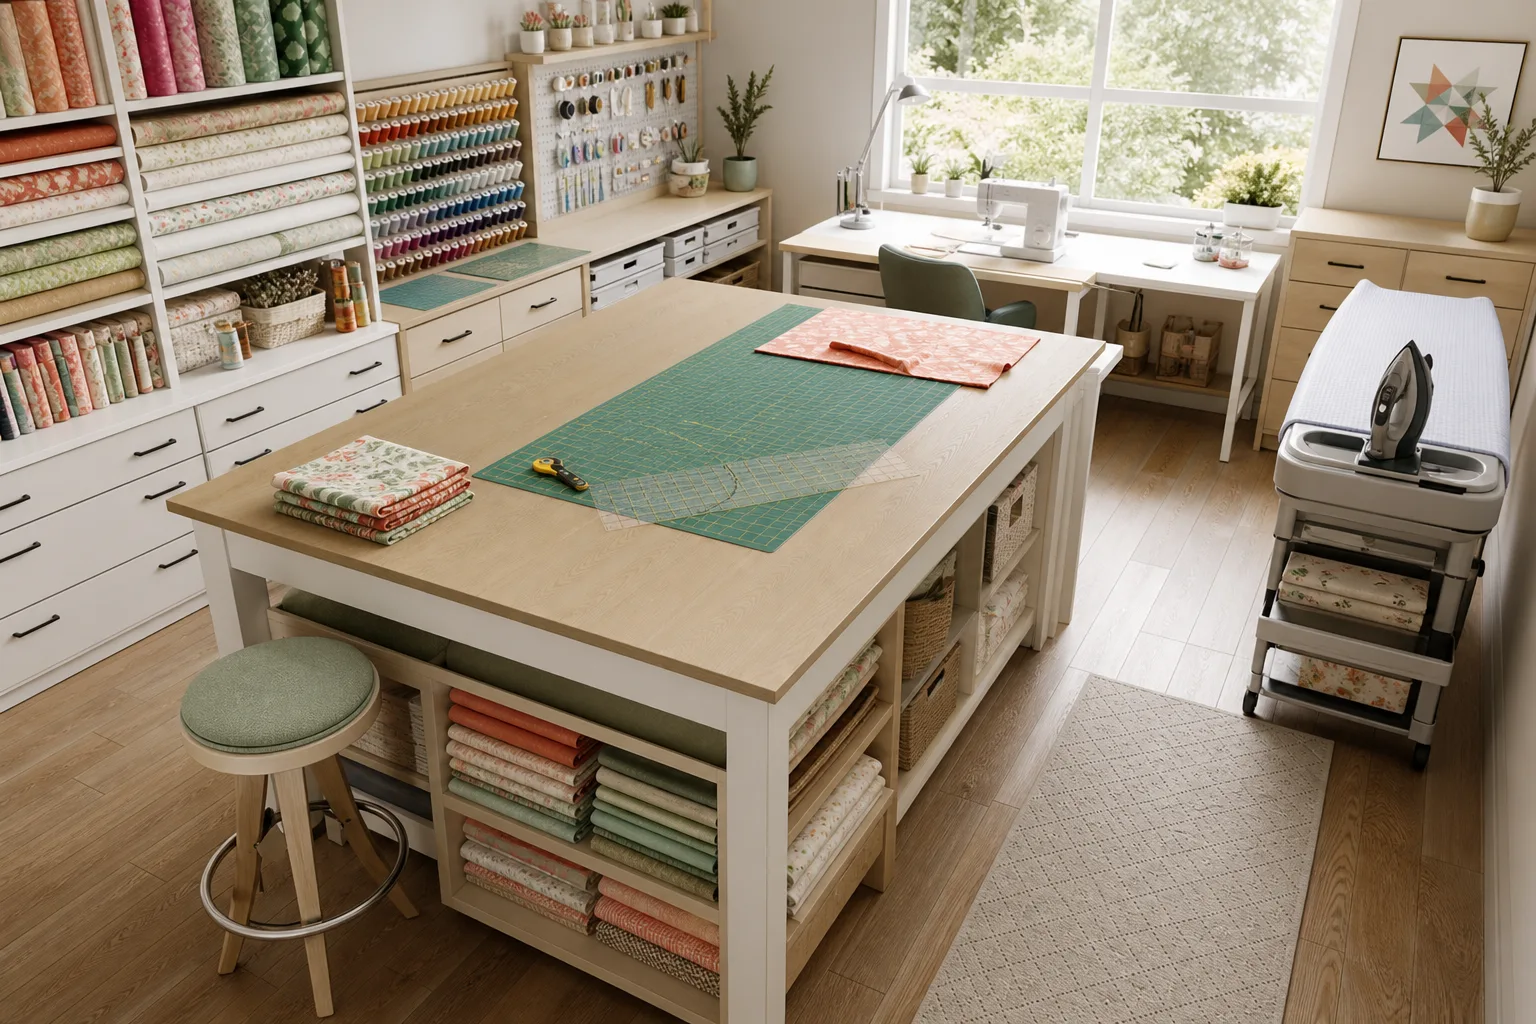
A productive sewing room is not a decorated storage room. Fabric moves from shelves to cutting, marking, machine work, pressing, fitting, and finished storage. Each step changes the size and orientation of the material, so a layout that fits a closed machine may fail as soon as a quilt, dress, or curtain panel spreads across the room.
Start With the Projects You Actually Make
List the largest recurring item and the most frequent item. Garments need pattern layout, fitting, hanging, and a mirror. Quilts need a broad cutting surface and room to support bulk beside the machine. Upholstery and curtains require long fabric runs and stronger tables. Small repairs may prioritize instant setup over maximum surface.
Record which steps happen seated, standing, or moving. Note whether another person helps, whether clients visit, and whether children or pets enter. These facts decide table access and tool security.
Size the Cutting Table From Material
The cutting surface should support the material without forcing constant folding or floor work. Many home makers test widths around 90–120 cm and lengths around 150–240 cm, but pattern size, mat format, arm reach, and room size should determine the final table. A very wide island is useless if its center cannot be reached safely.
Set height from the primary user’s standing elbow and preferred cutting posture rather than copying a kitchen counter. Mock up the surface with boxes, then cut and mark for twenty minutes. Adjustable height or two work levels can accommodate varied tasks and users.
Preserve Access Around the Table
Access on all four sides makes large layouts easier, but a wall-adjacent table can save space for smaller work. Start by testing roughly 90 cm where a person stands and turns, then add space for drawers, another person, mobility needs, or a rolling cart. Avoid a narrow dead side where fallen pins cannot be retrieved.
If the table folds or rolls, define its parked position and the clear floor needed to deploy it. Casters must lock securely for rotary cutting. Do not let the deployed table block the only exit.
Build the Machine Station Around Posture
Measure the machine, extension table, knee lift, pedal, thread stand, embroidery unit, power switch, and fabric moving left, right, and behind. A sewing surface that places the machine bed flush with the table can support fabric, but the exact insert and ventilation must suit the model.
Set chair, table height, and pedal so shoulders stay relaxed, forearms are supported, and feet remain stable. Provide space behind the machine for fabric and in front for chair movement. Keep the pedal cable away from casters and walking routes.
Separate Pressing From Cutting
The iron, steam station, board, and hot tools need a stable heat-resistant zone, reachable outlet, cord control, water refill, and safe cooling location. Do not lay a hot iron on the cutting mat or run its cord across the main aisle. Follow appliance instructions and local electrical safety requirements.
Place pressing close enough to reduce carrying but far enough that steam does not affect fabric storage, electronics, or paper patterns. A wall-mounted folding board saves floor space only when its full swing and standing area remain clear.
Store Fabric by Visibility and Weight
Deep shelves hide fabric and encourage unstable stacks. Use shelf depths matched to folded dimensions, bins that can be lifted safely, and labels that do not rely on perfect memory. Keep heavy bolts and machines between knee and shoulder height where practical; rarely used light supplies can go higher.
Protect fabric from direct sun, dust, pests, and humidity appropriate to the material. Closed cabinets reduce fading and visual noise. Open shelves improve visibility but require more cleaning. Do not compress delicate or rolled material merely to fit a uniform cubby.
Put Small Tools at the Point of Use
Cutting rulers, weights, chalk, and rotary tools belong at the cutting table. Machine needles, bobbins, feet, and screwdrivers belong at the machine. Pressing cloths and water belong at the ironing zone. Duplicating one inexpensive tool may be better than walking across the room with a sharp or hot item.
Use shallow drawers and vertical dividers so the bottom item remains visible. Secure blades, pins, chemicals, and cords if children or pets can enter.
Light for Color and Fine Detail
Combine even ambient light with adjustable task lighting at cutting, machine, and pressing stations. Place light from the side opposite the dominant hand when possible so the hand does not shadow the needle or cut line. Manage glare on rulers and shiny fabric.
Daylight is useful for color judgment, but direct sun fades fabric and changes throughout the day. Use controllable shading and compare color under the lighting in which the finished item will be used. Select appropriate electrical fixtures and avoid overloading one extension lead with machine, iron, and lights.
Model a Complete Project
In Aedifex, place the full cutting mat, opened pattern, person reach, machine extension, chair pull-out, fabric behind the machine, open storage, ironing board, mirror, waste, and parked carts. Use the room planner to compare a central island, peninsula, and fold-down table.
Run one project from fabric retrieval to finished hanging. Track clean scraps, waste, pins, pressing, and work-in-progress storage. The home art studio guide offers related lighting and material-storage checks.
Sewing Room Checklist
- Identify the largest recurring project and its material envelope.
- Mock up cutting-table length, width, height, and reach.
- Preserve safe access and a defined deployment zone for folding tables.
- Fit the machine, fabric support, chair, pedal, cords, and attachments.
- Give pressing a separate heat-resistant zone with safe power and cooling.
- Match fabric shelving to folded sizes, weight, sun, dust, and humidity.
- Store tools where they are used and secure sharp items.
- Provide shadow-controlled ambient and task lighting.
- Define parking for carts, projects, scraps, waste, and finished work.
- Simulate a complete project, not only a tidy empty room.
The right sewing room keeps the material supported and the next tool within a safe reach. After workflow validation, use the interior planner to compare storage and lighting, then register to save the measured studio.