Tilt-Out Shoe Cabinet Clearance for a Narrow Entryway
Check tilt-out shoe cabinet clearance with the front open, shoes inside, and someone standing nearby so a shallow cabinet does not block your entryway.
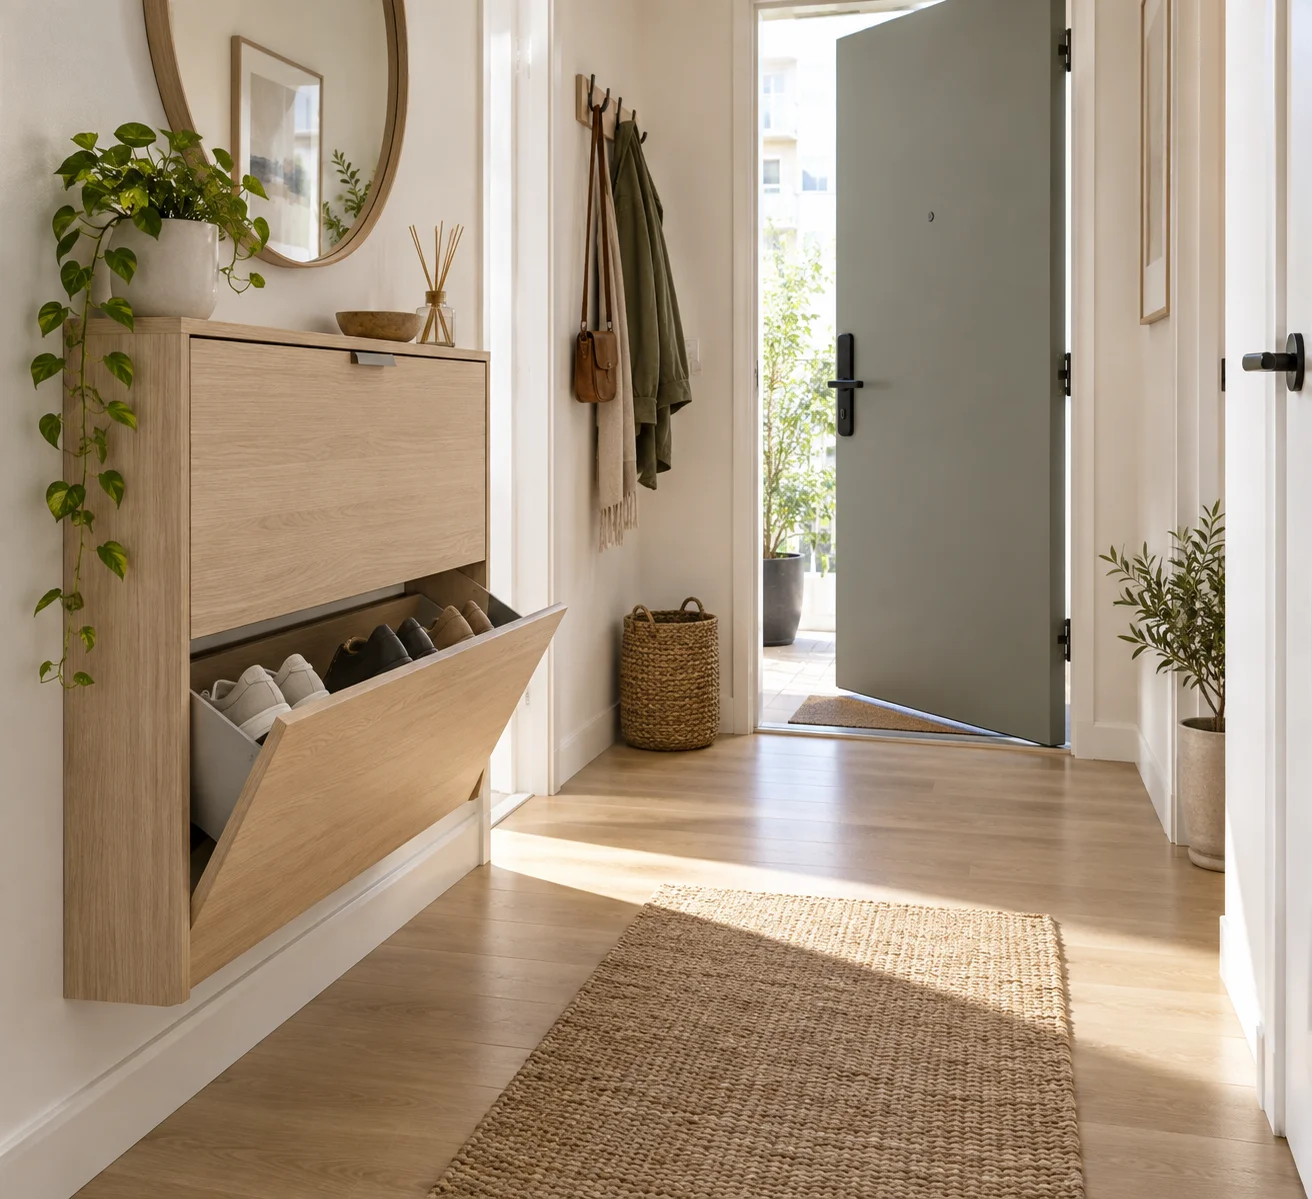
A shallow shoe cabinet can look like the perfect answer to a narrow entrance. Its closed depth may be less than a pair of shoes laid flat, and its front hides everyday clutter. The difficulty arrives when the compartment tilts forward: the door, internal basket, and person retrieving shoes occupy space that the product's closed dimensions do not describe.
Before buying, compare the cabinet in its closed, opening, and fully open states. Add the entrance door and the household's arrival routine. The planning examples below are not minimum passage standards or installation instructions. Local access and escape requirements, the exact product instructions, and the needs of the people using the entrance take priority.
Get an Opening Diagram from the Supplier
Start with overall width, height, and closed depth, including the handle. Ask for the maximum projection when the compartment opens. Some product listings show only the cabinet body; others include the handle but omit the moving basket. Confirm precisely which reference points the drawing uses.
Do not calculate the open footprint from a photograph of the door angle. Different hinge positions and basket designs produce different movements. Ask whether compartments may be opened together and whether the mechanism has a stop. Follow the manufacturer's specified use rather than trying to extend the opening by altering the hinges.
Record the installation stand-off from the wall as well. A skirting board, wall irregularity, or required mounting bracket can increase the final depth. A cabinet that looks flush in an image may sit several centimeters farther into your actual hall.
Calculate Remaining Space in Each State
Imagine an entrance corridor measuring 110 cm between finished walls. A cabinet installed at 22 cm overall depth leaves 88 cm when closed. If the front and basket project 40 cm from the wall when open, the remaining width becomes 70 cm before a person stands there.
Those numbers demonstrate the difference between storage depth and operating depth; they do not prove that either width is adequate. A person bending to retrieve shoes can occupy much of the remaining strip. Someone else carrying groceries may be unable to pass, even though the closed cabinet looked unobtrusive.
Mark the installed cabinet and open projection on the floor. Use a cardboard panel to represent the tilted front if possible. Have the actual users approach, open, reach, close, and walk away. Consider bags, coats, mobility aids, and children alongside the person operating the cabinet. Never assume a narrow leftover width satisfies accessibility requirements.
Keep the Entrance Door Independent
Draw the full door swing, including the handle and any closer. Then test it with the shoe compartment open. A door can hit the tilted panel, trap the person between two moving surfaces, or prevent the compartment closing until the door is moved again.
Even a cabinet beside the hinge wall needs checking. The door handle may strike the top before the door leaf touches the body. Include the door's normal opening angle and the space needed to bring parcels or furniture inside. Do not add a stop that limits required access merely to protect the cabinet.
If the only workable position is behind the entrance door, consider whether another wall or a different storage format is more appropriate. Required escape and access routes must remain usable. A routine that depends on everyone remembering to close a compartment at exactly the right moment is fragile.
Match the Interior to the Shoes You Actually Wear
A tilt-out cabinet often stores shoes at an angle, and nominal capacity can assume small, low-profile pairs. Measure the household's largest everyday shoes, including heel height and the bulk of soles. Tall boots, broad sneakers, and bulky work shoes may not fit the same compartment setting.
Use the supplier's internal clearances and permitted divider configurations. Do not remove structural parts or overfill the basket to reach an advertised pair count. A few pairs that can be retrieved cleanly are more useful than compressed shoes that prevent the front from closing.
Consider which footwear needs to dry before storage. Follow the cabinet's material and ventilation guidance. A separate suitable place for wet shoes may be necessary, especially where rain or snow is frequent. Do not count the entrance mat as unlimited extra storage if it is also the standing and walking zone.
Plan the Person's Position, Not Just the Door
The user may stand directly in front, approach from an angle, or sit on a nearby seat while changing shoes. Test the expected method. A cabinet opening at shin height can be awkward beside a chair if the tilted front blocks the seated person's feet.
If a seat is necessary, give it a separate stable footprint and test the transfer between seat and storage. Do not use the shoe cabinet as a seat unless it is specifically designed for that load and use. Likewise, do not turn the top into a heavily loaded shelf without checking the manufacturer's limits.
For households with simultaneous arrivals, decide whether one person can wait outside the operating zone without blocking the doorway. A storage position farther along the hall may reduce congestion, provided it preserves the necessary circulation route and does not merely move the pinch point elsewhere.
Resolve Wall Fixing Before Purchase
Tall, shallow cabinets can require anti-tip wall fixing. Read the installation instructions before choosing the location and confirm that the wall and specified fixings are suitable. Skirting boards can complicate the connection, so use the manufacturer's approved installation method rather than improvising a spacer.
In a rental, obtain any required permission for wall fixing and clarify the wall construction. If you cannot install the product as required, choose another product or location. Filling a cabinet with shoes is not a substitute for required anchoring, and opening only one compartment does not remove an installation requirement.
Make a Full-Size Arrival Test
Place tape for the cabinet body and open front. Bring in the usual shopping bag, close the entrance door, put down keys, change footwear, and store the shoes. Then repeat with another household member arriving at the same time. Watch where bags land and whether either person has to step over shoes.
The narrow hallway guide provides broader ideas for circulation and shallow storage. Use the room planning introduction or Aedifex demo to compare the overall furniture arrangement, but verify moving geometry from the product drawings and a physical mock-up.
Before You Order
- Obtain installed depth and maximum open projection, with handles included.
- Check the entrance door and cabinet in conflicting open positions.
- Measure the largest shoes rather than relying on a pair-count claim.
- Test reaching, changing shoes, and passing with the actual users.
- Confirm wet-shoe storage without occupying the walking route.
- Resolve wall fixing, skirting boards, and any rental permissions.
A good entry cabinet makes arrival simpler in use, not just tidier in a photograph. If the open panel turns the entrance into a one-person trap, choose a different position or storage type before the cabinet is installed.