Walk-In Shower Layout: Bench, Niche, Drain, and Door
Design a walk-in shower around the bench, niche, drain, controls, glass, spray zone, drying space, accessibility, and practical cleaning routines.
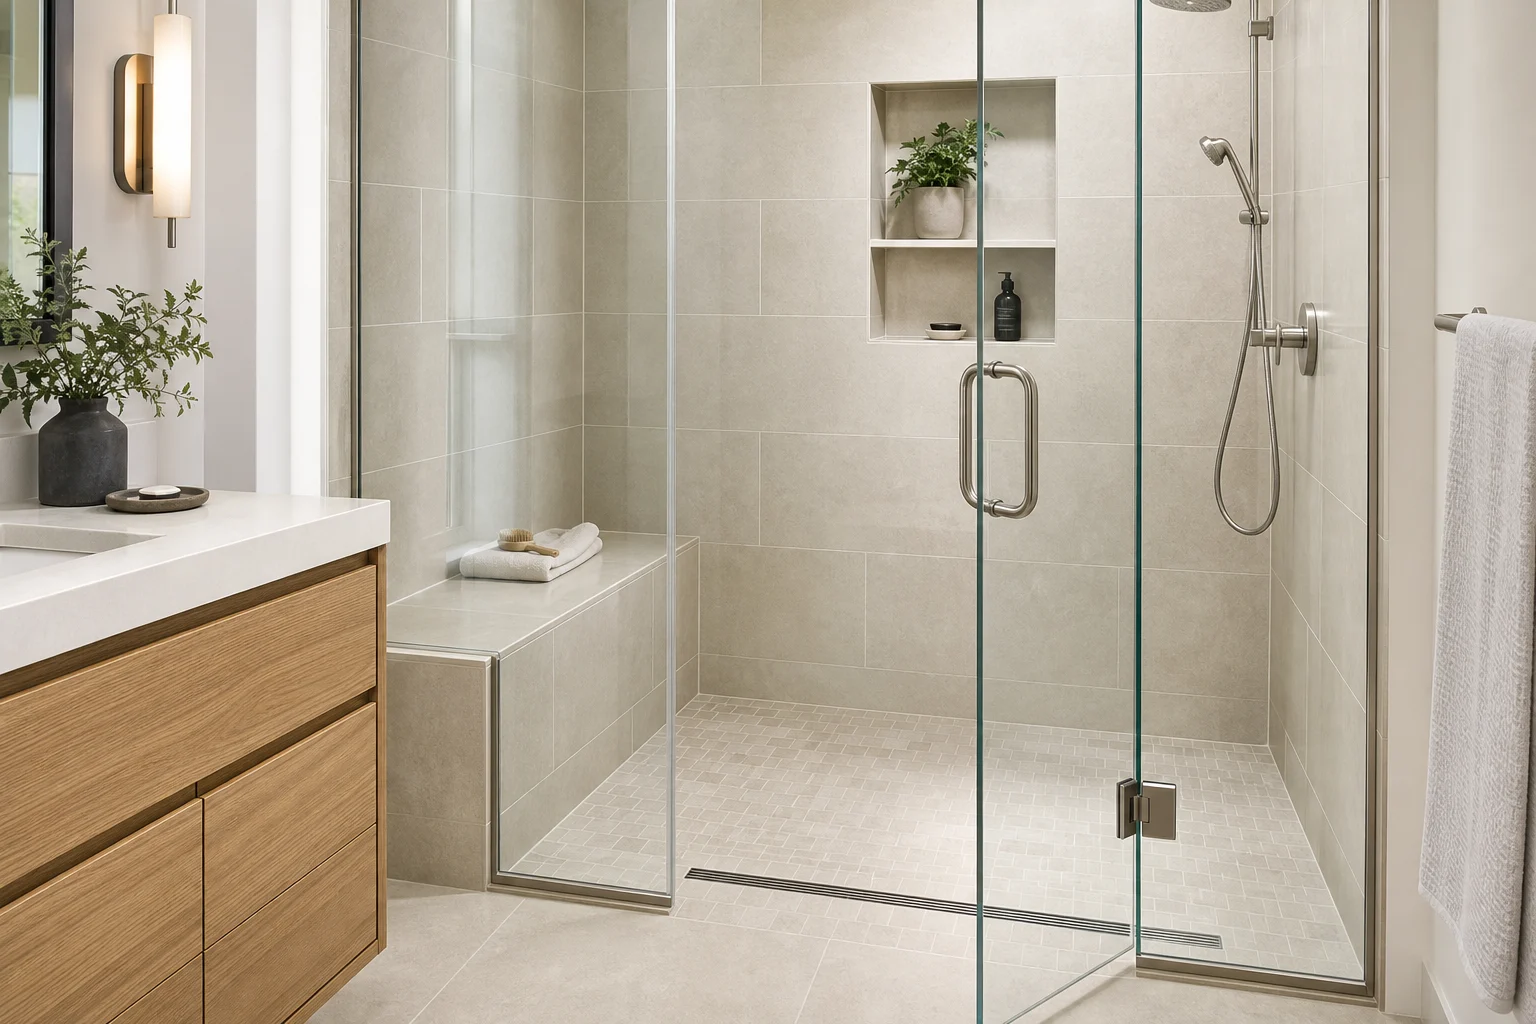
A walk-in shower has several overlapping zones: standing under water, reaching controls, sitting on a bench, opening glass, keeping towels dry, and moving safely across a sloped floor. A generous-looking enclosure can still place the niche behind a user's shoulder, soak the entry mat, or make the bench block the only comfortable standing position. Coordinate the whole sequence before selecting tile or glass.
Start With Users and Required Clearances
List who will use the shower now and in the future, including height, reach, balance, mobility devices, caregiving, and whether a child will be assisted. Local codes and accessibility standards govern minimum dimensions and details; use qualified designers and trades for compliance. Rules of thumb are useful only for early option testing.
Draw the finished enclosure after backer, waterproofing, tile, profiles, and glass. A framed rough opening can lose meaningful width once finishes are complete. Include the user standing, turning, bending, and reaching rather than relying on an empty rectangle.
Place the Water and Control Zones Separately
The shower head determines the main spray zone, but controls do not have to sit directly below it. Locating controls near the entry can let a user start the water without stepping into a cold spray. Check reach from outside and inside, valve requirements, pipe routes, and whether an open glass door blocks access.
Place handheld equipment where it can serve both standing and seated users without the hose becoming a trip or cleaning problem. Confirm that doors, grab bars, shelves, and the hose do not overlap. Professional plumbing design is essential for pressure, temperature control, and safe installation.
Size and Locate the Bench for a Real Task
A bench may support seated showering, shaving, washing feet, or temporarily holding products. Those purposes require different positions. A seat roughly 43–48 cm high and 35–45 cm deep is a common early test range, but individual needs and local requirements control the final design.
Keep the bench out of the strongest spray unless seated showering requires otherwise. A full-width bench can reduce standing floor area; a corner seat or fold-down model may preserve space. Every built-in surface needs proper slope, waterproofing, structure, and a finish that remains comfortable and maintainable.
Put the Niche Where It Can Be Reached and Drained
Stand in the intended washing position and mark a natural reach that does not require turning under water or leaning over the bench. Separate tall bottles from soap and small items. One oversized niche may cut across more structure and collect clutter; two modest compartments can be easier to use.
Coordinate the niche with stud bays, pipes, membranes, tile module, and exterior-wall conditions before framing. Horizontal surfaces must drain toward the shower, and waterproof transitions need tested details. Do not improvise a recess after the wall is already built.
Coordinate Floor Slope and Drain Position
Point drains usually require slopes from multiple directions, while linear drains can support a single-plane slope when correctly located. The best choice depends on structure, drain route, waterproofing system, tile format, threshold, and local practice. Large tile on a multi-plane slope may be difficult to set without lippage; small tile adds joints but follows compound falls.
Keep the standing surface stable and avoid abrupt transitions. The floor must carry water to the drain without creating a low spot at the bench or entry. Require a complete waterproofing and flood-test plan from qualified professionals; tile and grout are not the waterproof layer.
Control Spray at the Entry
Doorless showers need enough depth, head orientation, and screen length to contain spray. A hinged glass door needs a swing that clears the vanity, toilet, towel rail, and bath mat. Sliding glass removes the swing but changes opening width, tracks, and cleaning access.
Model water direction, not just glass outlines. A rain head near an open end, a handheld aimed toward the door, or a bench beside the opening can send water into the dry zone. Preserve a place to stand and towel off without blocking another fixture.
Plan Grab Bars and Future Support
Even when bars are not installed immediately, suitable wall reinforcement can make later adaptation easier. Coordinate backing locations with the bench, controls, niche, glass fixings, and pipes. A bar must be installed into an appropriate support system; it cannot share an unverified fixing zone with a niche.
Consider a step-free threshold, reachable controls, hand shower, stable seat, and adequate approach early. Retrofitting these features after waterproofing is expensive and risky. Use applicable accessibility standards and professional advice for the intended user.
Test Cleaning and Maintenance
Check whether a hand can clean behind the bench, along glass channels, around the drain, and inside the niche. Frameless glass still needs hardware and seal maintenance. A fixed panel that is too close to a wall can create an unreachable slot.
Provide ventilation that handles moisture and is appropriately controlled. Place products where they can dry rather than holding water. Select surfaces for grip, cleanability, and compatibility with the waterproofing system, not merely for appearance.
Model the Complete Bathroom
Build the shower, vanity, toilet, door, glass, bench, niche, and drying zone in the Aedifex room planner. View the enclosure in the 3D demo style at standing and seated eye level. Test starting the water, entering, reaching soap, sitting, using the handheld, exiting, and collecting a towel.
Walk-In Shower Checklist
- Define users, reach, mobility, assistance, and applicable standards.
- Measure finished dimensions after all wall and floor layers.
- Separate entry controls from the strongest spray where practical.
- Size the bench for its actual task and preserve standing space.
- Coordinate the niche with structure, pipes, tile, and waterproofing.
- Select drain and tile together with a verified slope strategy.
- Test glass, spray, bath mat, towel, and adjacent fixture clearances.
- Plan reinforcement, ventilation, cleaning, and maintenance access.
After technical coordination, compare tile and fixture finishes in the interior planner, then register to save the selected bathroom layout.