2D vs 3D Floor Plans for Renovation: When to Use Each
Use 2D plans for dimensions and coordination, 3D views for scale and sightlines, and a shared model to test furniture, doors, light, and decisions.
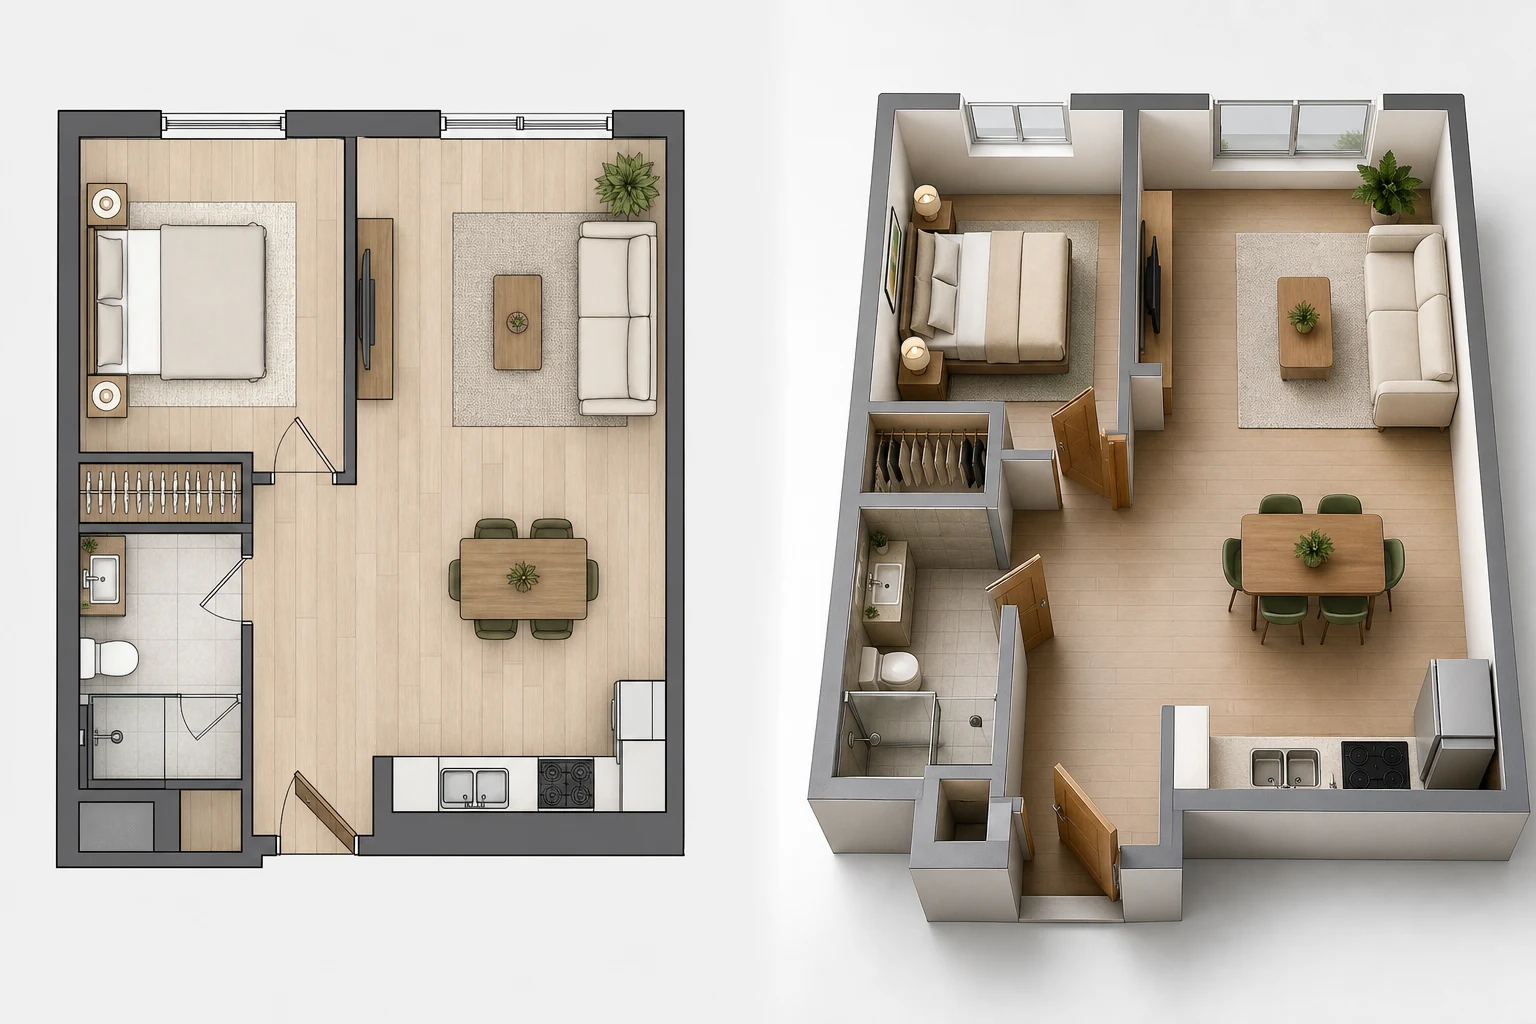
Two-dimensional and three-dimensional floor plans answer different renovation questions. A 2D plan makes dimensions, alignments, door swings, and room relationships easy to audit. A 3D view makes height, mass, sightlines, daylight, and furniture scale easier to feel. The strongest workflow does not choose one format; it keeps both views tied to the same measured model.
What a 2D Floor Plan Does Best
A plan view removes visual clutter and shows walls, openings, fixtures, furniture, and circulation from directly above. It is efficient for comparing room widths, checking whether doors overlap, locating plumbing runs, and marking dimensions. Contractors and consultants often need precise drawings and schedules beyond a styled 3D image.
Use 2D to establish the measured existing condition, demolition intent, proposed partitions, key clearances, and item references. Apply a consistent scale and symbol system. The floor-plan symbols guide explains common notation, but project documentation must follow local professional and permitting requirements.
Where 2D Can Mislead
A sofa rectangle may fit while its high back blocks a window. A cabinet footprint does not reveal whether a door handle collides at shoulder height. A narrow room can look acceptable from above while a low beam makes it uncomfortable. Elevations, sections, and 3D views are needed when height changes the decision.
2D also encourages false precision when the survey is incomplete. A clean line does not prove a wall is square, structural, or free of services. Mark assumptions and verify critical dimensions onsite before ordering or construction.
What 3D Adds to Renovation Planning
Three-dimensional views help non-specialists understand volume, compare finishes, see across connected rooms, and judge whether tall storage dominates a space. Eye-level walkthroughs reveal window views, privacy from the entry, furniture mass, pendant sightlines, and the effect of open doors.
3D is especially useful for kitchens, small apartments, sloped ceilings, split levels, built-ins, and open-plan zoning. It lets a household discuss the same scene rather than interpret abstract symbols differently. Multiple camera positions are essential; a single flattering angle can hide conflicts.
Where 3D Can Mislead
Perspective can make a room look larger, particularly with a wide field of view. Beautiful materials and sunlight can distract from narrow aisles, missing outlets, or impossible joinery. Generic furniture may not match the intended purchase. A render is not automatically a construction document, structural assessment, lighting calculation, or permit drawing.
Keep dimensions visible in the underlying model and review the plan view after every visual change. Avoid approving a layout only because one camera looks attractive. Test doors, drawers, chairs, appliance panels, and people in motion.
Build One Source of Geometry
The efficient workflow uses one model for 2D and 3D. Start with surveyed wall lengths, thicknesses where known, openings, sill and head heights, floor levels, columns, beams, and fixed services. Add uncertainty notes rather than inventing precision.
Then add furniture with real dimensions and operating envelopes. A dining table includes pulled-out chairs; a wardrobe includes open doors; a kitchen includes dishwasher and oven doors; a bed includes the frame and making space. Changes made in plan should appear immediately in 3D, and visual concerns should return to the dimensioned plan for resolution.
Match the View to the Decision
Use 2D for partition alternatives, circulation widths, furniture fit, floor finish quantities, and coordination points. Use elevations or sections for cabinet heights, wall composition, steps, beams, and tile layout. Use 3D for sightlines, perceived scale, daylight direction, color balance, and household communication.
For each decision, record the winning option and why. “Island moved 150 mm to preserve dishwasher unloading” is more useful than “Option B looks better.” Keep versions so a later finish discussion does not accidentally restore a rejected geometry.
A Practical Five-Pass Workflow
Pass 1: survey. Follow the room measurement guide and record uncertainty. Pass 2: 2D options. Compare walls and major furniture without decoration. Pass 3: operational test. Open every door and add people. Pass 4: 3D review. Walk from entry, seats, and work positions. Pass 5: documentation. Transfer confirmed decisions to the drawings and specifications required by the project team.
Use the Aedifex room planner to switch between plan reasoning and spatial review, then inspect the 3D demo from normal eye height. Exported or shared visuals should always identify whether dimensions are verified, approximate, or design intent.
2D and 3D Review Checklist
- Create a measured existing-condition plan before proposing changes.
- Mark assumptions and verify critical site dimensions.
- Use 2D for dimensions, alignment, circulation, and coordination.
- Add elevations and sections wherever height controls the result.
- Use 3D for scale, sightlines, daylight, and communication.
- Avoid wide-angle views that exaggerate room size.
- Use real furniture and full operating envelopes.
- Check every visual change back in dimensioned plan view.
- Record option decisions and preserve versions.
- Obtain the professional drawings and approvals required locally.
When the shared geometry is stable, use the interior planner for material studies and register to keep the renovation options organized.