Guitar Stand Placement: Check Drawers and Daily Routes
Find a guitar stand position that leaves room for drawers and daily movement. Compare the instrument's full outline with an alternate corner.
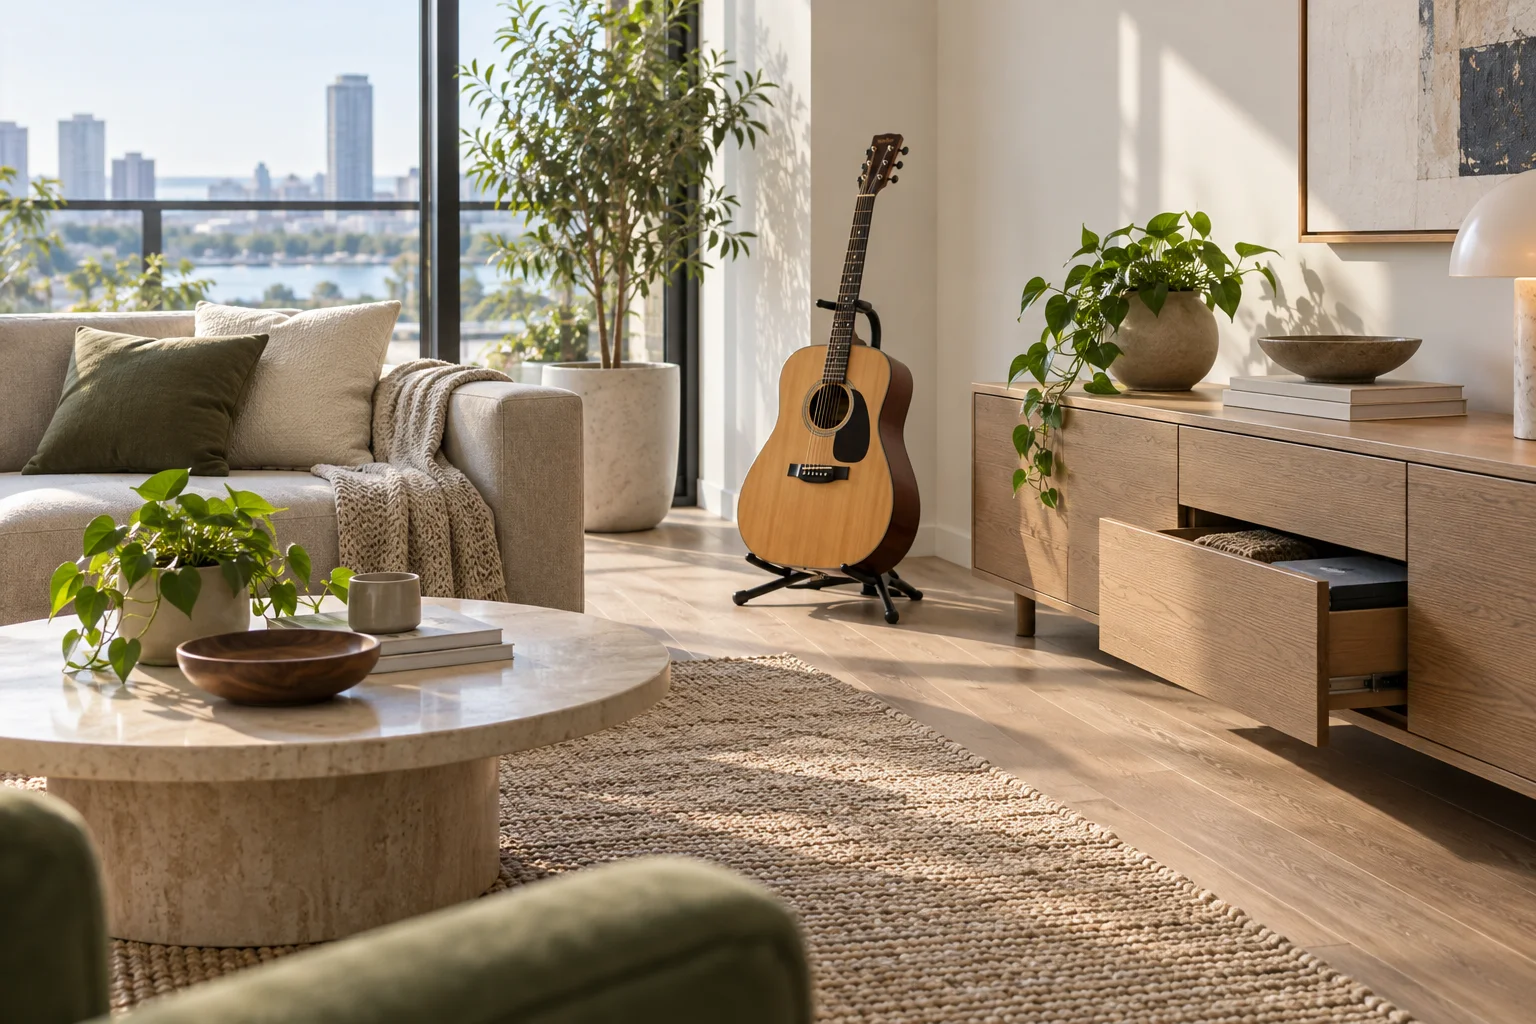
Keeping a guitar on a stand can make practice inviting, but the instrument and its stand together occupy more than the feet shown in a product photo. Before choosing a corner, check the loaded outline, the route for lifting the instrument and any drawers that open into the same space.
Measure the instrument in the stand
Place the guitar in the actual stand according to its instructions. Measure the farthest points of the body, neck, headstock and stand feet, including the lean angle. Record the widest outline at several heights: a drawer may miss the feet but hit the body. If either product is not available, use the maker's dimensions as provisional figures and remeasure the combination before final placement. Confirm the stand is suitable for the instrument and finish with the manufacturers; a plan cannot verify material compatibility or stability.
Compare the drawer open and closed
In this example, a 1300 mm strip separates the wall behind the guitar from the cabinet. The loaded guitar and stand occupy 400 mm from the wall. An open drawer projects 350 mm from the opposite edge. The remaining section is 550 mm. If the household chooses a separate 450 mm trial envelope for reaching the drawer, the remaining arithmetic balance is 100 mm. It is a one-dimensional comparison, not proof of safe movement or a clearance requirement.
A different stand or position that reduces the loaded projection to 300 mm gives 650 mm between the two outlines and 200 mm after the same trial. This does not show how the guitar is lifted, whether the stand is stable, or whether the instrument actually clears the open drawer at every height. A shallower footprint may also change the stand's support; do not modify it or force the instrument into an unsuitable stand to obtain the number.
Rehearse the retrieval route
Mark the stand feet and the widest outline with floor-safe removable tape. With the instrument safely held, practise moving it between playing position and storage. The headstock needs a route as well as the body, especially near a shelf or sloping ceiling. Open the drawer slowly while another person controls the instrument; stop before contact. Do not lean the guitar against an unsecured temporary mock-up.
Consider a case or wall-mounted holder as alternatives only after checking the product, mounting surface and household needs. A case takes time to open and needs its own floor area; a wall mount requires suitable approved fixings and can move the obstruction to head height. Keep it away from radiators, direct sun, moisture and high-traffic impacts as appropriate for the instrument, following its care instructions.
Decide using the complete routine
Compare the proposed position with a second location away from the drawer. A spot that looks neat but forces someone to move the stand before accessing storage is unlikely to stay convenient. If the route is shared with children, pets or a door, test those interactions without assuming that a positive arithmetic balance guarantees protection. Record the actual loaded outline, open-drawer projection and any unresolved measurement, then update the plan when the stand or furniture changes. The furniture fit guide covers other measurements to obtain before ordering.
Download the measurement and evidence record (CSV). Keep unknown values blank. The example uses the stated inputs. Record your own measurements and the source of each observation.
Geometry and assumptions
Hypothetical section in mm: 1300 available, 400 loaded instrument and stand, 350 open drawer, and an independent 450 trial envelope. The loaded shape changes with height.
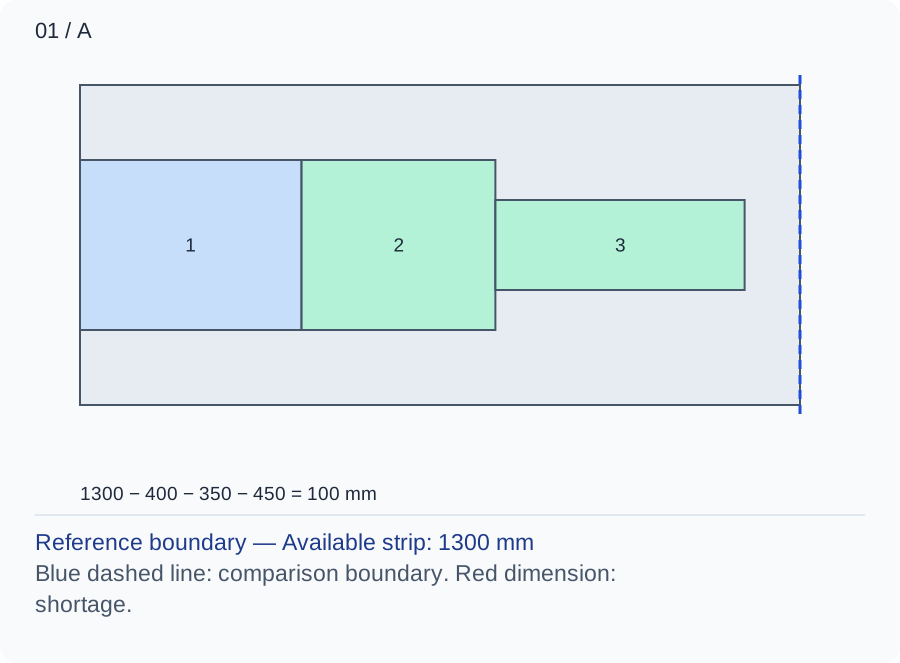
The loaded stand and drawer leave 550 mm; subtract the 450 trial allocation and 100 mm remains. The diagram cannot show retrieval or stability.
Numbers and marks identify the items described here; use the stated dimensions rather than measuring the screen.
1: loaded instrument and stand; 2: open drawer from the opposite edge; 3: separate chosen trial. These bands show allocations, not exact object locations; the lifting route is omitted.
| Input | A | B |
|---|---|---|
| Available strip (mm) | 1300 | 1300 |
| Loaded stand projection (mm) | 400 | 300 |
| Open drawer projection (mm) | 350 | 350 |
| Chosen retrieval trial (mm) | 450 | 450 |
Changed conditions and evidence
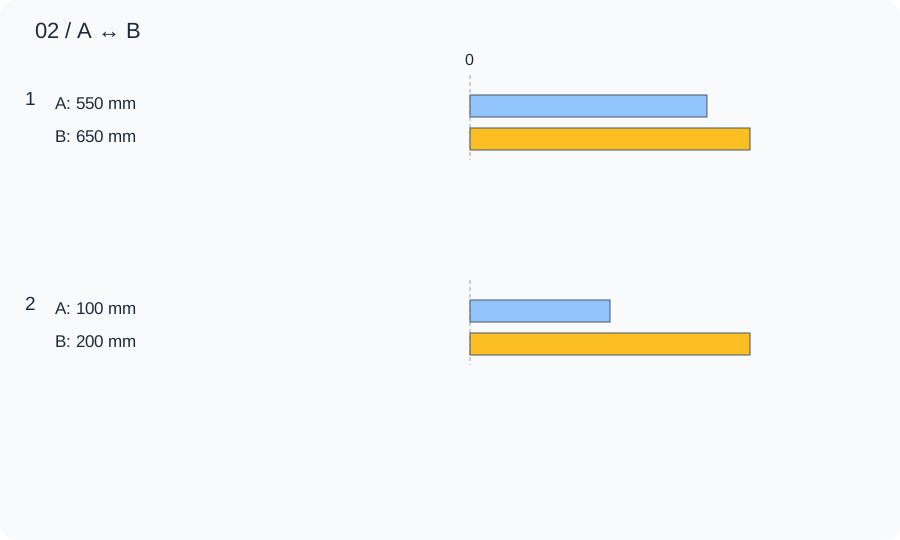
B reduces only the loaded projection to 300 mm. The gap becomes 650 mm and the trial balance 200 mm. Confirm the actual stand supports the instrument and does not conflict at another height.
| Calculated relationship | A | B |
|---|---|---|
| 1. Gap between guitar and drawer | 550 mm | 650 mm |
| 2. Balance after retrieval trial | 100 mm | 200 mm |
Secure the instrument while opening the real drawer, and rehearse lifting both body and headstock through the route. Follow the stand and instrument makers’ instructions.
TRY THE EXAMPLE
Compare a loaded stand and drawer
Hypothetical section in mm: 1300 available, 400 loaded instrument and stand, 350 open drawer, and an independent 450 trial envelope. The loaded shape changes with height.
Allowed range: 1–4000 · Step: 1
Allowed range: 0–2000 · Step: 1
Allowed range: 0–2000 · Step: 1
Allowed range: 0–2000 · Step: 1
Positive remainder under these assumptions. Check the actual use and product requirements before choosing a layout.
- Gap between guitar and drawer
- 550 mm
- Balance after retrieval trial
- 100 mm
Reference boundary — Available strip: 1300 mm
Blue dashed line: comparison boundary. Red dimension: shortage.
1300 − 400 − 350 − 450 = 100 mm
Secure the instrument while opening the real drawer, and rehearse lifting both body and headstock through the route. Follow the stand and instrument makers’ instructions.
Teaching assumptions, not a surveyed home or a construction check. Results describe this simplified geometry or budget only. Changes stay on this page and reset on reload.