Kitchen Task Lighting Layout: Counters, Island, Sink
Plan kitchen task lighting around work surfaces, cabinet shadows, beam angles, color quality, dimming, controls, safety, cleaning, and night use.
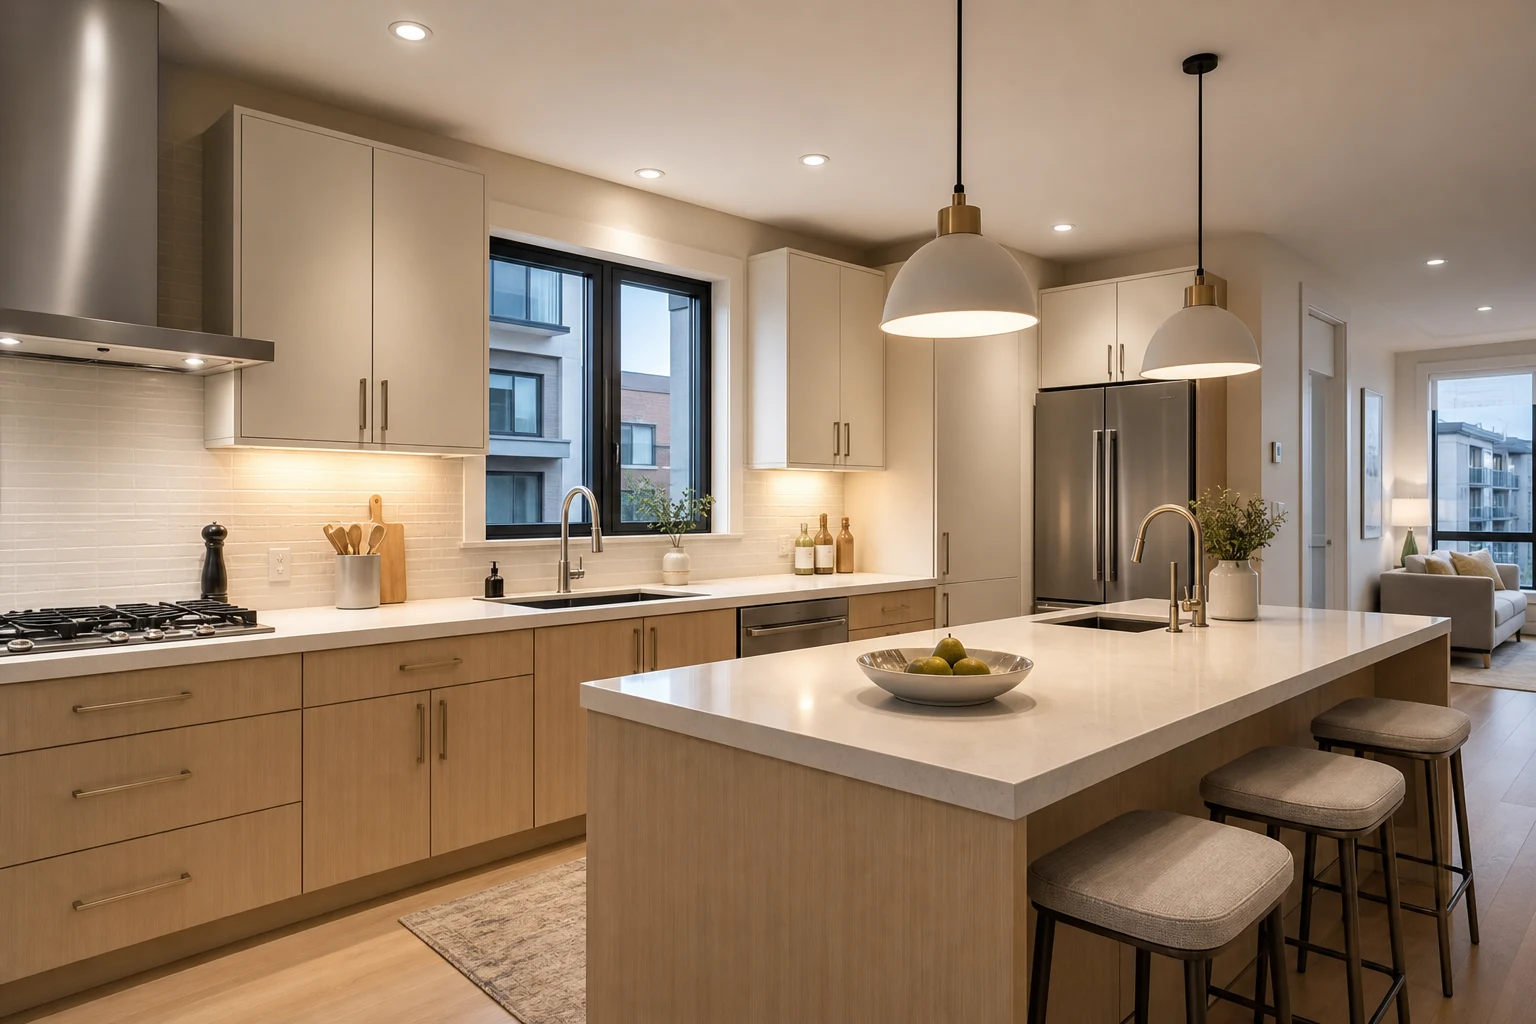
Kitchen lighting succeeds when hands, knives, food, water, and controls are visible without glare. A neat ceiling grid often puts light behind the cook, creating a shadow exactly where work happens. Plan each work surface first, then choose fixtures, beam spreads, color quality, controls, and decorative layers.
Map Tasks Before Fixtures
Mark the sink bowl, main preparation counter, cooktop, island work edge, appliance garage, coffee station, pantry entry, dining edge, and floor-cleaning route. Note who stands at each task and from which direction. A counter used only for serving needs different light from a chopping zone.
Record finished ceiling height, cabinet depths, open doors, range hood, tall cabinets, shelves, beams, skylights, and daylight direction. The lighting plan should work on a dark winter evening, not only in a bright rendering.
Put Counter Light in Front of the User
Ceiling downlights placed over the aisle can cast the user’s head and shoulders onto the counter. Move or aim general task lights toward the counter edge while respecting fixture photometry, glare, fire, and electrical constraints. Do not guess spacing from a universal grid; use the selected product’s distribution and a qualified lighting or electrical professional.
Check reflections on polished stone, stainless steel, black glass, and glossy cabinets. A fixture visible as a bright dot in the countertop can be uncomfortable even when measured light is adequate.
Use Continuous Under-Cabinet Light Where Needed
Under-cabinet lighting directly serves wall counters and avoids body shadow. Position it toward the front of the cabinet so light reaches the work edge rather than washing only the backsplash. A diffuser helps reduce visible LED points and reflections.
Coordinate channel depth, driver location, cable routes, cabinet joints, hood, corner, and switches before cabinet manufacture. Keep drivers ventilated and accessible for replacement. Select products rated for the location and follow local electrical rules; do not bury service components behind sealed cabinetry.
Light the Island as Work and Social Space
Determine whether the island is used for chopping, cooking, washing, homework, or dining. Pendants can provide a visual focus but should not block sightlines, cabinet doors, or heads. Their light distribution must actually reach the worktop; decorative shades may create bright spots and dark gaps.
Recessed or surface task lights can supplement pendants. Place fixtures relative to the usable work zone, not merely the island centerline. Test both seated and standing eye levels, and keep controls flexible enough for food preparation and evening conversation.
Give Sink, Cooktop, and Pantry Specific Attention
At the sink, light the basin without throwing glare from water into the user’s eyes. At the cooktop, verify the range hood’s built-in light quality and coverage before adding more. Do not place fixtures where steam, heat, grease, or cabinet doors violate product requirements.
Pantries need vertical illumination so labels and shelf backs are readable. Door-triggered or occupancy controls can help, but manual override and safe switching matter. Appliance garages need light that does not overheat or conflict with moving doors.
Choose Color and Controls as a System
Use consistent or deliberately coordinated color temperature across connected kitchen zones. Good color rendering helps distinguish food condition and surface colors. Compare actual samples, because specifications alone do not describe every finish under light.
Separate useful circuits: general light, under-cabinet task light, island/decorative light, and night light. Dimming expands scenes, but lamps, drivers, and controls must be compatible to avoid flicker or poor low-end performance. Place switches where the kitchen is entered and where tasks begin.
Include Night, Cleaning, and Maintenance
A low, shielded night scene can guide someone to water without turning on every task light. Avoid floor-level glare and preserve step visibility. A bright cleaning scene should reveal spills under cabinets and around the island.
Plan how diffusers, pendants, hood lenses, and drivers will be cleaned or replaced. Tall ceilings and fixtures over fixed islands need a safe maintenance method. Lighting that cannot be serviced will degrade unevenly.
Review the Layout in 3D
Model cabinets, counters, standing users, pendants, and daylight in the Aedifex room planner. Compare an aisle-centered downlight grid with a counter-focused plan. In the 3D demo, inspect eye-level glare, pendant sightlines, and shadows from open upper doors.
For final illuminance, fixture count, wiring, wet-location rating, and code compliance, use manufacturer photometric data and qualified professionals. A 3D scene helps coordinate geometry; it does not replace an electrical or lighting calculation.
Kitchen Lighting Checklist
- Mark every preparation, washing, cooking, serving, and pantry task.
- Record cabinets, hoods, beams, doors, ceiling height, and daylight.
- Put useful light in front of the worker, not behind the head.
- Position diffused under-cabinet light toward the counter front.
- Keep drivers ventilated, accessible, and correctly rated.
- Test island lights at standing and seated eye levels.
- Review glare on stone, glass, steel, and glossy doors.
- Coordinate color quality, temperature, dimming, and circuits.
- Provide night and cleaning scenes.
- Confirm photometrics, electrical safety, and code with professionals.
Once geometry is coordinated, refine fixtures in the interior planner and register to save lighting alternatives with the kitchen plan.