Apartment Bicycle Storage Layout: Space Beyond the Bike
Measure bike storage beyond the wheels: plan handlebar width, lifting space, door turns, dirty tires, and daily access before choosing an apartment rack.
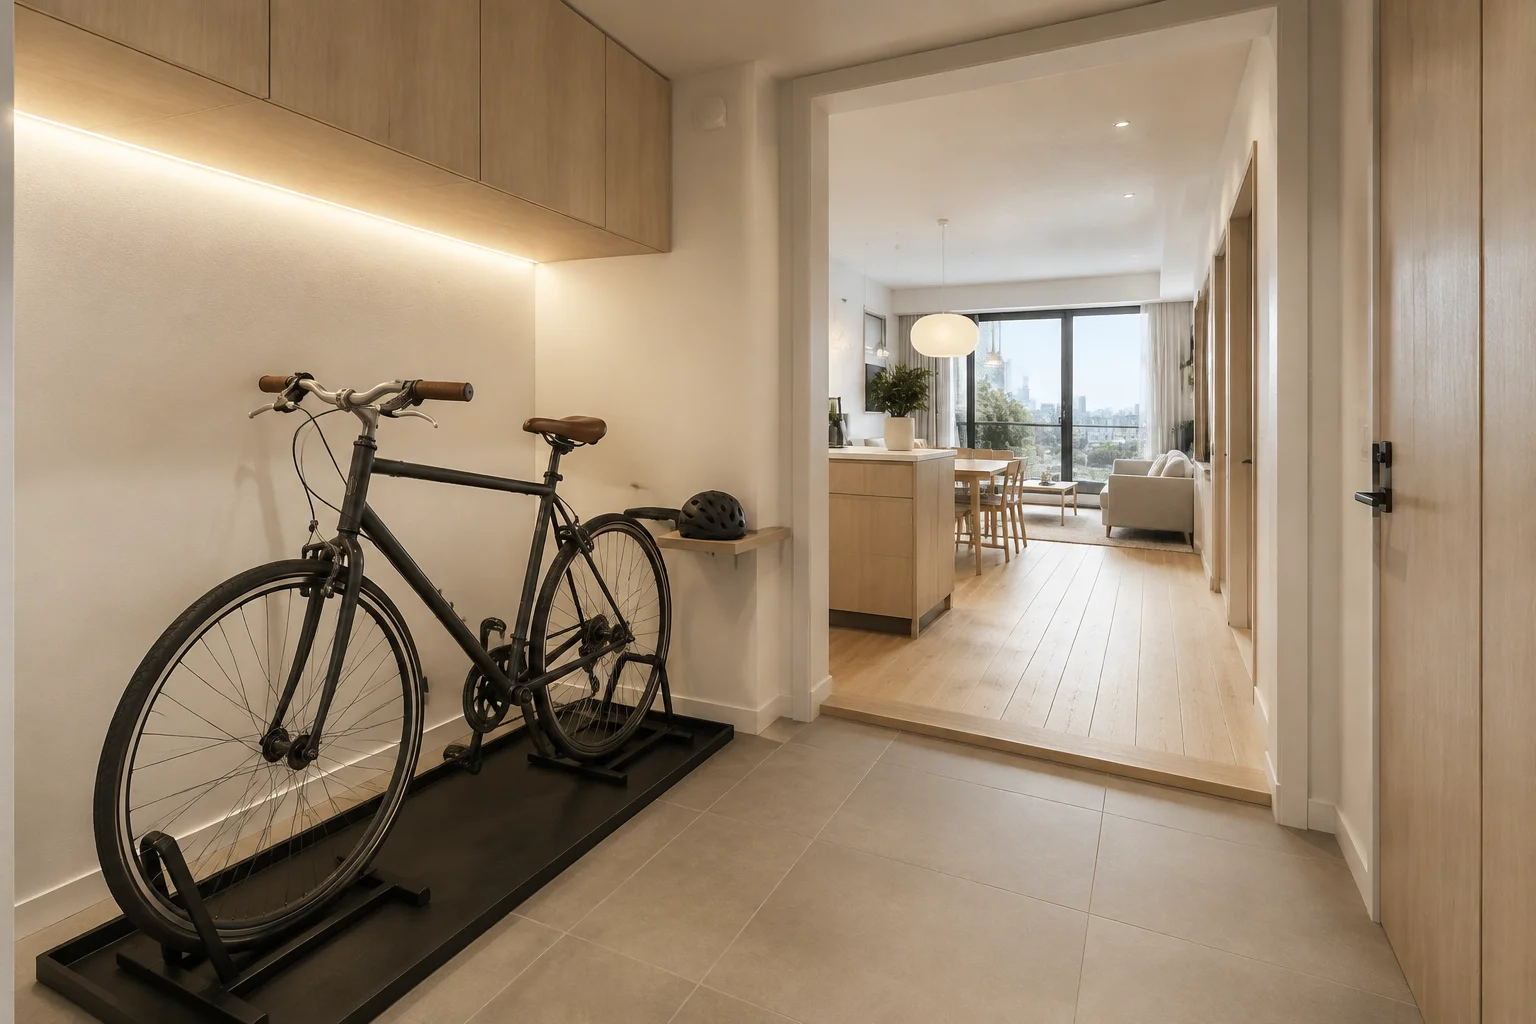
The hardest part of storing a bicycle in an apartment is often the final two metres between the entrance and the rack. A bicycle can fit neatly against a wall yet be impossible to turn into that position without hitting a wardrobe. A vertical rack can save floor length but require a lift that its daily user cannot perform comfortably. Good storage begins with the arrival sequence, not a photograph of an empty wall.
Measure the actual bicycle with its normal equipment attached. The examples here are starting points for spatial planning, not universal bike dimensions, rack specifications, or building requirements. Keep required access and escape routes clear, and follow both the rack instructions and your building's rules.
Measure the Entire Bicycle, Including Accessories
An adult bicycle might be approximately 180 cm long, while handlebar width can vary from around 45 cm on some road bikes to 75 cm or more on wider setups. Pedals, mirrors, panniers, a child seat, and baskets can change the useful envelope dramatically. Measure the widest and highest points instead of copying a generic bicycle symbol.
Record length, handlebar width, pedal projection, height, and weight. If bags normally stay attached, measure with them attached. If removing them is part of the plan, give them a nearby storage location and test whether that extra step is realistic after every trip.
A folding bicycle also needs two measurements. Its folded package may fit a cupboard, but you need an accessible place to perform the fold and space to grip it when removing it. A cupboard that exactly matches the folded dimensions can still be too tight for your hands.
Trace the Route From the Front Door
Open the entrance door fully and mark where the bicycle first waits while you close it. Include shoes, a delivery parcel, and anything normally left in the hallway. Walk the bicycle to the proposed storage position with the handlebars and pedals in their usual orientation.
At a right-angle turn, a simple passage-width measurement is insufficient. The wheels and handlebars sweep through different paths as you turn. Use the actual bicycle or tape out a full-size outline and test the movement slowly. Confirm that brake levers do not catch a doorframe and that pedals do not scrape cabinet fronts.
Do not solve a tight apartment layout by moving storage into a shared landing or stairwell. Shared-space permission and escape requirements are separate constraints. Your plan should show a complete route inside the space you are permitted to use.
Compare Storage Methods by Daily Handling
Floor parking beside a wall
Floor parking minimizes lifting and is often easiest for a heavy bicycle. A 180 × 75 cm example bike occupies a large rectangle, although the actual outline is irregular. Add room to stand beside it, release the support, and roll it away without trapping yourself against furniture.
The stand must suit the wheel and bicycle type. Check whether it contacts spokes, discs, or other components, and follow its compatibility guidance. A kickstand alone may not provide the stability needed beside valuable furniture or where children play.
Vertical wheel storage
Vertical storage exchanges floor length for height and handling effort. Measure the installed bike's projection from the wall rather than assuming that the front wheel is the only protruding part. The bars, rear wheel, or mounting mechanism may extend farther than expected.
Test the required movement before buying. Some systems need the front wheel raised; others pivot or roll. A daily rider should be able to load and unload the bicycle without twisting under its weight. Rack compatibility, fixing requirements, and load limits need to match the actual bicycle and wall.
Horizontal wall storage
A horizontal mount can place a bicycle above low furniture, but lifting space remains essential. Check handlebar and pedal projection at shoulder or head height. Do not create a place where someone rises from a chair into a pedal.
A bicycle above a sofa may look tidy while being awkward to remove without stepping onto upholstery. Keep a stable standing area beneath or beside the lifting path, and consider the consequences of dirty tires passing over a sitting area. Wall storage is only useful if the daily handling sequence works.
Separate Wet Arrival From Clean Living Space
Allow a small cleaning and landing zone close to the entrance. A washable, non-slip mat can catch water and road dirt, but its edge should not interfere with door movement or become a trip point. Measure it with the bicycle parked and with the door open.
Provide a reachable place for a lock, helmet, gloves, and lights. A shallow tray or small cabinet often works better than hanging everything from the bicycle, where accessories increase the storage envelope and catch on furniture. Wet outerwear should have an appropriate drying location rather than being draped over the stored bike.
If the bicycle is electric, plan charging separately from storage geometry. Follow battery and charger instructions and applicable building rules. Do not obstruct exits with charging equipment or improvise a charging cabinet solely because it fits the battery. The spatial sketch cannot assess electrical or battery safety.
Worked Example: A Narrow Entrance and a Living-Room Bay
Suppose an entrance passage is 120 cm wide and a shoe cabinet occupies 30 cm of that width. Parking a bicycle with 65 cm handlebars beside it could leave only 25 cm at the widest point. Even if part of the bike tucks under a shelf, this is not a functioning passage.
Instead, test a 210 cm long bay beyond the entrance in the living room. An example 180 cm bicycle leaves 30 cm along its length, but that does not automatically provide enough removal space. Check the sideways standing position, the handlebar sweep, and the turn back toward the door. Moving a small side table may improve access more than buying a complicated lifting rack.
Use the room planner to compare a floor footprint with a wall-mounted option. Represent the bike with simple shapes if necessary, including a separate handlebar block. Check heights in a 3D view, then verify the real handling motion at home; a static model does not prove that the bicycle can be maneuvered through a turn.
Make Storage Work for the Least Convenient Day
Test the arrangement while carrying a bag and wearing your usual outerwear. Imagine arriving in rain, finding a parcel inside the door, and needing to leave again quickly. A solution requiring five furniture moves on every return will soon become an unused rack with a bicycle in the hallway.
For two bicycles, check each one independently. The frequently used bicycle should not require removing the other. Different handlebar heights can reduce interference, but staggered mounting must still allow safe loading and comply with the chosen hardware instructions.
Before purchasing, confirm the measured bicycle envelope, complete arrival route, stable handling position, rack compatibility, permitted fixings, and accessory storage. Try the Aedifex demo to compare room arrangements, then perform a full physical arrival and departure trial. A successful apartment bike layout makes the daily ride easier while keeping the rest of the home usable.
Apartment Bicycle Storage Layout: Space Beyond the Bike
An independent bicycle parking study uses a 2400 × 2000 mm indoor bay. A hypothetical complete bicycle envelope is 1800 × 650 mm at (300,200) mm, with its long axis east-west.
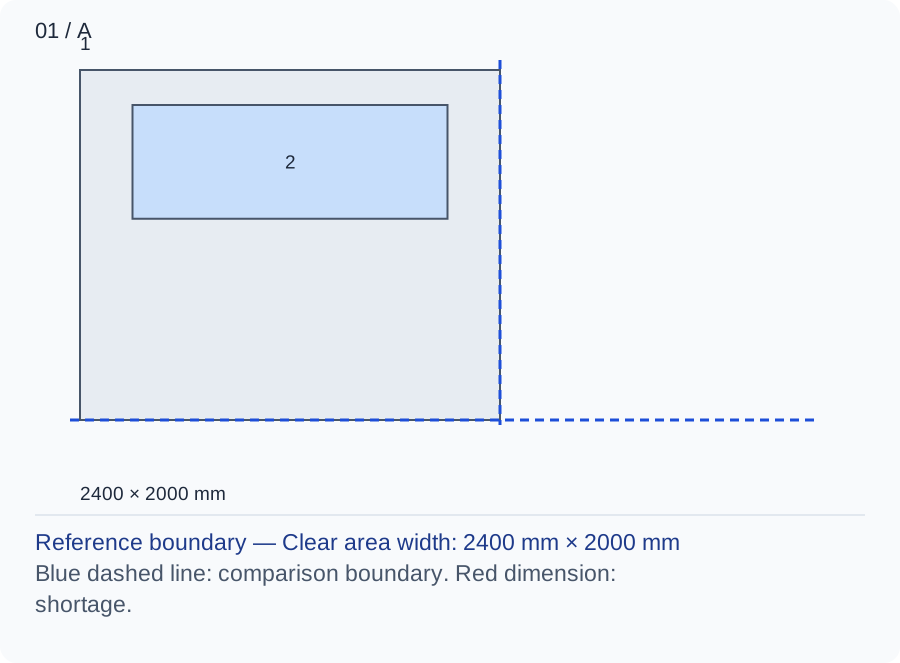
Both ends have 300 mm, while the north and south gaps are 200 and 1150 mm. The larger south strip is potential handling space, but does not prove the bicycle can rotate through the door.
Numbers and marks identify the items described here; use the stated dimensions rather than measuring the screen.
1: clear room boundary; 2: complete object outline. West is left; north is up. Other objects are omitted.
| Input | A | B |
|---|---|---|
| Clear area width (mm) | 2400 | 2400 |
| Clear area depth (mm) | 2000 | 2000 |
| Complete object width (mm) | 1800 | 2000 |
| Complete object depth (mm) | 650 | 800 |
| West offset (mm) | 300 | 300 |
| North offset (mm) | 200 | 200 |
Changed conditions and evidence
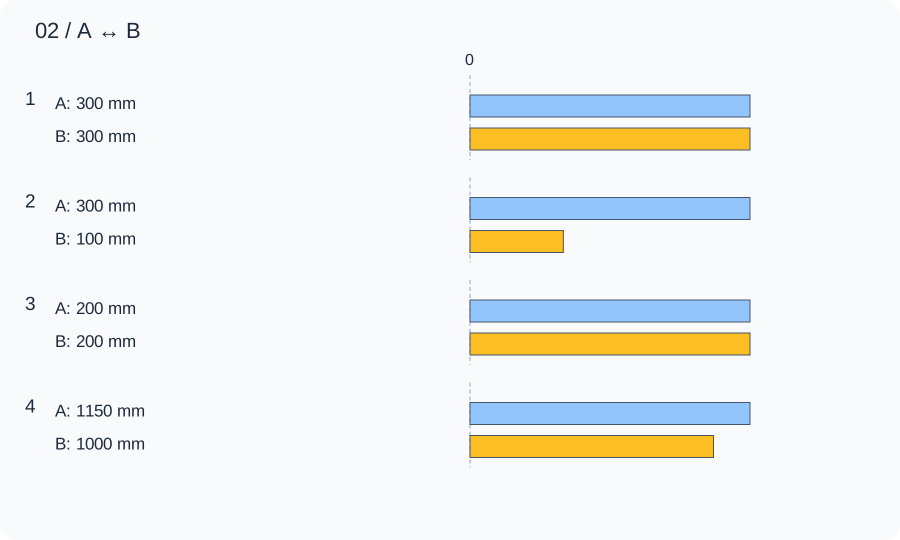
A rack, basket or longer frame expanding the envelope to 2000 × 800 mm leaves only 100 mm east and 1000 mm south. Keeping the parking anchor fixes the comparison and reveals the accessory cost instead of silently centering the larger bicycle.
| Calculated relationship | A | B |
|---|---|---|
| 1. West remainder | 300 mm | 300 mm |
| 2. East remainder | 300 mm | 100 mm |
| 3. North remainder | 200 mm | 200 mm |
| 4. South remainder | 1150 mm | 1000 mm |
Trace the actual wheel and handlebar path through the entry without lifting beyond the user’s ability. Check storage hardware, wall permission and any charging instructions separately; the parking rectangle omits a turning sweep.
TRY THE EXAMPLE
Apartment Bicycle Storage Layout: Space Beyond the Bike
An independent bicycle parking study uses a 2400 × 2000 mm indoor bay. A hypothetical complete bicycle envelope is 1800 × 650 mm at (300,200) mm, with its long axis east-west.
Allowed range: 1–12000 · Step: 1
Allowed range: 1–12000 · Step: 1
Allowed range: 1–12000 · Step: 1
Allowed range: 1–12000 · Step: 1
Allowed range: 0–12000 · Step: 1
Allowed range: 0–12000 · Step: 1
Positive remainder under these assumptions. Check the actual use and product requirements before choosing a layout.
- West remainder
- 300 mm
- East remainder
- 300 mm
- North remainder
- 200 mm
- South remainder
- 1,150 mm
Reference boundary — Clear area width: 2400 mm × 2000 mm
Blue dashed line: comparison boundary. Red dimension: shortage.
2400 × 2000 mm
Trace the actual wheel and handlebar path through the entry without lifting beyond the user’s ability. Check storage hardware, wall permission and any charging instructions separately; the parking rectangle omits a turning sweep.
Teaching assumptions, not a surveyed home or a construction check. Results describe this simplified geometry or budget only. Changes stay on this page and reset on reload.