Bedroom Projector Layout: Throw Distance and Bed View
Plan a bedroom projector around throw distance, screen size, pillow sightlines, ventilation, and cables, with practical measurements before choosing hardware.
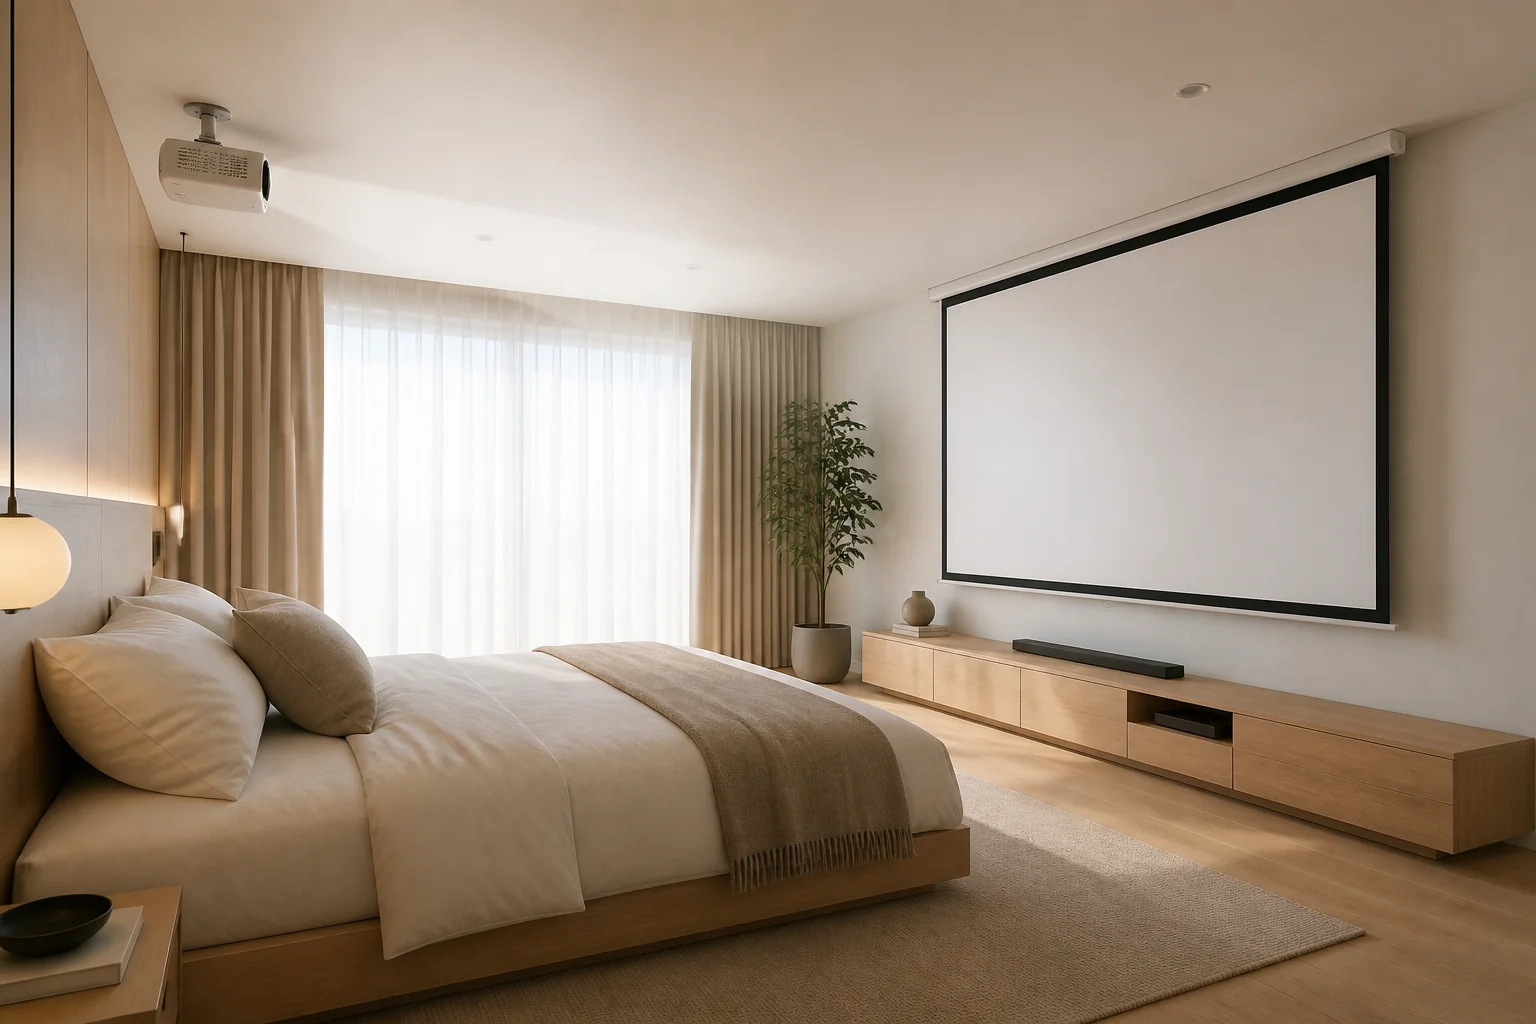
A bedroom projector must work around a bed, pillows, wardrobe doors, and a room that still needs to support sleep. The largest possible image is rarely the best starting point. Begin with a comfortable view from the actual resting position, then check whether a projector can produce that image from a location with suitable mounting, airflow, power, and access.
Fix the Viewing Position Before the Screen Size
Sit or recline against the pillows you normally use. Mark approximate eye position and look at the wall opposite the bed. Notice the difference between lying flat, sitting upright, and leaning against a headboard. An image that feels comfortable in one position can require sustained neck extension in another. If two people use the room, test both pillow positions.
Tape a rectangle on the wall to represent the proposed image. Watch a short familiar clip on another suitably positioned screen, or simply read large printed text within the rectangle, to test the posture. These exercises cannot reproduce every viewing condition, but they reveal a screen mounted too high or a sightline hidden by the footboard. Allow for the duvet and raised knees as well as the bed frame.
Convert the Diagonal Into Real Wall Dimensions
Projectors are commonly discussed by diagonal image size, while the wall and throw ratio use width. For a 16:9 image, width is approximately 0.872 times the diagonal and height is approximately 0.490 times the diagonal, using the same units. Convert inches to centimeters before comparing with the room.
An 80-inch image is approximately 177 cm wide and 100 cm high. A 100-inch image is approximately 221 cm wide and 125 cm high. These are image dimensions, not the outside dimensions of a screen case or frame. Add the selected product's border, housing, brackets, and installation allowances before declaring the wall suitable.
Do not let the available wall force the viewing size. From the pillow, compare two taped rectangles and check whether subtitles, corners, and the whole image feel comfortable. Personal preference, eyesight, content, and actual viewing distance matter. A smaller image may be easier to place below a ceiling beam and can reduce brightness demands, but the final brightness depends on the projector, screen, and room light.
Use Throw Ratio With the Correct Reference Point
Throw ratio is approximately lens-to-screen distance divided by image width. Rearranged, required throw distance equals image width multiplied by throw ratio. Use the actual manufacturer's specification for the chosen projector, including its optical zoom range and the measurement reference. The case edge and the room wall are not interchangeable with the lens position.
For a 100-inch 16:9 image about 2.21 m wide, a projector with a throw ratio range of 1.2–1.5 needs approximately 2.65–3.32 m from lens to screen. If the available lens position is only 2.40 m away, that combination does not reach the target image through normal optical placement. Digital resizing or keystone correction should not be treated as a substitute for a compatible throw specification.
Ultra-short-throw models need their own placement drawings. Their advertised distance can refer to different parts of the unit, and the cabinet depth, vertical offset, screen flatness, and wall clearance are critical. Do not apply a conventional lens-distance sketch to an ultra-short-throw product without checking its installation diagram.
Choose Between a Shelf and a Ceiling Mount
A shelf behind the bed
A shelf may seem convenient because power is nearby, but a tall headboard or a person's head can interrupt the beam. Check lens height, required offset, shelf depth, rear cable bends, and ventilation. The projector must rest on a stable support suitable for its weight. Do not balance it on bedding, stack it loosely on books, or block cooling vents against a wall.
A ceiling position
A ceiling mount can keep the unit away from bedside surfaces, but the structure must support the correct bracket and load. Verify the mounting pattern, ceiling construction, and safe fixing method with the installer. Locate the unit so its beam clears heads, pendant lights, and any ceiling fan. Account for access to filters, controls, and removal for maintenance.
A side position
A side shelf may preserve headroom, but it can demand more image correction and put the projector fan close to one person. Check optical lens shift if the product offers it; lens shift and digital keystone are different capabilities. Extensive digital correction can reduce usable image detail and introduce a shape that still looks awkward on a carefully aligned screen.
Keep the Room Usable When the Projector Is Off
A fixed screen should not prevent wardrobe doors, windows, or essential room access from working. A retractable screen needs its case and drop path checked, including clearance in front of handles and furniture. Do not place a screen where normal use blocks a required exit or necessary ventilation. For a rental, confirm permissions and fixing restrictions before ordering mounted equipment.
Reserve a place for the remote, streaming device, and power supplies. Plan a cable route along appropriate surfaces instead of across the floor beside the bed. Concealed power and permanent electrical work require suitable installation; an extension cord hidden loosely inside a wall is not a permanent wiring solution. Leave enough cable slack for connectors without crushing plugs behind the projector.
Check Heat, Noise, and Light Together
Projector fans can be more noticeable beside a pillow than in a living room. Compare the manufacturer's noise specifications cautiously because test conditions vary, then audition the intended operating mode if possible. A quieter mode may also reduce brightness. Keep all airflow clearances from the manual, and avoid enclosing the unit in decorative cabinetry without a suitable ventilation design.
Try the room with curtains closed at the time you expect to watch. Streetlights, gaps at curtain edges, and bedside lamps can wash out the image. A dim, shielded path light may help someone leave the bed without lighting the screen directly. Ensure light control does not obstruct safe movement or make switches difficult to find.
Work Through One Measured Layout
Suppose the chosen pillow position is 2.80 m from the screen wall and an 80-inch image feels comfortable. Its width is about 1.77 m. A throw ratio of 1.2 requires a lens distance of about 2.12 m. That places the lens forward of the pillow line, so a simple shelf directly behind the headboard would not match this example unless an appropriate zoom range changes the required distance.
Draw the bed, screen plane, lens location, and approximate beam envelope in a room planning model. Use simple placeholder objects for hardware. The model can expose physical conflicts, but it does not verify optical performance, brightness, mounting strength, or fan noise. Confirm those using product data and an actual test before purchasing.
Finish by recording image width, lens distance, eye position, mounting requirements, and cable path in one place. Check a demo scene for spatial scale, then save your room plan with the alternative hardware positions. Choose the arrangement that supports comfortable watching and an ordinary night's sleep without moving furniture every evening.
Bedroom Projector Layout: Throw Distance and Bed View
Independent teaching assumptions: Reuse the article’s rounded image widths: 2210 mm for 100-inch and 1770 mm for 80-inch 16:9 images. Hold the assumed throw ratio at 1.2 and available lens-to-screen distance at 2400 mm; other installation reserves remain unassigned, not proven unnecessary.
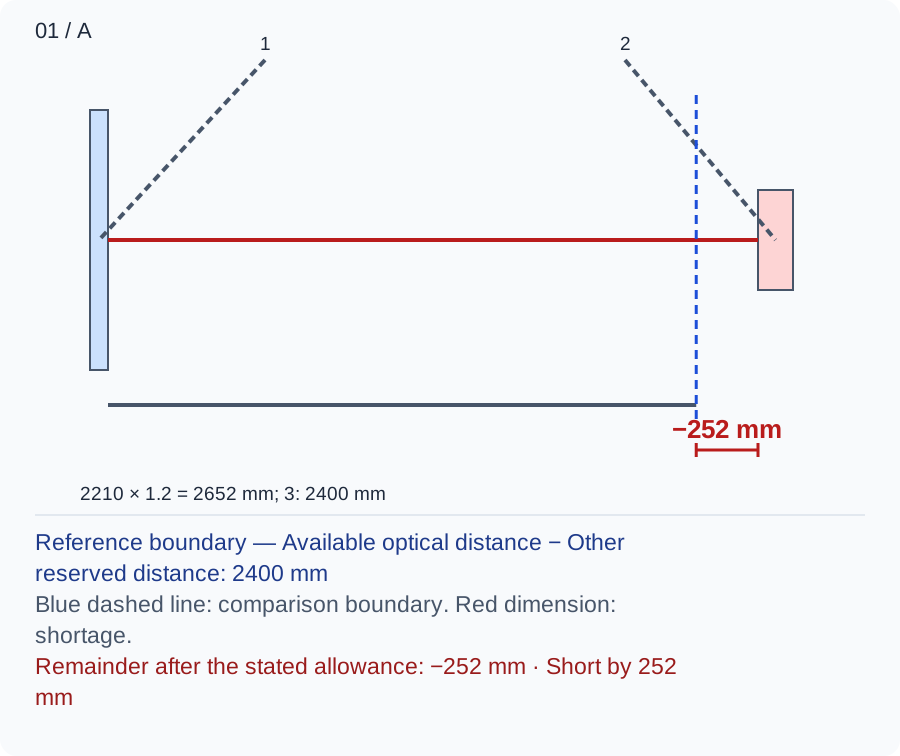
The distance is measured optically from the lens, so projector casing depth must not be subtracted from it unless the available-distance datum requires that change. 2210 × 1.2 = 2652 mm optical distance; 2400 − 2652 − 0 = -252 mm remains.
Numbers and marks identify the items described here; use the stated dimensions rather than measuring the screen.
1: screen plane; 2: assumed lens position; 3: available distance. Service allowance is subtracted separately.
| Input | A | B |
|---|---|---|
| Image width (mm) | 2210 | 1770 |
| Assumed throw ratio (ratio) | 1.2 | 1.2 |
| Available optical distance (mm) | 2400 | 2400 |
| Other reserved distance (mm) | 0 | 0 |
Changed conditions and evidence
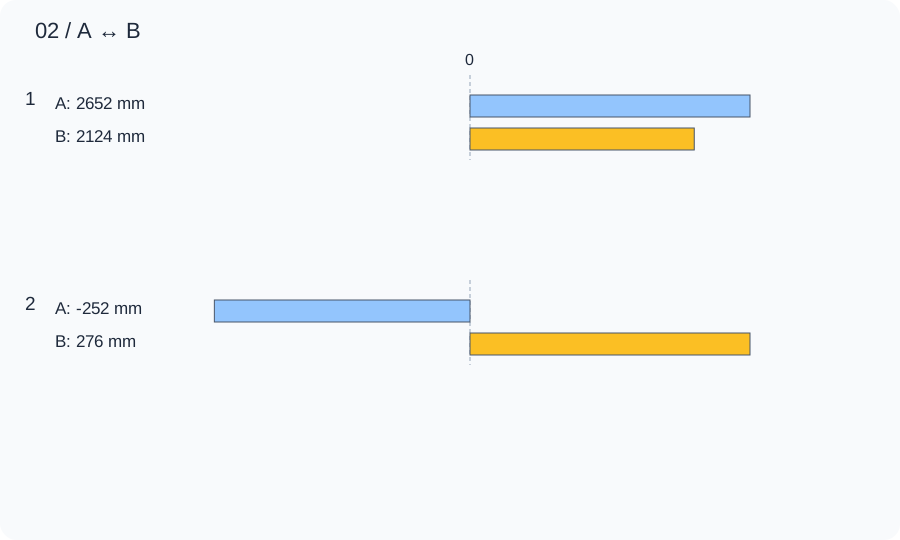
Reducing to the 80-inch image changes the shortage to a geometric surplus while sacrificing image size; it still needs compatible zoom, body placement and cable space. 1770 × 1.2 = 2124 mm optical distance; 2400 − 2124 − 0 = 276 mm remains.
| Calculated relationship | A | B |
|---|---|---|
| 1. Assumed throw distance | 2652 mm | 2124 mm |
| 2. Remainder after the stated allowance | -252 mm | 276 mm |
Tape both image outlines and watch from the actual reclining position before choosing. Check the selected model’s throw range, lens offset, screen housing, ventilation and mount instructions; this ratio calculation does not approve installation.
TRY THE EXAMPLE
Bedroom Projector Layout: Throw Distance and Bed View
Independent teaching assumptions: Reuse the article’s rounded image widths: 2210 mm for 100-inch and 1770 mm for 80-inch 16:9 images. Hold the assumed throw ratio at 1.2 and available lens-to-screen distance at 2400 mm; other installation reserves remain unassigned, not proven unnecessary.
Allowed range: 1–10000 · Step: 1
Allowed range: 0.1–5 · Step: 0.05
Allowed range: 1–10000 · Step: 1
Allowed range: 0–10000 · Step: 1
A negative remainder means the selected allocations overlap. Change the inputs or the proposal.
- Assumed throw distance
- 2,652 mm
- Remainder after the stated allowance
- -252 mm
Reference boundary — Available optical distance − Other reserved distance: 2400 mm
Blue dashed line: comparison boundary. Red dimension: shortage.
Remainder after the stated allowance: −252 mm · Short by 252 mm
2210 × 1.2 = 2652 mm; 3: 2400 mm
Tape both image outlines and watch from the actual reclining position before choosing. Check the selected model’s throw range, lens offset, screen housing, ventilation and mount instructions; this ratio calculation does not approve installation.
Teaching assumptions, not a surveyed home or a construction check. Results describe this simplified geometry or budget only. Changes stay on this page and reset on reload.