Indoor Drying Rack Layout: Clearances for Small Homes
Plan an indoor clothes drying rack with room for laundry, daily walkways, and airflow. Compare folding, wall-mounted, and ceiling options before buying.
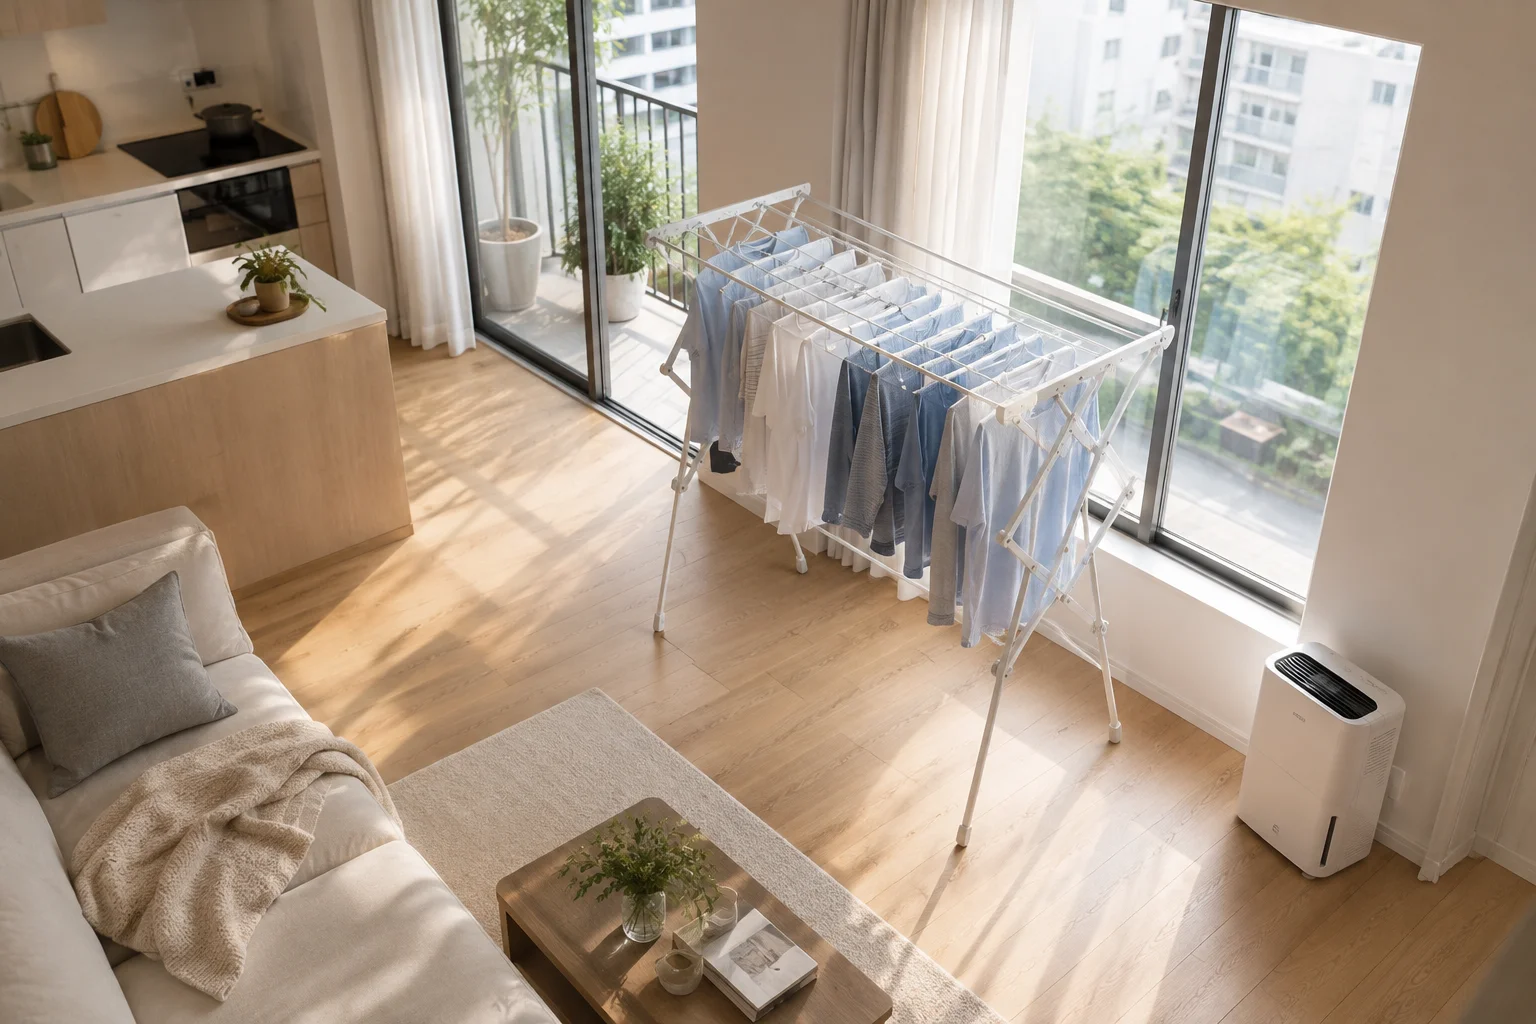
An indoor drying rack occupies three different spaces: its stored footprint, its open frame, and the larger volume of wet laundry hanging from it. Shopping by the folded width alone misses the part that determines whether a small home remains comfortable on washing day. A rack that technically fits beside a sofa can still block a curtain, brush clean clothes against upholstery, or turn the route to the bathroom into an obstacle course.
Start with the longest items you actually wash and the route you must keep open. The dimensions below are planning examples, not installation standards. Measure your rack, follow its instructions, and make allowance for the people using the home.
Measure the Laundry Before Choosing the Rack
Lay a wet-size towel flat and measure its width and drop when folded over a rail. Repeat for a shirt on a hanger and your longest trousers. A frame only 60 cm deep may occupy around 75–85 cm once sleeves project beyond both sides. Heavy towels may hang lower than expected and touch a nearby chair.
Record the rack in three states:
- Folded and standing in its storage location.
- Fully extended with wings, stabilizers, and supporting feet deployed.
- Loaded with representative clothing, including the widest hangers.
Do not confuse total hanging length with floor area. Twenty metres of rail spread over tightly spaced tiers can offer plenty of nominal capacity while leaving little separation between bulky garments. For your initial mock-up, allow visible gaps between adjacent items and check that fabric does not overlap. Actual drying performance depends on moisture, temperature, air movement, and the laundry load.
Preserve a Route That Works While Carrying a Basket
A practical first drawing might reserve about 90 cm for a main household passage, then enlarge it for your mobility needs. This is a layout target rather than a statement of accessibility compliance. Existing required escape routes and door clearances must remain unobstructed.
A 65 cm walkway that feels acceptable when empty can fail when someone carries a 55 cm basket. Tape the loaded rack footprint on the floor, carry the actual basket past it, and open the nearby door fully. Check both directions. You should not have to lift the basket over wet laundry or step over a rack foot.
If the rack is used overnight, test the route with the lights dimmed. Low stabilizer bars are much harder to notice than a tall drying rail. A location outside the main circulation line is usually more useful than a slightly sunnier location that interrupts every trip through the room.
Compare Three Rack Types by Working Space
A folding floor rack
A winged rack might open to approximately 160 × 60 cm, although models vary substantially. Its advantage is flexibility: move it after the load is dry and regain the floor. Its weakness is the long footprint and the temptation to place it across a doorway.
Reserve a storage slot as deliberately as the drying location. Check folded depth, protruding feet, and whether a stored rack can fall when someone opens the wardrobe. Do not assume the gap behind a washing machine is appropriate; hoses and service access may occupy it.
A wall-mounted rack
A folding wall rack keeps feet out of the walking path but still projects into the room when open. Include the fabric envelope below and around the bars. Check the wall construction, permitted fixings, and the manufacturer's wet-load rating before selecting it.
Positioning it over a bathtub can contain drips, but the bathroom must remain usable. Towels hanging over taps or controls create a daily conflict. A rack that has to be emptied before every shower may be less convenient than a portable model elsewhere.
A ceiling-mounted rack
A raised rack can recover floor space, but installation and loading require careful measurement. Draw its lowered position, the hanging garment drop, and its highest position. Check head clearance, light fittings, ceiling fans, sprinklers, and access to windows.
The ceiling support and lifting mechanism must suit the intended wet load. Rental permission and professional fixing advice may be necessary. Never treat a suspended rack as safe merely because it looks clear in a room model.
Choose Air Movement Without Creating a Damp Corner
A bright window does not guarantee effective drying. A closed, cool room with wet clothes can develop persistent condensation even when the rack receives sunlight. Avoid packing laundry against cold glazing, curtains, or an outside wall. Leave enough space to inspect those surfaces and clean around the rack.
Use the ventilation arrangements appropriate to your home. Where a dehumidifier is used, follow its placement clearances and electrical instructions, keep dripping laundry away from it, and give its water tank a reachable removal path. A humidity meter can help you observe conditions over several loads; the layout itself cannot predict drying time or rule out damp problems.
Do not place fabric on a heater or improvise extra heat sources beneath the rack. Keep appliance vents, sockets, and controls available, and follow all equipment instructions. Improving the room arrangement should not introduce an electrical or fire hazard.
Worked Example: A Living Room With One Free Side Wall
Consider a room 3.2 m wide with a 90 cm deep sofa along one long wall. A loaded rack needs an estimated 75 cm width along the opposite wall. Subtracting these footprints leaves 155 cm across the middle before accounting for the coffee table.
If an 80 cm deep coffee table occupies that same strip, only 75 cm remains. The rack has not caused the entire problem; the table and drying zone overlap. Move the table toward the sofa temporarily, replace it with a smaller movable piece, or position the rack beyond the sofa end where there is a separate bay. Recheck door swings rather than accepting the subtraction as proof of a working plan.
Model these alternatives in the room planner, using simple objects to represent the loaded rack and basket. The purpose is to compare physical footprints and sightlines. Airflow, humidity, structural fixings, and actual drying performance need separate checks in the real home.
Make Laundry Day a Complete Sequence
Think through carrying, hanging, drying, unloading, and storage. Provide a temporary landing place for the basket close enough that you do not repeatedly bend across the rack. Keep pegs and hangers in a small accessible container. Leave space to remove one long garment without pulling adjacent clothing onto the floor.
Before buying, run this final checklist with the largest expected load:
- Every required door and escape route remains clear.
- Clothing stays off floors, curtains, heaters, and upholstered furniture.
- The basket can be carried past without sideways shuffling.
- Rack controls and any dehumidifier tank remain accessible.
- The rack has a secure, measured storage location after use.
Explore the Aedifex demo to sketch the room, then compare an ordinary evening with a full laundry day. The best position works in both states and does not rely on everyone remembering to avoid the same obstruction.
Indoor Drying Rack Layout: Clearances for Small Homes
Keep the original 3200 mm room section and 900 mm sofa. The drying rack plus hanging clothing occupies 750 mm, while the original 800 mm coffee table remains a separate fixed obstruction in this example.
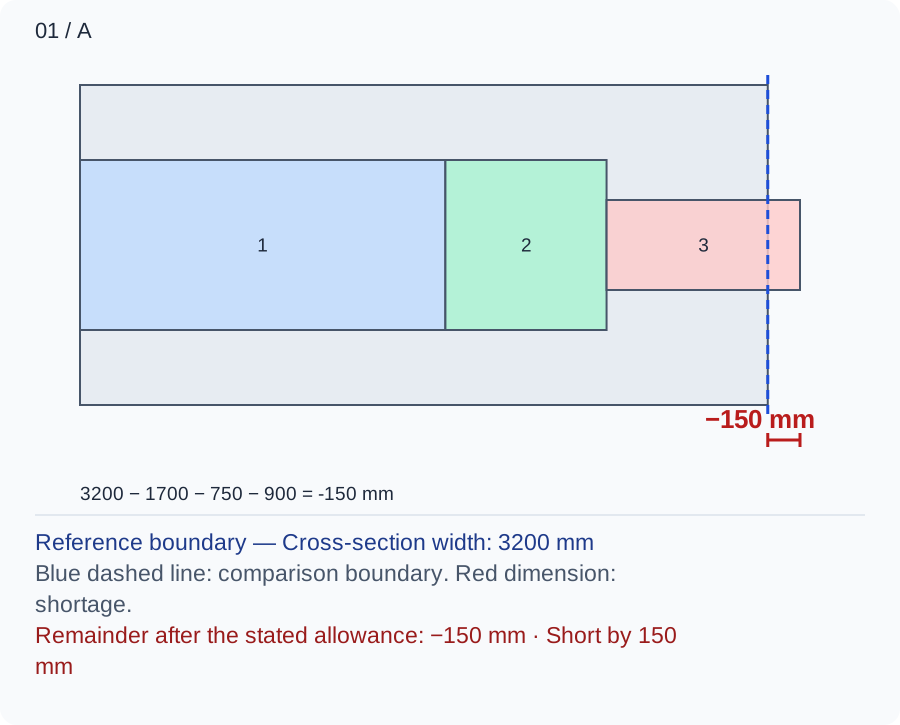
Combining sofa and table gives 1700 mm of fixed occupation. 3200 − 1700 − 750 = 750 mm remains, which is 150 mm short of a hypothetical 900 mm carrying-laundry envelope.
Numbers and marks identify the items described here; use the stated dimensions rather than measuring the screen.
1: fixed occupation; 2: operating extension; 3: chosen user or route allocation. These are sequential allocations, not exact furniture positions.
| Input | A | B |
|---|---|---|
| Cross-section width (mm) | 3200 | 3200 |
| Fixed installed depth (mm) | 1700 | 900 |
| Additional operating projection (mm) | 750 | 750 |
| Measured task envelope (mm) | 900 | 900 |
Changed conditions and evidence
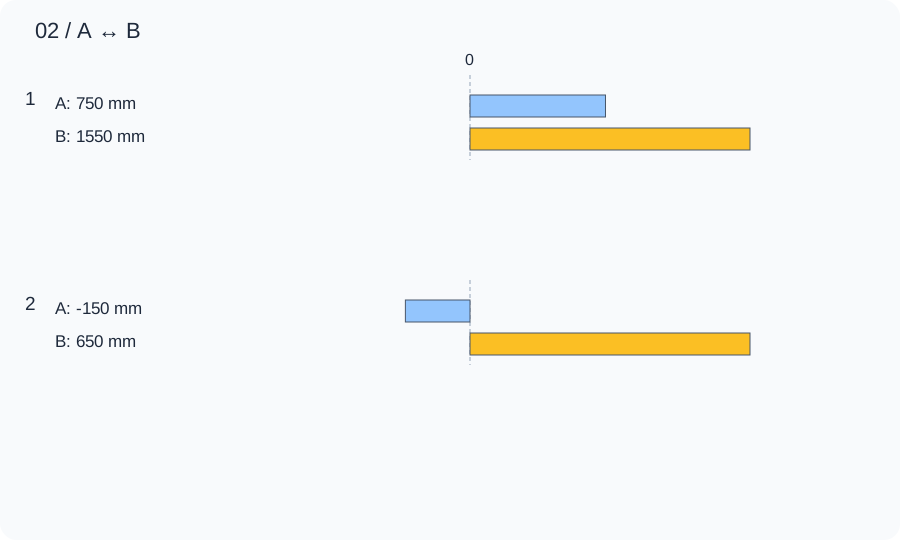
Moving the coffee table out of this section reduces fixed occupation to 900 mm. The strip becomes 1550 mm with 650 mm beyond the task, but the table must have a genuine parking place rather than blocking another route.
| Calculated relationship | A | B |
|---|---|---|
| 1. Unoccupied cross-section | 750 mm | 1550 mm |
| 2. Remainder after the stated allowance | -150 mm | 650 mm |
Test the rack fully loaded with representative garments, then carry an empty basket through the marked route. Check window operation, moisture management and folded storage separately; floor fit alone does not establish drying effectiveness.
TRY THE EXAMPLE
Indoor Drying Rack Layout: Clearances for Small Homes
Keep the original 3200 mm room section and 900 mm sofa. The drying rack plus hanging clothing occupies 750 mm, while the original 800 mm coffee table remains a separate fixed obstruction in this example.
Allowed range: 1–10000 · Step: 1
Allowed range: 0–10000 · Step: 1
Allowed range: 0–10000 · Step: 1
Allowed range: 0–10000 · Step: 1
A negative remainder means the selected allocations overlap. Change the inputs or the proposal.
- Unoccupied cross-section
- 750 mm
- Remainder after the stated allowance
- -150 mm
Reference boundary — Cross-section width: 3200 mm
Blue dashed line: comparison boundary. Red dimension: shortage.
Remainder after the stated allowance: −150 mm · Short by 150 mm
3200 − 1700 − 750 − 900 = -150 mm
Test the rack fully loaded with representative garments, then carry an empty basket through the marked route. Check window operation, moisture management and folded storage separately; floor fit alone does not establish drying effectiveness.
Teaching assumptions, not a surveyed home or a construction check. Results describe this simplified geometry or budget only. Changes stay on this page and reset on reload.