Shower Squeegee Storage: Compare Drip and Access Zones
Compare a shower squeegee stored inside or outside the enclosure, check the hanging height and drip destination, and test the door before fixing a hook.
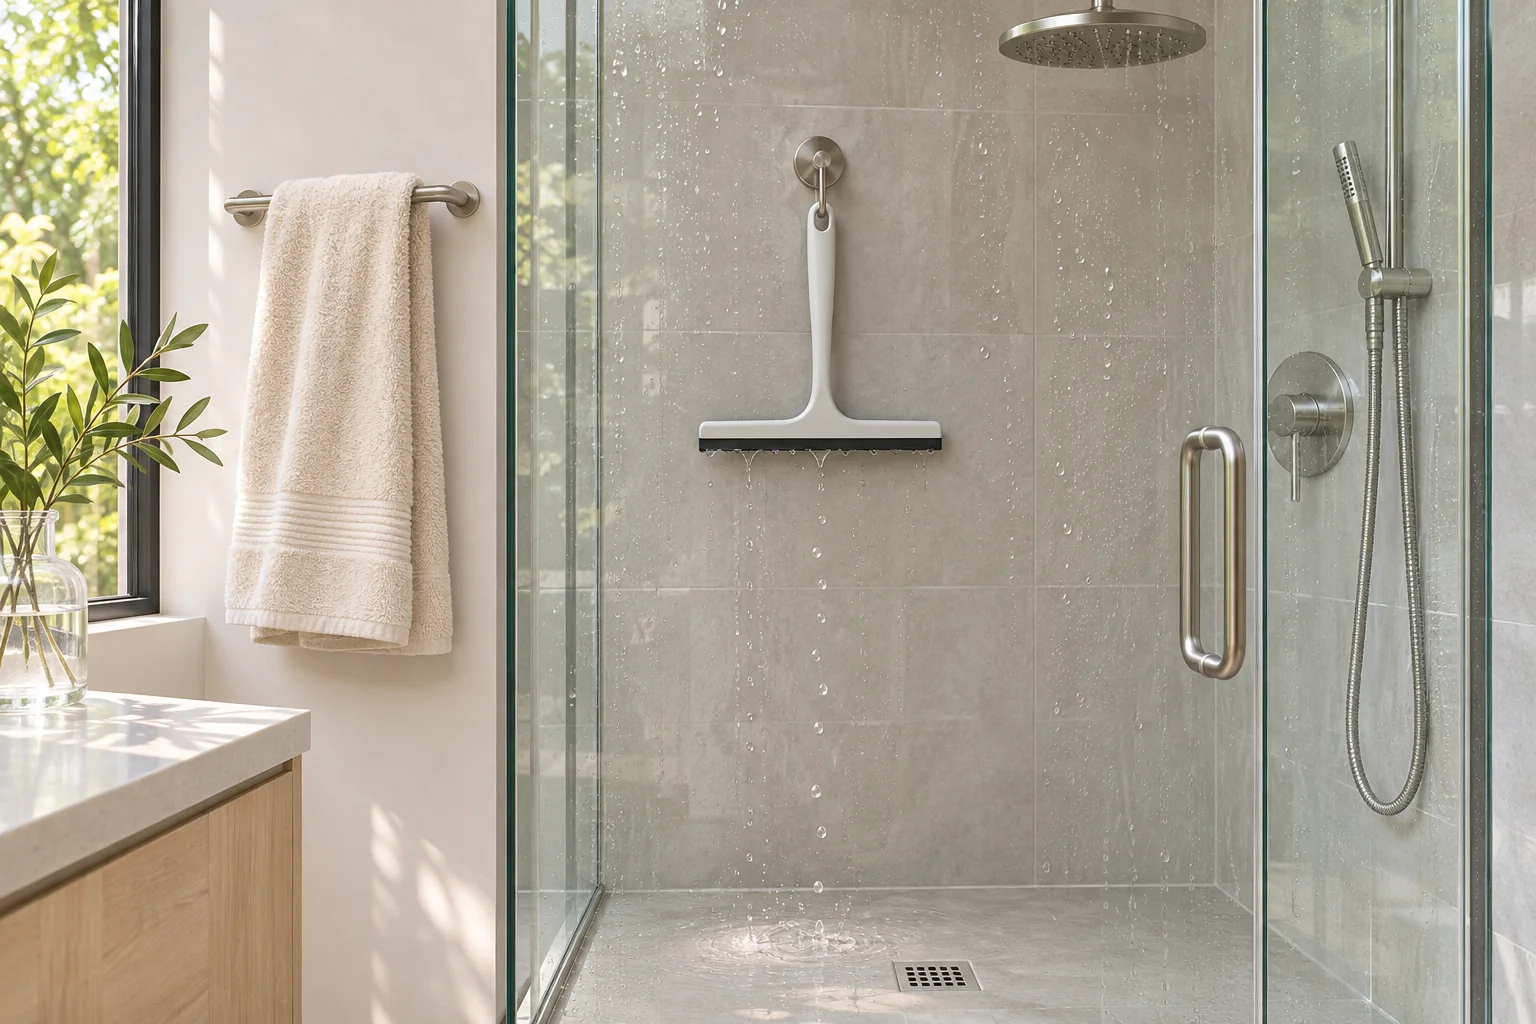
Squeegee hanging above a shower shelf
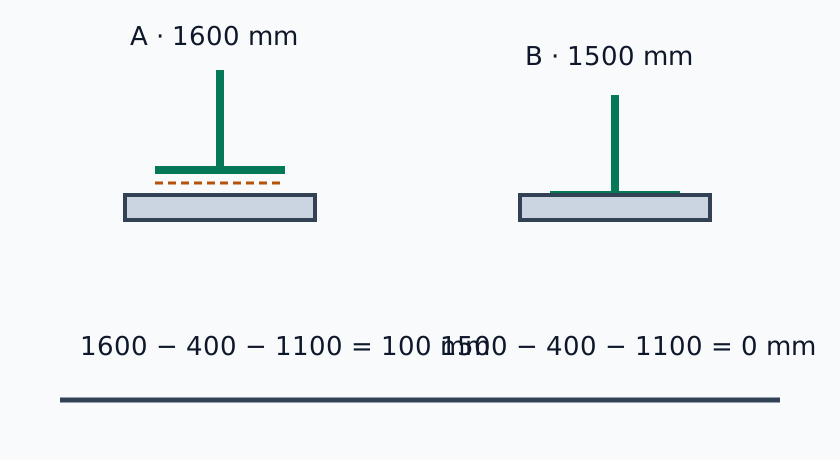
The 400 mm hanging tool on a 1,600 mm hook leaves 100 mm above the 1,100 mm shelf in A. Lowering the hook to 1,500 mm in B removes the static gap.
Watch what happens after the last pass across the glass. The squeegee has changed hands, orientation and condition in a few seconds: it was a dry tool on a holder, then a tool pressed against glass, and now it is wet at the point where someone needs to put it away. An inside hook and an outside hook can be equally close on a plan while asking for completely different movements at that moment. On one side the door may have to stay partly open. On the other, the wet blade may cross a surface someone expected to stay dry.
Compare two actual places at the same time. Call the inside location A and the outside location B, matching the zone drawing further down. In A, the enclosure can receive the first drops if the tool, door and user all fit. In B, the user may reach the tool from the room side, but the wet journey continues past the boundary of the enclosure. Neither location has an inherent advantage once a shallow ledge, a pivot door, a narrow entrance or a badly placed towel enters the picture. The useful comparison follows the blade as well as the hand.
The exercise has three separate results. A section tells you whether a hanging tool occupies the same height as a shelf underneath it. A plan and a dry rehearsal tell you whether the tool and door can move in the same space. A small observation on moisture-tolerant surfaces tells you where water goes in that particular trial. Keep those results separate so that a pass on one drawing does not quietly become a pass on everything.
Mark the enclosure boundary first
On a photograph or sketch, mark the inside face of the glass, the edge of the shower floor, the opening and the first place outside where a wet blade could pause. In a shower with a curb, the change of surface makes part of that boundary easy to identify. In a curbless arrangement, the user may walk across continuous tile even though the shower zone and the adjacent floor were designed for different exposure. Locate that difference on the project information or confirm it with the installer before deciding which surfaces should receive drips. A finish that looks similar on both sides gives very little information about the underlying assembly.
Add only the objects that can actually change the decision. A glass panel, door pull, shelf and towel edge may explain a failed return. A full floor plan of the home will not improve that diagnosis. To make A and B comparable, draw the same actual blade width and hanging length at both positions. Mark the opening direction and the location of an existing tray, if there is one. If the shower has more than one door position during a normal routine, outline the partly open position separately. A pivot door that looks clear fully open can occupy the candidate storage area midway through its travel.
Compare the vertical space first
Open the full-size height comparison
In this teaching example the hook reference is 1600 mm above the finished floor, the tool hangs 400 mm down from that reference and the shelf top is 1100 mm above the same floor. At the same horizontal position, the lower edge is 1600 − 400 − 1100 = 100 mm above the shelf. Subtract a separately chosen 50 mm trial separation and the balance is 50 mm. The dashed line marks the chosen reserve, not a required standard.
With the hook at 1500 mm, the tool's lower edge and shelf top both reach 1100 mm: the static gap is zero and the balance after the same trial is −50 mm. Raising the hook can increase this gap but may make the tool harder to reach. The section is schematic and assumes the shelf lies beneath the tool; it does not predict swinging, wall fixing or water flow.
Keep the reference points identical
In the drawing, the hook height is measured to the point that actually supports the tool. That might be a hook seat, a slot, the bottom of a ring, or the point where a cord settles. Measuring to the top of a mounting plate gives the wrong number unless it happens to coincide with that support point. Hang or hold the tool in its intended resting orientation and mark the reference. Then find the lowest part, which could be a blade corner or the end of the handle, depending on how the manufacturer intends it to hang. A holder that changes the angle of the tool changes the measured hanging length even though the squeegee itself is the same.
The shelf height also needs a named point. Use the top of the fixed edge that lies beneath the hanging object. A removable tray on that shelf can make the relevant top higher. If the shelf has a raised lip near the front, record that lip and the flat surface behind it separately. The tool may clear the flat surface but contact the lip during removal. Some ledges have fall built into the surface; measure at the section you're comparing instead of taking an unrelated height at the far end. Check both marks from the same finished floor datum and write down the reference so someone can reproduce it later.
Use a straightedge or a vertical measure for the height difference. The curved path along the wall and the length of a handle strung diagonally across a tape have other meanings. To decide whether the shelf and blade even overlap, look down in plan or align a vertical reference from the suspect blade corner to the shelf. When there is no overlap in the resting position, the arithmetic in the side section no longer describes a possible resting collision. Removal could still bring that same corner over the ledge, so keep the activity check.
Read the section as a choice between two heights
If two people record different values at the same candidate spot, first reconstruct each reading before averaging. One person might have measured to the lower edge of the tray, while another recorded the top of the lip. One might have taken the finished floor immediately next to the wall, while another used the farther side of a stepped or sloped floor. Sketch the individual endpoints and establish the reference that will remain available after installation. If the floor varies, use a common level datum passed across the relevant parts of the section and relate both dimensions to it. A smaller discrepancy can come from a flexible hanging loop settling at a slightly different angle after each return. Observe the repeated resting positions and record the lowest relevant configuration as a separate case.
This simple test is valuable precisely because you can vary one thing. If you also change the tool and move the shelf when you lower the hook, you can't see which change made the difference. On a real project, keep the reference drawing fixed, duplicate it for the next option and circle each changed quantity. A different hook design might lower its support seat relative to the mounting holes. A shorter blade might also change the way it hangs. Record those as changes in reference or hanging length rather than silently measuring from a different place.
A reserve can give the household vocabulary for comparing options, especially when several people have to move the same object in a confined area. It is a margin chosen for the test. It cannot be used to infer fixing strength, ease of reach, an accessible placement or the space needed to pull up and unclip the tool. If the change from the 1500 mm option to the 1600 mm option makes the reach worse, revisit the position of the shelf, move the candidate to a different vertical strip on the wall, or consider a different tool and holder combination. Each alternative addresses a different constraint. Keep the reason beside the dimension.
Test what happens above the hook too
In a typical open hook shape, the hand raises the tool before pulling it forward. In a clip, the user may have to pull in a particular direction or press a release. A slot may move the tool sideways. Ask the hardware instructions which action is intended and make a dry rehearsal with the actual tool and a stable temporary arrangement. At the top, identify anything that limits that motion, including a second shelf, the underside of a niche or a screen bracket. Transferring the 100 mm difference below the blade to the space above the hook would count a gap on the wrong side of the object.
Make room for the part of the hand that takes the load. Someone approaching from the room side may turn the hand before the handle can clear the hook. Someone approaching from inside may have a better view of the holder yet place their elbow closer to the glass. Two hands are sometimes needed for hardware that both clips and releases. A clean elevation can omit all three of those constraints. If a person cannot retrieve the dry tool without leaning on a screen, squeezing fingers against a bracket or reaching beyond their comfortable position, record the failed movement and choose a different location.
The sequence can also be tested with an outline held by another person when no appropriate temporary support is available. Dry paper or card is a way to explore competing outlines away from moisture; don't stick an uncertain temporary product on glass, tile or a finish as a substitute for a load-bearing holder. The aim is to locate interference before there is any reason to buy mounting hardware or alter a finished surface.
The dry zone needs its own test
Open the full-size drip-zone diagram
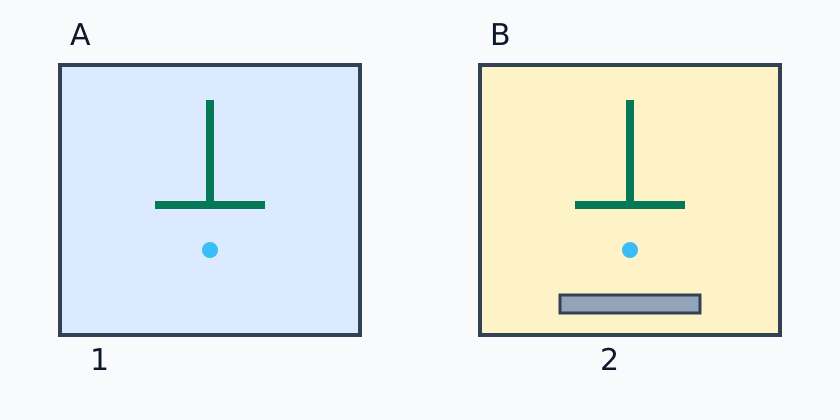
A is inside the enclosure; B is outside above a tray. In A, check whether the shower door, screen and body can pass the hanging tool. In B, follow the path from the wet glass to the tray and check whether the floor, tray and nearby surfaces can handle drips. The dot is a prompt to observe, not a simulation of water spread. A tray must be emptied and cleaned; a hook over a tray does not guarantee a dry floor.
Follow A from the place where the glass is cleaned
Start on the inside in the same place from which the last part of the glass is normally reached. For the rehearsal, use a dry tool and dry footing. Look at the nearest plausible hook location without moving the door. Pay attention to anything that needs to change before you can return the handle: the wrist may rotate, the blade may cross the opening, or the body may need to move away from a bench or shelf. Face the return position and check the view of the holder from that approach. A hook that is obvious from the bathroom entrance can be hard to see directly behind a fixed panel.
An inside corner sometimes appears ideal because the tool can hang above a water-tolerant zone. Look down to see what lies directly beneath the blade. A corner shelf, a niche ledge or a removable storage caddy can interrupt the expected path. Water on a blade may move to either end depending on how the tool hangs. Set out which nearby surfaces you would observe in a permitted wet check. Include the edge of the shelf and the back corner if they are part of the route. The intended landing surface is simply the surface you want to observe, and it may differ from the dot on a teaching diagram.
Now consider where the user leaves the shower. Hold the tool in the intended resting envelope and move the actual door slowly through its range. In a hinged enclosure, the handle and the outer corners of the moving panel are worth checking as well as the panel face. A sliding assembly changes what can pass where panels overlap, and hardware on the moving panel can project into the same area as stored equipment. If the tool is to be placed near a door, use the movement of that actual enclosure rather than a generic swing radius. Confirm that a latch, handle or release remains available throughout normal use.
An inside option that avoids the door may still force someone to step further back into the enclosure to put the tool away. That difference matters if the normal routine is to clean from the opening and leave directly. Rehearse the final two actions in their usual order. If the person's path depends on returning the squeegee before opening the door, record that dependency. A location that works only for an unusually precise order of movements can be less useful for a shared bathroom, where people may approach or leave from different places.
Follow B all the way to the tray
An outside position should have a moisture destination of its own. On paper, draw a line from the last part of glass that usually gets wiped to the planned holder. Add the first place where someone might stop to move a door, grab a towel or change grip. Drops can fall during that pause before the blade reaches the tray. With the dry tool, see whether the usual approach keeps the blade clear of towels, cabinets, the door frame and anyone approaching the room. An outside hook that is easy to grab on the way in can ask for a longer movement on the wet return.
Place the tray or other existing moisture-tolerant receiving surface under the resting outline, if that is how the arrangement is meant to work. The vertical alignment matters on both axes. A shallow dish can line up with the blade from a side view and miss its low corner in plan. Mark the outline of the holder and the area available beneath it. Notice whether a mat or a cabinet door is the first thing a drop would meet if it misses the tray. If the room has materials or finishes that should stay dry, ask the person responsible for their care which surfaces are appropriate for any wet observation.
Access to the tray is part of B. Imagine the blade is hanging and the tray is ready to be removed. Check the direction in which it must lift or slide, where it can be carried, and whether removing it asks someone to handle the squeegee first. A container tucked behind the toilet, under a shelf lip or in a narrow gap may collect drops but be hard to inspect and empty. That converts a frequent simple task into a hidden maintenance step. Draw the tray removal path as its own short arrow so the proposed location can be evaluated with the door, cabinets and any mats in their usual places.
Compare the two positions on the same set of observations
| Observation | What to document for A inside | What to document for B outside |
|---|---|---|
| First resting drop | Surface under the lowest point and nearby shelf edges | Tray alignment along both axes and surface immediately around it |
| Wet return | Blade movement from last wiped area to hook | Where the blade crosses the enclosure boundary or pauses |
| Door clearance | Handle projection and moving panel at intermediate positions | Door opening on the room side and person standing near the tray |
| Removal of tool | Direction of release and room for fingers | Direction of release and approach around adjacent fixtures |
| Maintenance | Cleaning access to the holder and receiving surface | Taking out, emptying, cleaning and replacing the tray |
| Mounting evidence | Substrate and hardware instructions for the exact location | Substrate and hardware instructions for the exact location |
The observations should be comparable even if the options use different hardware. Write the movement down in plain language: “lift toward the niche,” “return from the right while the door stands partly open,” or “remove the tray by sliding it toward the basin.” A label such as “clear” means very little without the object and action attached to it. A few precise notes make it possible to review the decision when a fixture, shelf or door configuration changes.
Suppose A fits vertically and the floor below can receive droplets but the door touches the tool midway through opening. Suppose B has a clear door path and a tray, but the blade must pass over a cabinet edge on the way back. These are hypothetical outcomes, not measured results from a real bathroom. The first decision to revisit is horizontal position in A and return path in B, because those are where the evidence points. Raising A or buying a larger tray for B would leave the stated problems unresolved. It takes less time to name the failed action than to retest every variable after an unrelated change.
Before fixing anything, hang the dry tool temporarily at each proposed position using a support that does not damage the finish. Slowly open the real door, remove and replace the tool, and inspect the holder with a small amount of water only where the surface permits it. Record where it drips and how it will dry and be cleaned. Stop if the holder slips or the action requires an unsafe reach.
What a wet check can tell you
Do the dry checks first. The purpose of the wet check is narrow: observe a small permitted sample on the specific receiving surface once the tool can be used without interference. It is not a reason to spray water over cabinetry, proof test a wall assembly or simulate a shower on a finished floor that was designed to stay dry. If uncertain about a finish or moisture path, leave that observation open. It is possible to reject a candidate on geometry or care requirements before a drop is applied.
Start with a known blade orientation and put the tool on the holder the way it would normally be returned. Observe the first visible drip and whether later droplets use the same route. The wet edge can behave differently when reversed, and water can collect where the blade joins the handle. Note whether there is a meaningful difference if a second person returns the squeegee the way they normally hold it. Avoid changing both location and orientation when comparing A and B. If the observed wet return itself is the issue, mark the point along the path where the first drop leaves the tool.
Inspect what happens after the drips land. Water can remain in a lip, on an edge or behind a tray; it may also become more visible once nearby surfaces are wiped. On appropriate surfaces, observe rather than extrapolate. For example, one trial might show the blade end drips squarely within the tray but a wet handle touches the wall just above it. The solution to this conditional example could involve the resting orientation, position or holder instructions. Increasing tray size alone would not change contact at the wall.
Someone must also be able to take the holder or tool out for cleaning in the way prescribed for that product. A tiny recess that keeps the squeegee visually unobtrusive may restrict the clearance needed to wipe behind it. Check that the adjacent shelf can be cleaned with the squeegee in a suitable temporary position, and that removing the tray does not put its wet underside on a dry surface. If the daily cleaning order drives the final choice, give it the same weight as a dimension. A practical place that can be inspected quickly may remain more useful than a hidden place chosen primarily for appearance.
Start with an existing bathroom before choosing a new fitting
With an existing bathroom, list which objects can be moved without altering the installation. A loose caddy or freestanding tray may be an easier variable to test than a fixed shelf or a screen. Keep the existing door position and finished surfaces as constraints. If the squeegee already has a compatible holder and the substrate and its intended placement are documented, try a different approach or sequence in a dry comparison before buying other hardware. If a convenient location is unavailable, a documented tool and holder alternative with a different hanging envelope may open an option.
In a planned refurbishment, record the desired storage and use zones before the glass and shelves are ordered. Glass hardware and fixed niches are harder to move once installed than small accessories. Ask for the true moving envelope of the selected enclosure rather than copying the diagram for a different door type. Keep the planned floor reference, location of the shelf, required release direction, and fixture projections on the same drawing. If a proposed location needs a fixing, give the installer the specific holder, position, material and moisture exposure to review. Concealed services and the waterproofing detail require project-specific knowledge.
In a rented bathroom or a shared building, check what variations are permitted before choosing a fixing. Some hardware offers a different installation method, but its permissions, directions, material compatibility and capacity still need to be checked. An existing compatible support or a genuinely stable freestanding option can make the comparison reversible if it keeps the tool out of the way. Changing the place where the tool is dried versus stored may also change the layout: a temporary drip position next to the shower and a dry storage space elsewhere have separate purposes. That arrangement creates another trip, so review whether people can keep those two positions distinct in practice.
Consider who approaches from which side
A location that works for a user standing inside the enclosure may hide the holder from someone who usually stands by the opening to wipe the glass. Compare both approaches on dry footing. For each one, track which hand holds the tool, where the person can stand without moving a mat or a stool, and which side of the door they use. If children or visitors share the room, avoid relying on everyone knowing an unusual sequence. Someone who returns the tool while carrying a towel may change the motion even at the same hook height. For deliberately shared storage, favor a candidate where the normal approach reveals both the place to put the tool and the way to release it.
Households may want a second tool for a mirror or for a different shower. Spread the two dry outlines across the proposed location and check what happens when the first is removed while the other stays hanging. Each tool has its own lowest point and release direction. If the blade edges overlap, one may need to be removed before the other can be used. Determine which is used where and which of the two can be wet at the same time. A holder with room for two outlines at rest could still create a worse return movement than two shorter routes. Note this as a separate comparison when one tool is routinely used away from the shower.
Adjust the problem that actually failed
If the blade touches a shelf while hanging, revisit the overlapping geometry. The section can help distinguish a vertical change from moving the holder to a part of the wall where the shelf is not below it. Verify the motion again after either change. A sideways move can solve overlap at rest while putting the release path against a door bracket. A higher support point can clear the shelf but make it more difficult to see and reach the holder. Recalculating the static number is the first part of checking a revised option.
If the door hits the tool, return to the drawing of the moving door and the observed moment of interference. Identify whether the blade, handle or holder protrudes into the sweep and whether it happens while hanging or during removal. This tells you which object and state must move. Do not alter a stop, remove a seal or change door hardware to make room for the squeegee without the appropriate installer review. A storage detail should respond to the enclosure and its required operation.
If the A position passes the two geometry tests but directs moisture to an unsuitable place, the next comparison should focus on the observed surface and the blade orientation. The main shower floor may be suitable while a specific shelf and what is stored on it need to stay clear. Moving the tool a little horizontally might change where a drop lands without changing height, but repeat the observed check rather than assuming the drip follows the wall. Conversely, moving the tool from A to B requires the whole outside return and tray care assessment, even if the new holder is at the same height.
If B passes the drip check at rest and fails during transfer, examine the pause and grip change before the tool reaches the tray. Moving the tray without changing the path can address one part only. Trying the inside candidate again with a documented replacement holder or relocating an obstruction may be worthwhile if it removes the crossing. If the wet trip is acceptable but the tray is hard to empty, draw the tray's handling path separately. The design decision depends on the failed action and its frequency. There's no reason to trade comfortable reach away to solve a problem at the basin.
A space for each kind of uncertainty
The field record can distinguish “measured,” “observed in a dry rehearsal,” “observed on a suitable wet surface,” and “pending instructions.” This is especially useful when bathroom installation is carried out by different people. A cabinet supplier may be able to confirm the lip height but not what can be mounted on the shower wall. The person cleaning the enclosure may know which way the door is usually left but not what lies behind the tile. Record who can resolve each open point. A taller proposed hook cannot cure an unanswered material question, and a favorable product listing alone provides no evidence about the route from the glass.
Here is an illustrative field note for the example, with assumptions clearly identified. The datum is the finished floor in the section; the shelf top is at 1100 mm at the point of overlap; the chosen tool and holder project 400 mm downward. The candidate at 1600 mm leaves 100 mm above the shelf and 50 mm beyond the chosen reserve. The candidate at 1500 mm contacts the shelf in the simplified section, so that location cannot be approved on the basis of the drawing. The door check, wet destination, hardware instructions and reach remain open until evidence is available. This note is useful because someone can repeat the comparison with new dimensions and knows which conclusions need on-site work.
If your own recorded shelf height comes from a different spot, keep that reading and take a second at the relevant overlap. If the tool changes from a loop to a clip, record the new support point rather than trying to correct the old height by an estimated amount. If a supplier can only give the hole pattern and not the loaded angle, mark that difference unresolved. Unknown inputs should remain unknown in the record. An attractive plan with missing observations is best treated as a provisional option.
You can run other arithmetic comparisons after the teaching case. Keep the hook at 1600 mm and the same 50 mm reserve, but imagine that a new tray on the shelf raises the top at the overlap from 1100 to 1140 mm. The static difference becomes 1600 − 400 − 1140 = 60 mm and the balance after reserve is 10 mm. This extra example isolates the effect of the tray; it says nothing about wet return or cleaning access. If the tray sits beside the blade instead of below it, that revised height does not belong in the blade-over-shelf comparison at all. Place matters as much as the number.
On a shared project, keep notes in the same units and identify each photograph by location and angle. A close-up of the hook with no view of the door teaches little about the sweep. A view of the entire room with the tool hidden teaches little about the support. Pair a front view that shows the blade's bottom and adjacent shelf with a side view that shows the tool and door projections. Include a narrow view from the direction of approach if the holder is concealed by a fixed panel. Photographs add context to a measurement; they don't substitute for a reliable datum.
Use the hanging comparison to change hook height, tool length, shelf height and trial reserve. It shows a vertical difference at one overlapping point; it cannot validate a hook, drip containment or an accessible route. Reset returns the example. Check the actual product's mounting instructions, substrate and any concealed services before permanent installation.
Enter the documented position that you want to compare. Change the hook height alone first so you can see the difference between zero and negative. Return to the original height and try the measured hanging length for a different supported tool. The changes answer different questions. If only one dimension can be reliably measured, leave the other values as teaching assumptions in your notes instead of describing the whole result as measured. Use the label on each control to keep support point, tool length and shelf reference distinct.
The diagram and the interactive balance can also explain why an apparently conflicting pair of measurements can both be true. The static gap may be nonnegative and the reserve balance still negative. In the lower W46 position the shelf and tool meet in the section, and subtracting the selected reserve reports the shortfall against that preference. In a different example, a narrow positive gap can coexist with a negative balance because the chosen margin exceeds it. Tell a supplier which quantity you are quoting. A negative balance after a reserve isn't the same as a literal negative geometry measurement at rest.
Make the choice from the end of the shower
Put the plans for A and B beside each other and imagine putting the tool away with the door where it usually sits. If the inside location keeps the blade over the wet zone, lets the door travel fully and is easy for the people who use it to reach, the cleaning routine can end inside the enclosure. If the outside option solves a real access problem, trace the last part of the wet journey to a surface that can receive it and make sure the receiving tray can be removed for care. If both leave unanswered questions, keep the existing arrangement until a viable candidate is demonstrated.
The piece of information to keep is a location paired with its reason: for example, the position that avoids the moving handle and keeps the wet blade within the suitable receiving area. Save the result with the holder reference, the door position you checked and the actual receiving surface. Take it out again if someone changes the tool or adds a shelf. At the end of a future shower, the household can tell whether the chosen place still works by making the same movement that originally settled the comparison.
For the wider wet and dry layout, see wet-room bathroom planning. Avoid altering waterproofing without an appropriately qualified installer.
TRY THE EXAMPLE
Compare hook and shelf heights
Measure from the same finished floor to hook and shelf. The hanging length reaches the lowest point of the tool; the trial separation is chosen by you, not a standard.
Allowed range: 1–3000 · Step: 1
Allowed range: 0–2000 · Step: 1
Allowed range: 0–2500 · Step: 1
Allowed range: 0–500 · Step: 1
Positive remainder under these assumptions. Check the actual use and product requirements before choosing a layout.
- Gap above shelf
- 100 mm
- Balance after trial separation
- 50 mm
Reference boundary — Hook height above floor − Shelf top above floor: 500 mm
Blue dashed line: comparison boundary. Red dimension: shortage.
1600 − 400 − 1100 − 50 = 50 mm
This section assumes the shelf is beneath the tool. Check the full door motion, holder, drip destination and waterproofing separately with the actual products.
Teaching assumptions, not a surveyed home or a construction check. Results describe this simplified geometry or budget only. Changes stay on this page and reset on reload.