Dining Pendant Height Guide: Table, Scale, and Sightlines
Set dining pendant height and position using table size, ceiling height, seated sightlines, dimming, extension leaves, and safe circulation around the room.
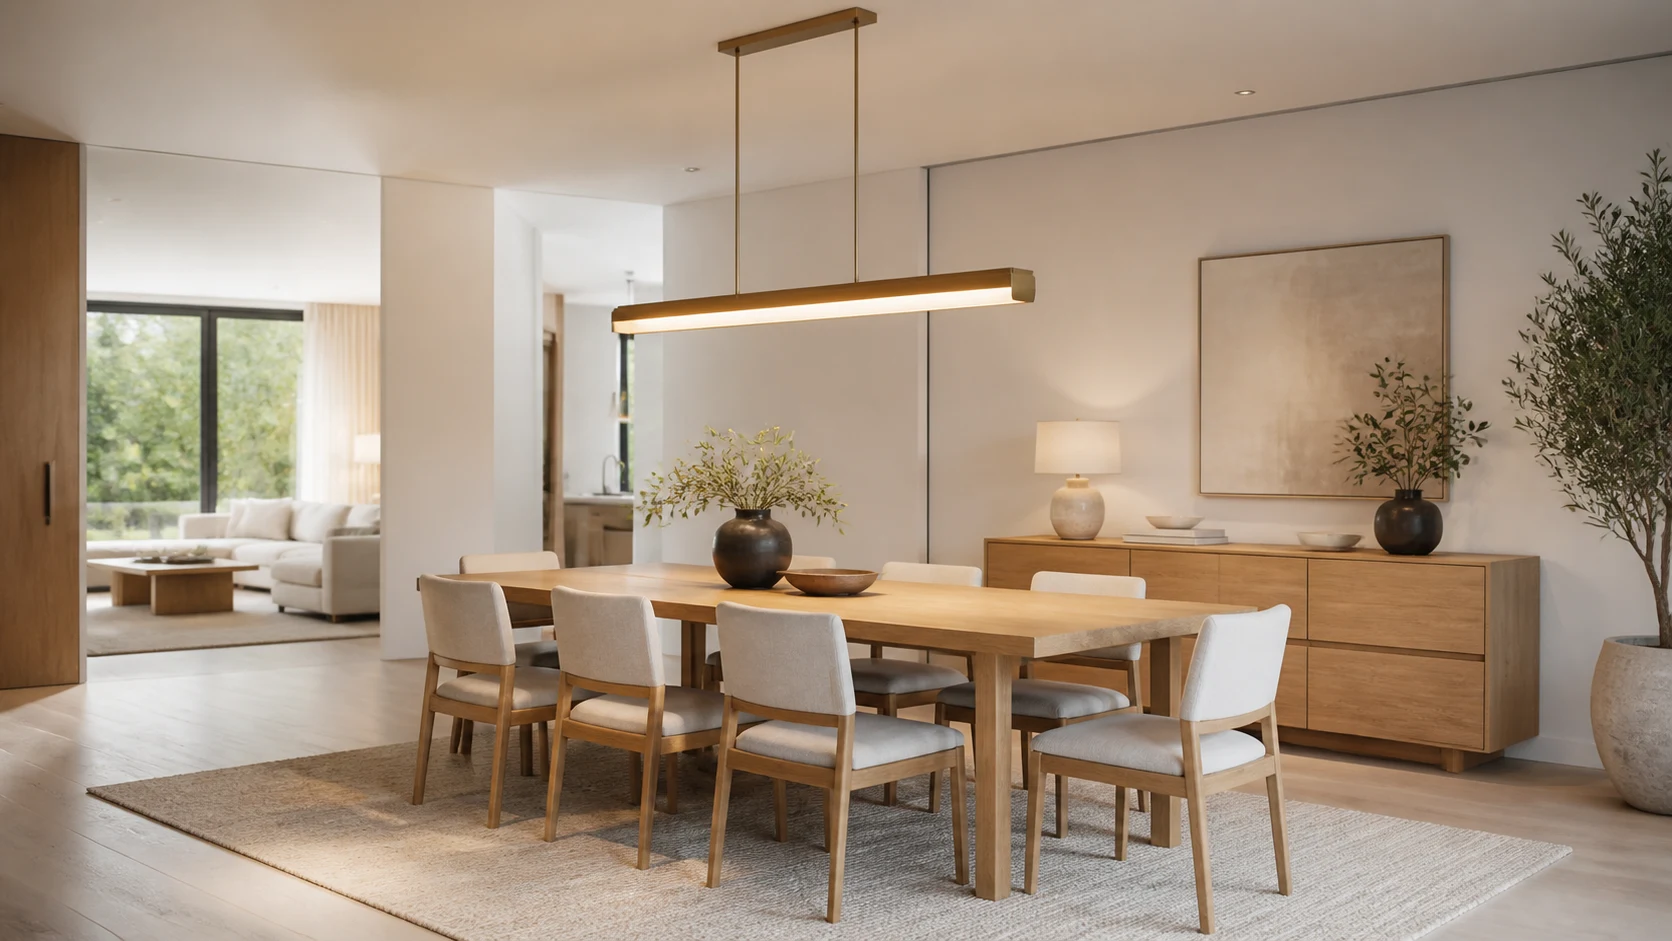
A dining pendant is both a light source and a visual ceiling over the table. Hung too high, it feels disconnected and exposes glare. Hung too low, it blocks faces, catches raised serving boards, and becomes a hazard when the table moves. Good placement starts with the actual tabletop and seated people—not the center of an empty room.
Center the Fixture on the Table, Not the Room
Dining tables are often offset by a sideboard, doorway, radiator, or circulation route. If the ceiling outlet sits at the geometric center of the room, a pendant installed there may visibly miss the table. Establish the table’s everyday position first, including chair pull-back and the main route around it, then locate the fixture above that composition.
Where moving the junction box is impractical, a listed swag solution, track-mounted pendant, or canopy with an approved offset may help. Electrical changes must follow local rules and product instructions. Do not create an improvised cord path that places strain on the cable or conflicts with fire and building requirements.
Use Height as a Starting Range, Then Test Eyes
A common starting range places the bottom of a dining pendant roughly 30 to 36 inches (76 to 91 cm) above the tabletop for a standard ceiling. Taller rooms or larger fixtures may justify a higher position, but adding a fixed amount for every extra foot of ceiling can make the light float away from the dining group.
Sit in every chair and look across the table. The shade should not cut through faces or hide the person opposite. Stand up, carry a serving tray, and reach toward the center. The lowest element must remain clear of normal actions. Adjustable suspension is valuable when table height or household use may change.
Match Fixture Scale to the Table
The pendant should feel related to the table without approaching its edges. One practical comparison is to choose a fixture or grouped composition around one-half to two-thirds of the table width. Another check is to keep about 12 inches (30 cm) or more of tabletop inset from the fixture edge on each side. These are visual starting points, not structural or safety rules.
A compact round table often suits one central pendant. A long rectangular table may need a linear fixture or two to three smaller pendants. When using multiples, judge the entire group as one object and distribute light across place settings rather than creating bright circles with dark gaps.
Plan for Extension Leaves and Rotated Tables
An extendable table changes its center and length. Decide whether extensions are occasional holiday use or the normal weekend arrangement. A linear light may still cover the longer top, while one small pendant can look stranded over half the table.
If the table sometimes rotates 90 degrees to make space for guests, a fixed linear fixture may prevent that flexibility. Test daily, extended, and rotated positions before committing the ceiling point. The dining table size guide helps establish the furniture envelope first.
Control Glare and Put Light on Faces
An exposed bright lamp can be uncomfortable at seated eye level even when the height is correct. Choose a diffuser, shaded source, or low-glare lamp appropriate to the fixture. Confirm the light distribution: a narrow beam may spotlight the centerpiece while leaving faces and plates dim.
Color quality matters around food and finishes. Use a high color-rendering source and a warm-to-neutral color temperature suited to the room. Check compatibility among lamp, driver, and dimmer; poor combinations can flicker, buzz, or have an unusably abrupt low end.
Layer the Dining Room Lighting
One pendant should not carry the entire room. Add soft ambient light for circulation, wall or picture lighting for vertical surfaces, and sideboard task light where serving happens. Layering lets the pendant create intimacy without leaving the path to the kitchen dark.
Place controls where people enter from the kitchen and main hall. Dimming is especially useful because the table may support breakfast, homework, video calls, crafts, and dinner. A brighter scene supports cleaning and work; a lower scene reduces glare during an evening meal.
Coordinate the Ceiling and View Beyond
Before choosing a wide shade, map sprinklers, smoke detectors, air diffusers, beams, ceiling fans, and cabinet doors. Maintain all required clearances and never relocate life-safety equipment casually. A pendant near an operable skylight or tall window may also reflect at night.
Look from the living room, kitchen, and entry. In an open plan, the fixture becomes part of several sightlines. Aligning it with the table matters more than aligning it with every ceiling grid. Compare its visual weight with kitchen pendants so the two zones do not compete.
Check Head Clearance When the Table Moves
The table normally protects people from walking under a low pendant. Cleaning, parties, or furniture rearrangement can remove that protection. If the table is frequently moved, use a higher or adjustable fixture, or select a ceiling-hugging alternative. Never rely on memory to prevent someone walking into a sharp or fragile edge.
Large fixtures also need a safe installation method and a ceiling structure rated for their weight. Coordinate support, access above the ceiling, and future cleaning or lamp replacement with a qualified electrician.
Model Height and Sightlines in 3D
Place the table in daily and extended states, occupied chairs, sideboard, pendant volume, and eye-level lines in the Aedifex room planner. Inspect the fixture from seated height with the 3D demo, then walk the kitchen-to-table route carrying an imaginary tray.
Use the interior planner to compare shade materials with the table, rug, and wall finishes. A fixture can be visually large but physically light when its material and transparency are controlled.
Dining Pendant Checklist
- Position the fixture over the final table location, not the empty room center.
- Start around 30–36 inches above the top, then test real sightlines.
- Relate the fixture or group width to the table dimensions.
- Check daily, extended, and rotated table positions.
- Control lamp glare and distribute light across faces and place settings.
- Add ambient and serving light instead of overdriving one pendant.
- Coordinate ceiling services, support, dimming, and electrical rules.
- Protect head clearance whenever the table is moved.
Mock the lowest safe and highest visually connected positions before installation. After the preferred height works from every chair, register to save the dining layout and give the electrician a measured reference rather than an on-site guess.