Galley Kitchen Layout Guide: Clearances and Storage
Plan a galley kitchen with practical aisle widths, appliance clearances, work zones, counter space, lighting, and storage before renovating.
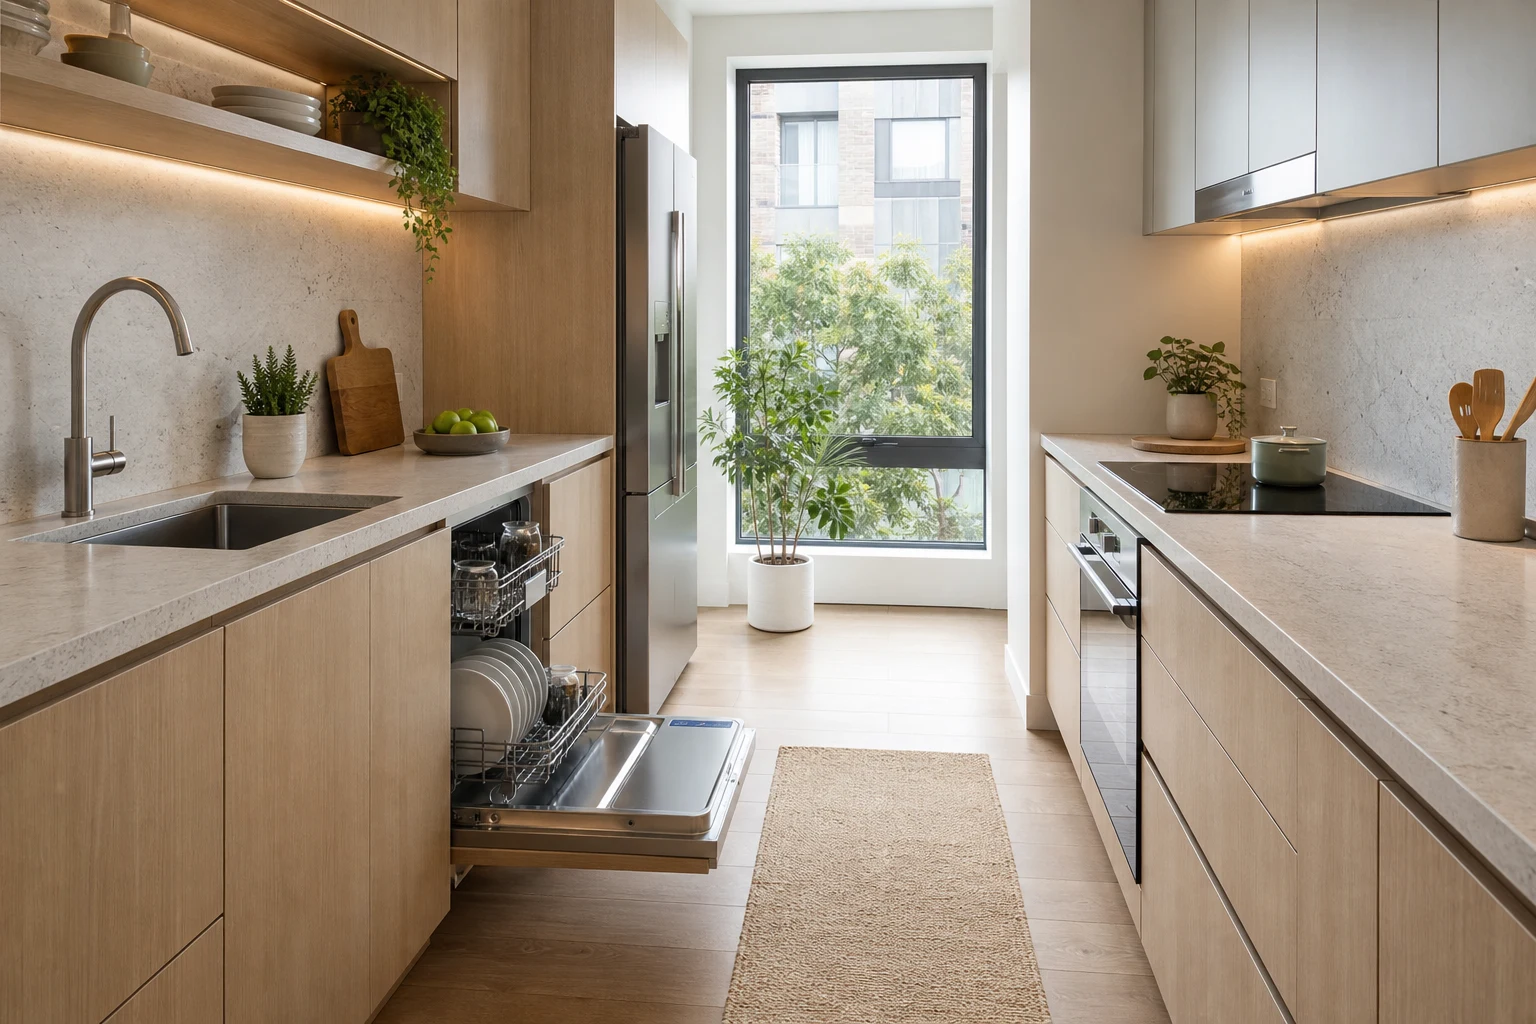
A galley kitchen can be faster to cook in than a much larger room because the sink, range, refrigerator, and prep surface are only a few steps apart. The same compactness becomes a problem when two people collide, an open dishwasher blocks the aisle, or tall cabinets remove all useful counter space. A successful plan starts with the active aisle—not the cabinet elevations—and tests every door, drawer, body position, and serving route at real scale.
Start With the Finished Aisle Width
Measure between finished cabinet or appliance fronts, not between bare walls. One cook can often work comfortably with a 100–110 cm aisle. Two regular cooks usually need 120–135 cm so one person can pass while the other opens a drawer. Wider is not automatically better: above roughly 150 cm, the opposite counter stops feeling conveniently close. Mark handles and projecting oven doors in the model, then test the narrowest point in Aedifex.
Decide Between a Through Route and a Dead End
A galley with doors at both ends carries household traffic through the work zone. Keep the refrigerator and snack storage near an entrance so someone can get a drink without crossing the cook. If one end terminates at a window, use the quieter end for uninterrupted prep or washing. Never place the range where a person entering quickly can hit a hot pan handle. A pocket door or outward-swinging door may protect more floor area than a door leaf opening into the aisle.
Build Work Zones Instead of Chasing a Triangle
The classic work triangle is less useful in a narrow room than a clear sequence: refrigerator, landing surface, sink, prep surface, range, and serving point. Aim for at least 40 cm of landing space beside the refrigerator and 60–90 cm of continuous prep space between sink and range. Keep the sink and range offset rather than directly opposite; two people standing back-to-back need extra clearance. Put waste and dishwasher beside the sink so scraping, rinsing, and loading happen in one zone.
Test Every Appliance in Its Open Position
Draw the dishwasher door fully down, the oven door open, refrigerator doors at their required angle, and deep drawers extended. An appliance can fit its opening yet fail in use. Check whether the dishwasher blocks the sink, whether an oven user can step back safely, and whether refrigerator drawers clear the opposite handles. Avoid placing two frequently opened appliances directly opposite each other. If that cannot be changed, stagger their positions by at least one cabinet module.
Protect Useful Counter Space
Small galley kitchens often have enough total counter length but no uninterrupted section large enough for preparation. Group tall units—refrigerator, pantry, oven tower—at one end rather than scattering them along both walls. Use a shallow appliance garage only if it leaves at least 45–50 cm of working depth. A removable board over the sink can add temporary space, but it should not be the only place to chop while water is needed.
Use Storage Depth Deliberately
Standard 60 cm base cabinets work for appliances, but the opposite run can sometimes be 35–45 cm deep for pantry goods, dishes, and small appliances. That change can recover 15–25 cm of aisle without losing the room’s second wall. Prefer drawers for pots and daily food because they reveal the full depth. Reserve the highest shelves for light, infrequent items. Keep heavy appliances between knee and shoulder height, and give each countertop appliance a nearby outlet.
Layer Task Lighting Along Both Runs
A single ceiling fixture leaves your body casting shadows on whichever counter you face. Add continuous under-cabinet lighting, a bright but shielded ceiling layer, and a focused light over the sink. Use a neutral color temperature around 3000–4000 K so food remains readable without making the kitchen clinical. If upper cabinets stop before the ceiling, do not rely on decorative uplight for chopping. Task light needs to land on the front half of the worktop.
Run a Two-Cook Simulation
Place one person at the sink and another at the range, then simulate opening the dishwasher, retrieving ingredients, draining pasta, and carrying plates out. Maintain a clear escape route from the range. Test a child or guest entering for water at the busiest moment. If the route fails, move the refrigerator toward the entrance, narrow one storage run, or consolidate tall cabinets. Review the broader kitchen work triangle guide for appliance relationships.
Galley Kitchen Pre-Renovation Checklist
- Confirm the finished aisle at handles and appliance projections.
- Open every door, drawer, oven, and dishwasher in the plan.
- Preserve one 60–90 cm uninterrupted prep surface.
- Keep landing space beside the refrigerator and range.
- Separate hot cooking from the main entry path.
- Place waste, sink, and dishwasher in one cleanup zone.
- Add task lighting to both counters and outlets where appliances live.
Before ordering cabinetry, create the room with exact wall, window, and service positions in the online room planner. A good galley kitchen is not simply narrow and symmetrical. It is a controlled sequence of landing, washing, preparing, cooking, and serving, with enough clearance for the real people and open appliances that occupy the aisle.
Galley Kitchen Layout Guide: Clearances and Storage
An independent galley study has a 2300 mm room width and two 600 mm finished runs. It adds a hypothetical 500 mm drawer extension and a chosen 600 mm standing zone.
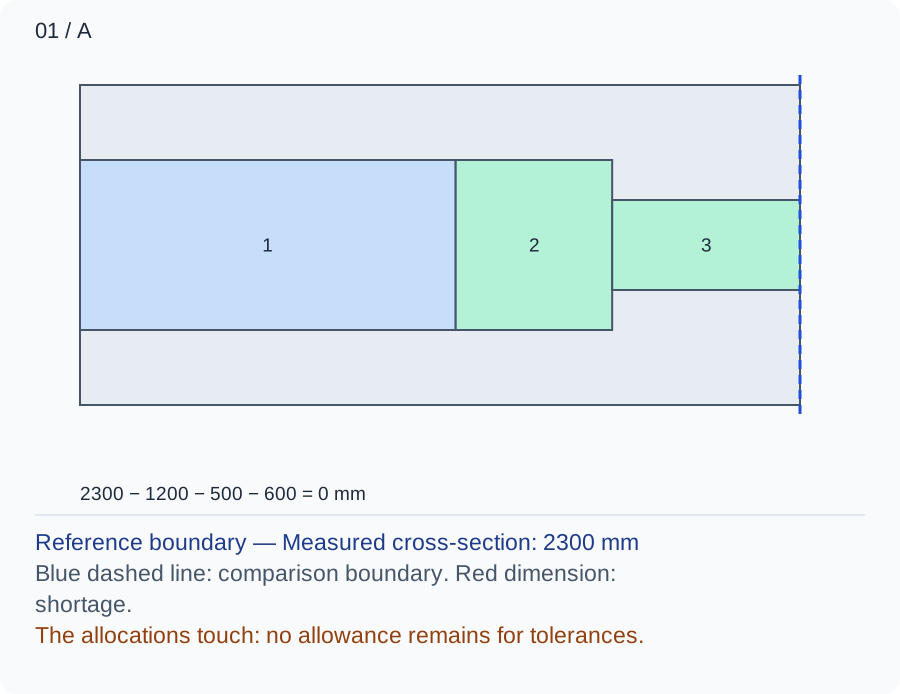
The closed aisle is 1100 mm and the open drawer reduces it to 600 mm. The user allocation consumes that remainder, so a second cook cannot be represented by the same empty strip.
Numbers and marks identify the items described here; use the stated dimensions rather than measuring the screen.
1: fixed occupation; 2: operating extension; 3: chosen user or route allocation. These are sequential allocations, not exact furniture positions.
| Input | A | B |
|---|---|---|
| Measured cross-section (mm) | 2300 | 2300 |
| Combined fixed occupation (mm) | 1200 | 1000 |
| Operating projection (mm) | 500 | 500 |
| Chosen user or route allowance (mm) | 600 | 600 |
Changed conditions and evidence
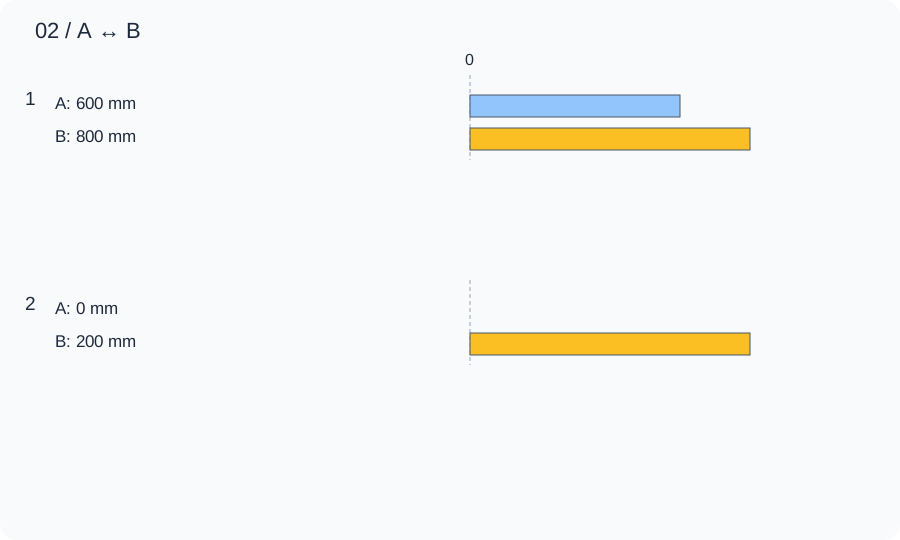
A 400 mm storage-only run lowers total fixed depth to 1000 mm and yields 200 mm after this task. This gains aisle width at the cost of storage depth; a second simultaneous opening can still erase the gain.
| Calculated relationship | A | B |
|---|---|---|
| 1. Unoccupied cross-section | 600 mm | 800 mm |
| 2. Remainder after the stated allowance | 0 mm | 200 mm |
Mark finished fronts including handles and rehearse one person chopping while the other retrieves a pan. Confirm the changed shallow cabinet still fits the actual contents and keep heat away from the through-route.
TRY THE EXAMPLE
Galley Kitchen Layout Guide: Clearances and Storage
An independent galley study has a 2300 mm room width and two 600 mm finished runs. It adds a hypothetical 500 mm drawer extension and a chosen 600 mm standing zone.
Allowed range: 1–12000 · Step: 1
Allowed range: 0–12000 · Step: 1
Allowed range: 0–12000 · Step: 1
Allowed range: 0–12000 · Step: 1
A remainder is zero: the selected allocations touch. This does not include tolerances or confirm usability.
- Unoccupied cross-section
- 600 mm
- Remainder after the stated allowance
- 0 mm
Reference boundary — Measured cross-section: 2300 mm
Blue dashed line: comparison boundary. Red dimension: shortage.
The allocations touch: no allowance remains for tolerances.
2300 − 1200 − 500 − 600 = 0 mm
Mark finished fronts including handles and rehearse one person chopping while the other retrieves a pan. Confirm the changed shallow cabinet still fits the actual contents and keep heat away from the through-route.
Teaching assumptions, not a surveyed home or a construction check. Results describe this simplified geometry or budget only. Changes stay on this page and reset on reload.