Home Theater Room Layout: Viewing Distance and Setup
Plan a home theater with the right screen size, viewing distance, speaker positions, projector clearance, seating, aisles, light control, and safe wiring.
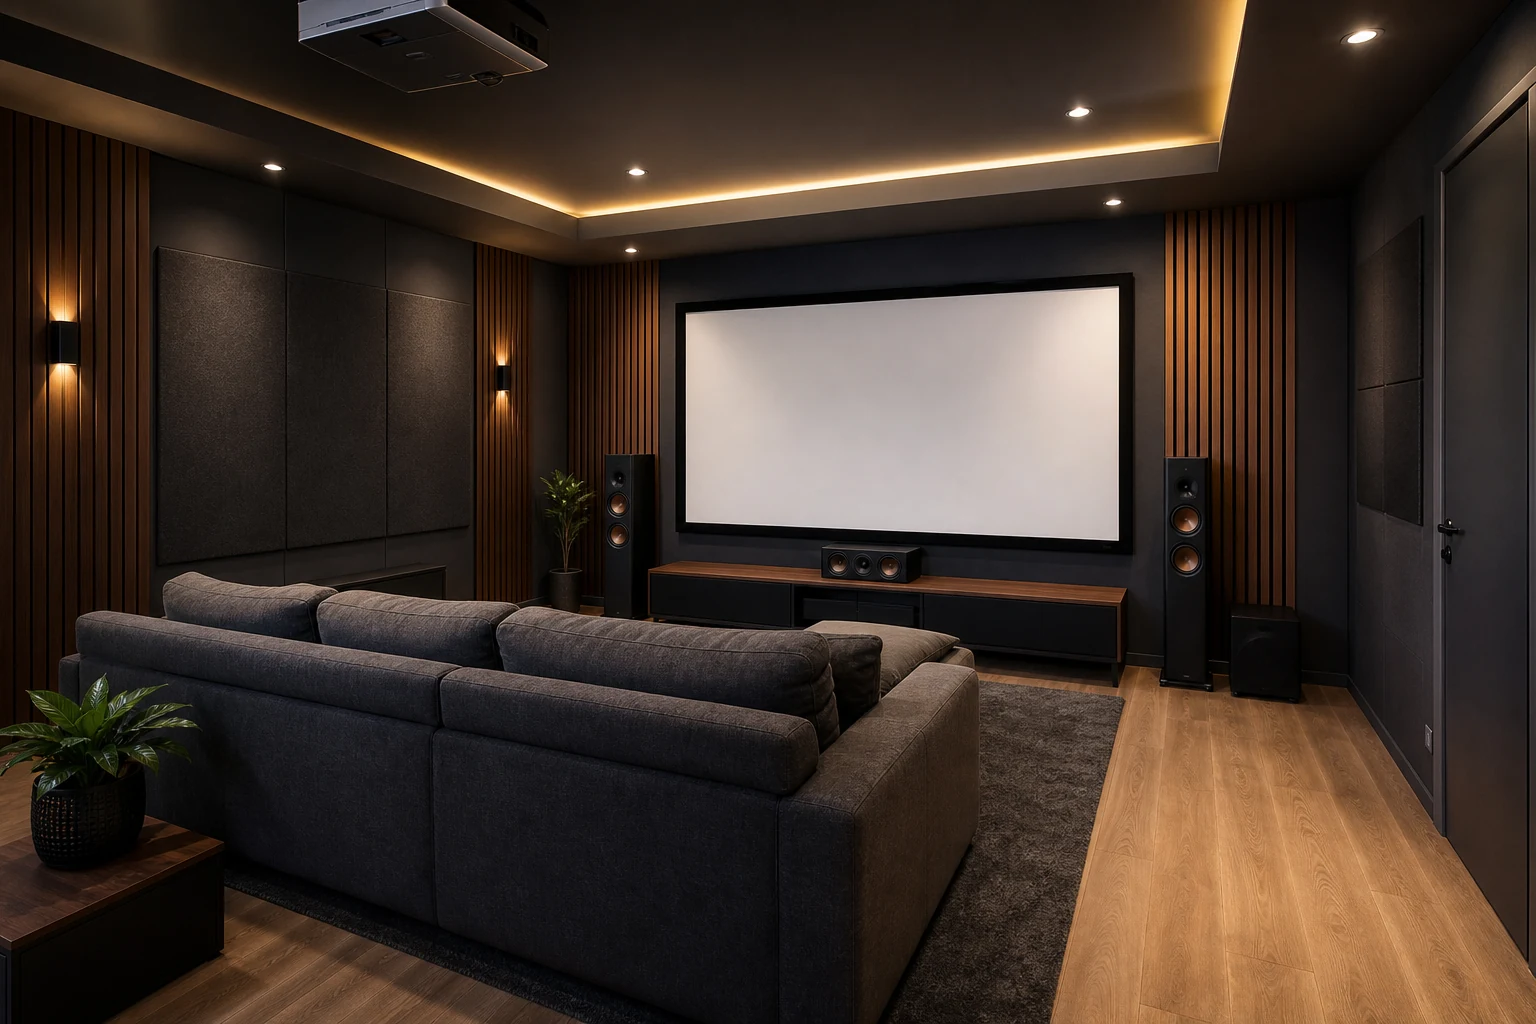
A home theater is not a large screen squeezed onto the only empty wall. Screen size, seating distance, eye height, speaker angles, projector throw, door position, and walking routes form one system. Choose equipment after the room geometry is tested. This avoids buying a screen that causes neck strain or a projector that cannot create the intended image from the available mounting point.
Start With the Viewing Wall
Select the wall with the fewest doors, windows, and unavoidable reflections. A screen centered on that wall simplifies speaker symmetry and sightlines, but the room entrance must still remain usable. Measure wall width, ceiling height, skirting, outlets, vents, and the arc of every door. Leave service access around fixed equipment.
For projection, check whether the surface can stay dark and flat. For a television, confirm the wall structure and the position of power and signal cables. Do not mount a display above a heat source unless the manufacturer and installer approve the temperature and clearances. A blank wall in daylight may become a mirror at night when lamps are behind the sofa.
Choose Screen Size and Distance Together
Viewing distance is usually discussed as a multiple of image width or as a viewing angle. A practical starting range for immersive film viewing is roughly 30–40 degrees of horizontal field of view. A 100-inch 16:9 screen is about 2.21 m wide; seating around 3.0–4.1 m away falls within a broad, comfortable range for many viewers. Preferences, visual acuity, resolution, and content vary, so test before buying.
Use painter’s tape to mark the image and sit through subtitles, dark scenes, sports, and a long conversation. If the eye must scan constantly or subtitles feel tiring, move back or reduce the image. If the screen feels like a distant object, move forward or enlarge it. Manufacturer calculators are useful, but they cannot know the viewer’s comfort.
Set Eye and Screen Height
The center of the image should be near seated eye level or only moderately above it. Measure the actual sofa or recliner because deep cushions and headrests change posture. A high screen encourages neck extension during a two-hour film. If a center speaker sits below the screen, keep it as close to image center as practical and angle it toward ear height.
For multiple rows, the rear viewers need sightlines over the front row without forcing the screen too high. A properly built riser may solve this, but it must be structurally sound, guarded where required, and lit at its edges. Test the tallest front viewer and shortest rear viewer in section, not only in plan.
Map Projector Throw and Maintenance
Every projector has a throw ratio and lens-shift range. Divide throw distance by image width to check whether the lens can create the target size. Measure from the lens, not the mounting plate or rear wall. Ceiling beams, fans, lights, and heads must remain outside the light path.
Leave space to remove filters, replace a lamp where applicable, adjust focus, and reach cables. Short-throw projectors have different furniture and screen requirements and can be sensitive to surface imperfections. Do not assume a ceiling projector is automatically quieter; fan noise above the main seat can be distracting.
Place Speakers Around the Seats
Start with the primary listening position. Left and right speakers should be reasonably symmetrical around the screen, with the center aligned to dialogue. Surrounds belong to the side or slightly behind, according to the chosen system and manufacturer guidance. Avoid hiding a speaker behind a solid cabinet door or pushing one into a corner simply to make it invisible.
Subwoofer position is room-dependent. Test more than one location because bass can be strong in one seat and weak in another. Plan cable paths and outlets before finishes. Separate signal and mains wiring where required, use rated in-wall cable, and let a qualified electrician handle permanent electrical work.
Keep a Real Aisle and Door Route
Allow enough space to enter without crossing directly in front of the screen. Around 75–90 cm can be a workable side aisle in a small private room, but local code, accessibility, seat design, and occupancy may require more. Recliners need their full extended length plus foot clearance. Draw cup holders, side tables, and open storage; these small items often narrow the route.
Doors should not strike a recliner or speaker. If the entry is behind the seats, keep a landing area where a person can close the door before stepping down. Add low-level pathway light that does not wash out the screen.
Control Light Without Creating Hazards
Layer blackout treatment with a lighter daytime layer if the media room has windows. Confirm that curtains do not cover heaters or block ventilation. Use dimmable, separately controlled wall or cove lights rather than downlights aimed at the screen. Place switches at the entrance and near the seating if local rules allow.
Dark finishes reduce reflections, but the room need not be black. Matte surfaces in subdued colors can preserve contrast while keeping the space pleasant for music, games, and conversation. Avoid glossy tables in the projection path.
Plan Sound Control Realistically
Acoustic treatment inside the room improves clarity; it does not automatically soundproof the room. Sound isolation depends on construction, seals, structure, and ventilation paths. If late-night bass affects bedrooms or neighbors, consult an acoustic professional before building. Rugs, curtains, upholstered furniture, and correctly placed absorption can reduce excessive echo, but random foam tiles are not a complete design.
Simulate the Whole Session
Build the room in Aedifex with the image rectangle, seated eye point, projector cone, speaker positions, reclined chairs, open door, and aisle. Test arriving with snacks, finding a seat in low light, adjusting equipment, watching for two hours, and leaving without crossing cables. The lighting guide for small rooms can help separate screen-safe pathway light from general illumination.
Compare screen and seating options in the room planner. A smaller image with comfortable posture, balanced sound, and safe circulation is better than the largest possible screen.
Home Theater Checklist
- Choose the viewing wall after mapping doors, windows, vents, outlets, and reflections.
- Test screen size and seating distance with a taped image and real content.
- Keep image center near seated eye level and check rear-row sightlines in section.
- Verify projector throw, lens shift, light path, ventilation, noise, and service access.
- Place speakers around the primary seats and test more than one subwoofer location.
- Draw recliners fully extended and preserve a code-compliant entry and aisle.
- Use blackout, dimmable pathway light, matte surfaces, and safe heater clearance.
- Plan rated wiring and qualified electrical installation before finishes.
- Distinguish acoustic treatment from structural sound isolation.
When the geometry works, use the interior planner to compare finishes without changing the tested sightlines. Register to save the equipment and layout version before construction begins.
Home Theater Room Layout: Viewing Distance and Setup
Continue the original home-theater screen discussion with a hypothetical 2210 mm image width. Assume a projection ratio of 1.5, 3600 mm of available lens-position distance and 200 mm of separate installation reserve.
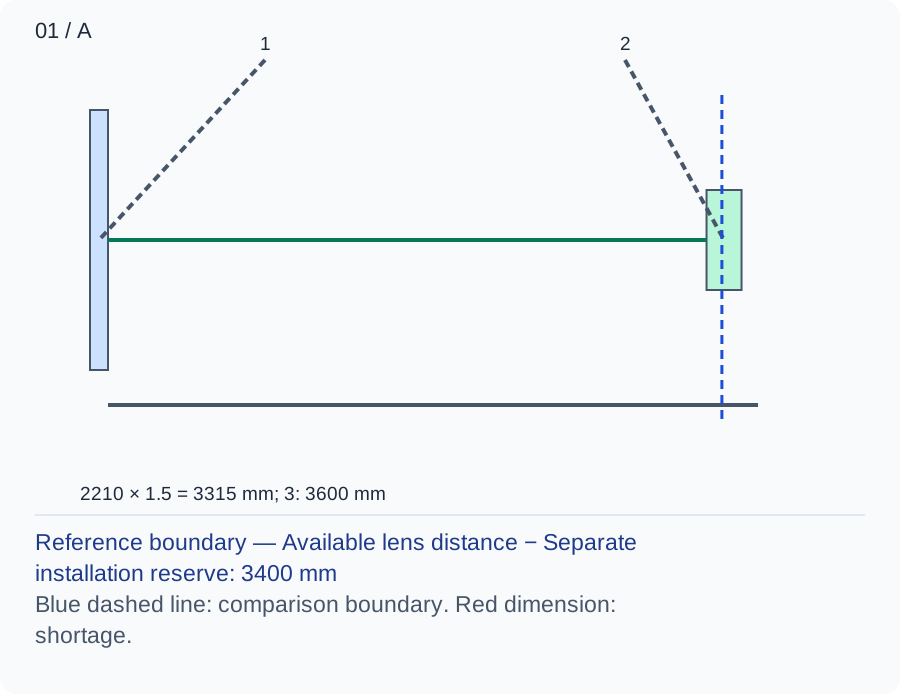
The projection diagram measures from the lens, not the back of the projector. 2210 × 1.5 = 3315 mm is the assumed optical distance, leaving 3600 − 3315 − 200 = 85 mm.
Numbers and marks identify the items described here; use the stated dimensions rather than measuring the screen.
1: screen plane; 2: assumed lens position; 3: available distance. Service allowance is subtracted separately.
| Input | A | B |
|---|---|---|
| Image width (mm) | 2210 | 2400 |
| Assumed throw ratio (×) | 1.5 | 1.5 |
| Available lens distance (mm) | 3600 | 3600 |
| Separate installation reserve (mm) | 200 | 200 |
Changed conditions and evidence
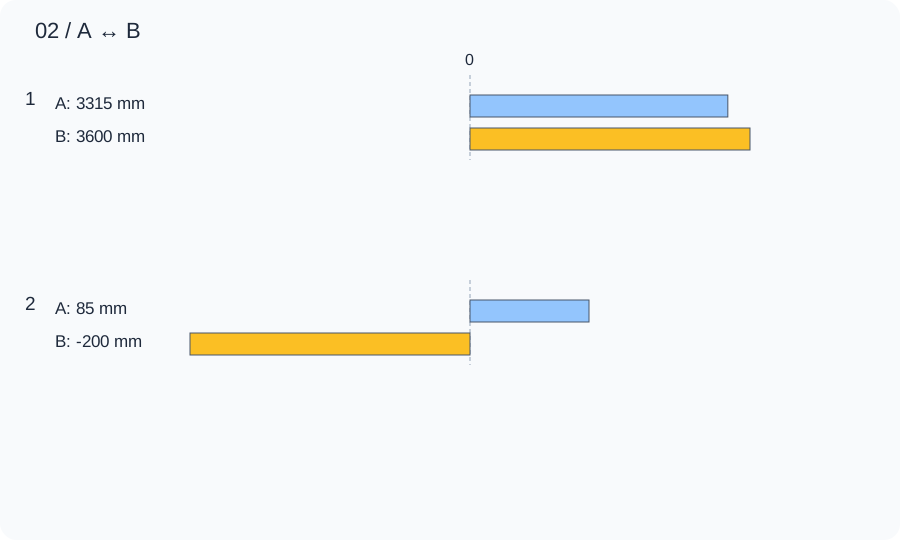
A larger 2400 mm image requires 3600 mm at the same ratio, so the result is −200 mm after the reserve. Compare a smaller image with a verified different lens specification; moving seats does not change this lens-distance arithmetic.
| Calculated relationship | A | B |
|---|---|---|
| 1. Assumed throw distance | 3315 mm | 3600 mm |
| 2. Remainder after the stated allowance | 85 mm | -200 mm |
Check the exact projector’s ratio range, lens reference and placement limits from its installation drawing. Tape the image at full size and test subtitles from the actual seat; optical fit does not establish viewing comfort or electrical suitability.
TRY THE EXAMPLE
Home Theater Room Layout: Viewing Distance and Setup
Continue the original home-theater screen discussion with a hypothetical 2210 mm image width. Assume a projection ratio of 1.5, 3600 mm of available lens-position distance and 200 mm of separate installation reserve.
Allowed range: 1–10000 · Step: 1
Allowed range: 0.1–5 · Step: 0.01
Allowed range: 1–10000 · Step: 1
Allowed range: 0–10000 · Step: 1
Positive remainder under these assumptions. Check the actual use and product requirements before choosing a layout.
- Assumed throw distance
- 3,315 mm
- Remainder after the stated allowance
- 85 mm
Reference boundary — Available lens distance − Separate installation reserve: 3400 mm
Blue dashed line: comparison boundary. Red dimension: shortage.
2210 × 1.5 = 3315 mm; 3: 3600 mm
Check the exact projector’s ratio range, lens reference and placement limits from its installation drawing. Tape the image at full size and test subtitles from the actual seat; optical fit does not establish viewing comfort or electrical suitability.
Teaching assumptions, not a surveyed home or a construction check. Results describe this simplified geometry or budget only. Changes stay on this page and reset on reload.