Kitchen Pantry Layout: Shelf Depths and Aisle Widths
Design a walk-in kitchen pantry with usable shelf depths, clear aisles, corner access, appliance zones, lighting, ventilation, and an inventory plan.
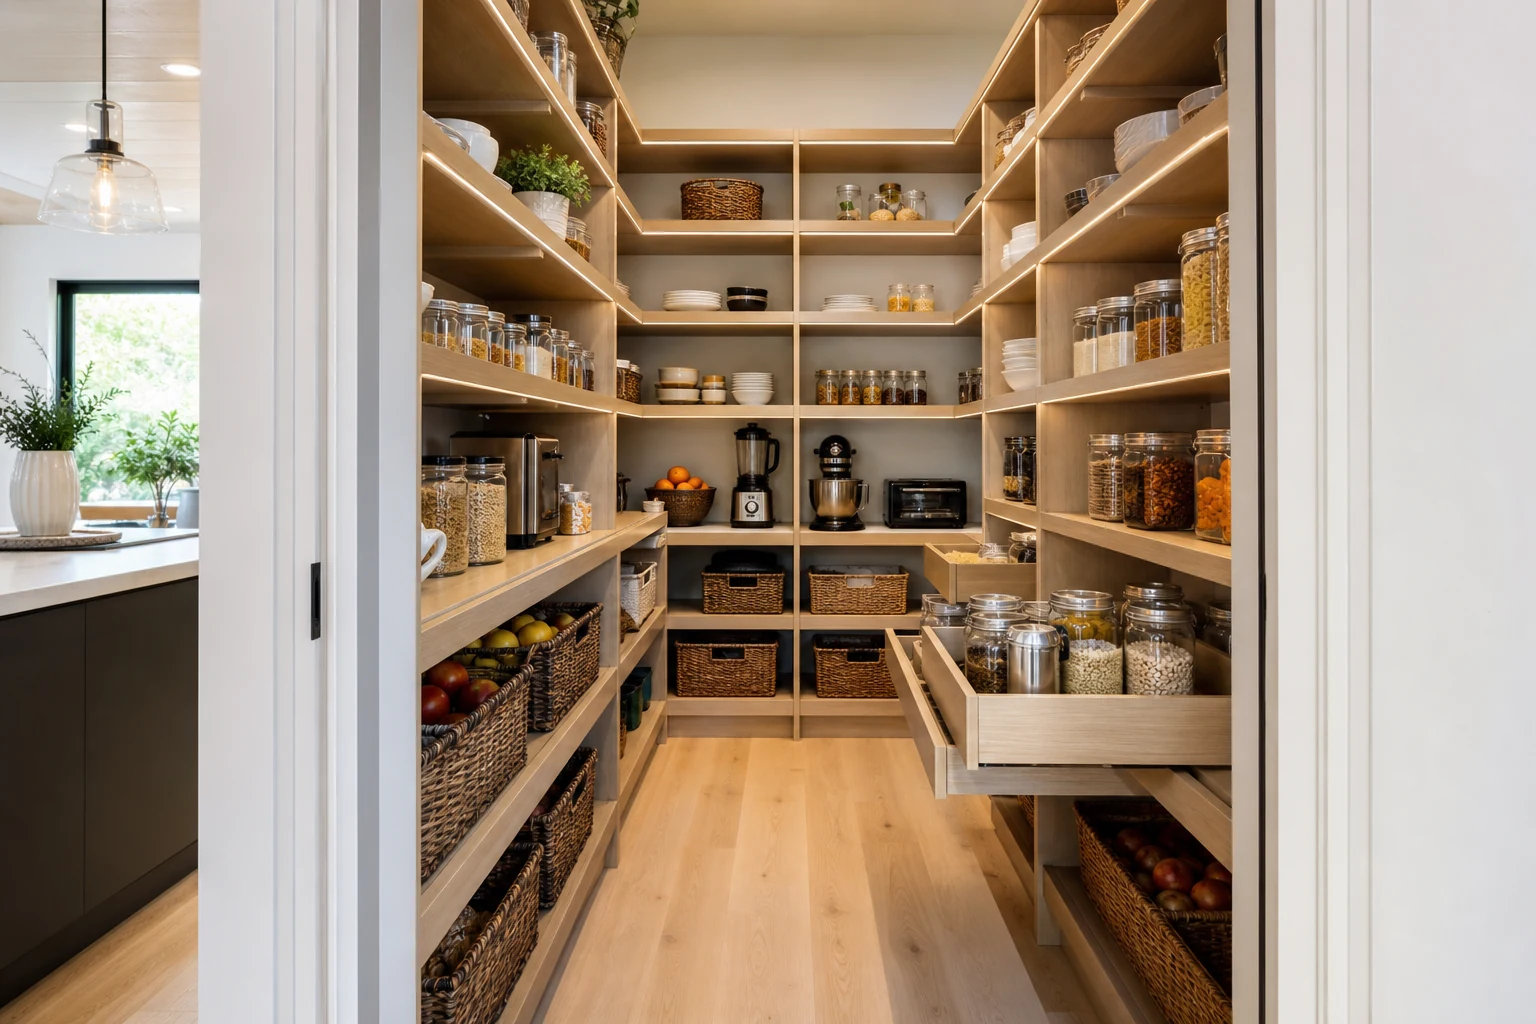
A walk-in pantry can hold more than tall kitchen cabinets, yet deep shelves and a narrow aisle often make half that capacity invisible. A useful pantry is designed around containers, hands, door swings, and stock rotation. Start with what the household stores, then assign shelf depth and height. Do not begin by covering every wall with the deepest shelf that fits.
Inventory Before You Draw Shelves
List one normal month of pantry contents: tins, cereal, rice, bottles, baking supplies, bulk packets, small appliances, serving pieces, pet food, recycling, and emergency stock. Measure the largest everyday items, not only matching storage jars. A rice cooker, stand mixer, paper-towel pack, and bottle crate create different depth and load requirements.
Sort the list into daily, weekly, and occasional use. Daily breakfast and cooking items belong between comfortable waist and eye height near the entrance. Heavy appliances should sit on a counter-height shelf or low pull-out, not above the shoulder. Bulk refills can occupy lower or higher zones if the working container remains easy to reach.
Use Several Shelf Depths
Shallow shelves around 20–30 cm make tins and packets visible in one or two rows. Shelves around 35–45 cm can hold cereal boxes, baskets, and many small appliances. Deeper shelves may suit bulk packages or equipment, but they need pull-outs or clearly defined bins; otherwise products disappear behind one another. Dimensions are planning ranges, so size each zone to the actual containers and support loads.
Varying depth is often more useful than a continuous deep shelf. Put shallow shelves on one long wall and a deeper appliance counter on the other. Step shelves back near the doorway to protect shoulder clearance. Leave the highest shelf shallower if a person must see and lift its contents safely.
Protect the Central Aisle
Around 90 cm of clear aisle can work for one person in a compact pantry, while 105–120 cm is more comfortable for turning, carrying a crate, opening lower storage, or sharing the room. Accessibility needs may require more and must follow local standards. Measure between shelf fronts, handles, bins, or appliances—whichever projects farthest.
The door should not consume the only standing space. A pocket or outward-swinging door can free the interior, but pocket walls have structural and services constraints. If the door swings inward, map its arc and avoid placing daily storage behind it. Keep a clear route from the kitchen counter to the pantry’s main landing surface.
Make Corners Visible
Three runs of identical deep shelving create inaccessible corner caves. Terminate one run before the corner, use shallower wraparound shelves, or dedicate the corner to a tall narrow item. Open corners also make it easier to clean crumbs and inspect for pests. Avoid diagonal corner shelves unless their front edge still allows the aisle and their containers remain reachable.
For a U-shaped pantry, test the body position needed to reach the back of each corner. A rotating tray can help small goods, but its diameter and edge rail must fit the shelf and load. In many rooms, a simple L shape plus one freestanding cart is more usable than maximum shelf coverage.
Create a Small-Appliance Work Zone
If the pantry is intended as a breakfast or appliance station, provide a counter approximately kitchen-counter height, proper electrical outlets, task light, heat clearance, and ventilation. Check each manufacturer’s requirements before enclosing a toaster, coffee machine, microwave, or multicooker. Steam beneath a shelf can damage finishes and create mold.
Keep an open landing area beside appliances. Do not fill the entire counter with machines. Draw doors, lids, water tanks, and removable trays at full travel. A coffee machine that fits under a shelf may still be impossible to refill; a mixer may need headroom when its top tilts back.
Plan Shelf Heights From Packages
Avoid equal shelf spacing. Short tins waste height on a 35 cm opening, while cereal boxes and bottles need more. Adjustable shelf pins provide flexibility, but vertical standards and brackets still have load limits. Give one zone enough height for occasional tall packages, and keep a few spare shelf positions for seasonal change.
Use raised lips only where needed; high edges can hide labels. Transparent or open-front bins help group sachets, but every bin should have a specific category. If a container becomes a miscellaneous drawer, remove it or divide it. Stock older items at the front and add a small “use next” basket to reduce waste.
Control Light, Heat, and Air
Use bright, neutral task lighting along shelf fronts rather than one ceiling fixture behind the user. Motion sensors are helpful when carrying groceries. Keep lamps away from stored paper and follow electrical clearances. If the room contains appliances, warm pipes, or an exterior wall, assess ventilation and humidity; food stores poorly in heat and damp.
Seal wall and floor junctions well enough to clean. Avoid an absorbent rug in a food store. Provide a reachable outlet for a vacuum, and keep the floor beneath the lowest shelf visible. A leak detector is sensible near plumbing or a water-using appliance.
Model One Grocery Trip
Build the pantry at actual size in Aedifex. Add shelves, baskets, doors, appliances, and a person holding a crate. Simulate entering, putting away cold and dry groceries, finding ingredients, refilling a machine, cleaning a spill, and checking stock. The kitchen layout guide helps connect the pantry to the wider cooking sequence.
Use the room planner to compare an L, U, and two-sided layout. Count how many daily items can be reached without bending, climbing, or moving another product. Capacity matters, but visible capacity is what the household actually uses.
Pantry Layout Checklist
- Measure the largest real packages, appliances, baskets, and crates.
- Assign daily, weekly, bulk, and occasional zones before sizing shelves.
- Use shallow 20–30 cm shelving for small goods and deeper zones only where justified.
- Preserve about 90 cm minimum working aisle as a starting point, with 105–120 cm where carrying, turning, or sharing requires it.
- Keep doors and pull-outs from blocking the only exit.
- Resolve corners without creating hidden deep storage.
- Provide landing space, outlets, task light, heat clearance, and ventilation for appliances.
- Make shelf heights adjustable and keep stock labels visible.
- Test restocking, cooking, cleaning, and inventory before installation.
A pantry should shorten kitchen work, not create a second search task. Once the storage map is practical, use the interior planner to compare shelf finishes and lighting, then register to save the chosen configuration.
Kitchen Pantry Layout: Shelf Depths and Aisle Widths
An independent pantry study assumes 1800 mm between finished walls. Two 350 mm shelves occupy 700 mm in total, and the chosen comparison route is 900 mm.
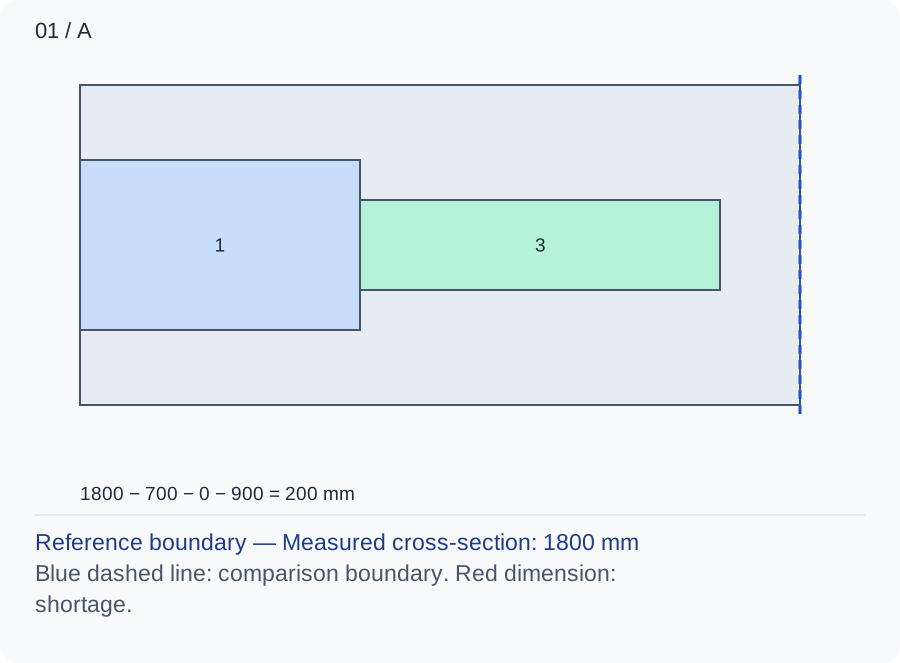
The shelf-only plan leaves 1100 mm between fronts and 200 mm beyond the chosen route. This shows the effect of paired shelf depths, not whether someone can reach an item at the back.
Numbers and marks identify the items described here; use the stated dimensions rather than measuring the screen.
1: fixed occupation; 2: operating extension; 3: chosen user or route allocation. These are sequential allocations, not exact furniture positions.
| Input | A | B |
|---|---|---|
| Measured cross-section (mm) | 1800 | 1800 |
| Combined fixed occupation (mm) | 700 | 1000 |
| Operating projection (mm) | 0 | 0 |
| Chosen user or route allowance (mm) | 900 | 900 |
Changed conditions and evidence
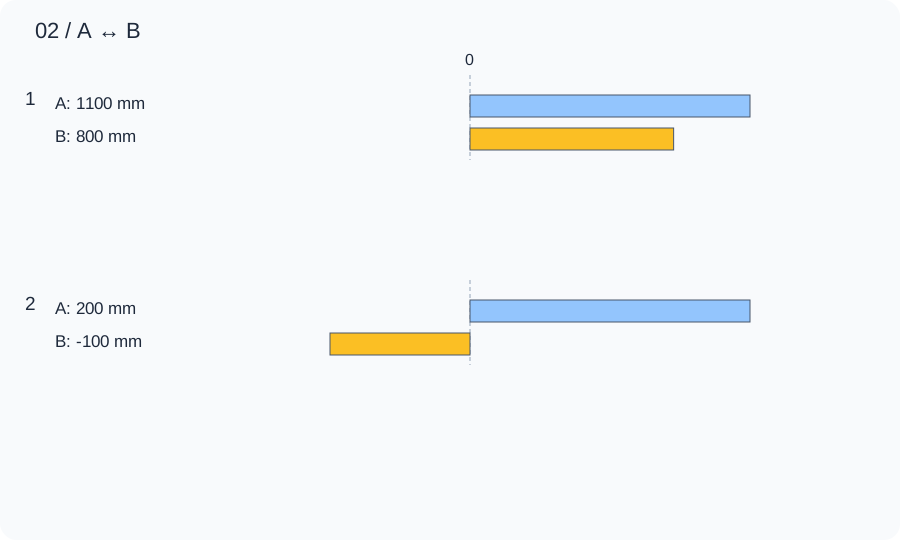
Two 500 mm shelves raise fixed occupation to 1000 mm and create a −100 mm balance. Deeper shelves may add hidden stock while reducing movement; keeping one side shallow can be a better inventory tradeoff.
| Calculated relationship | A | B |
|---|---|---|
| 1. Unoccupied cross-section | 1100 mm | 800 mm |
| 2. Remainder after the stated allowance | 200 mm | -100 mm |
Put actual cereal boxes, oil bottles and shopping bags on a mock shelf and retrieve the back row. Check door swing, shelf load and carrying turns separately; empty aisle width omits the objects in your hands.
TRY THE EXAMPLE
Kitchen Pantry Layout: Shelf Depths and Aisle Widths
An independent pantry study assumes 1800 mm between finished walls. Two 350 mm shelves occupy 700 mm in total, and the chosen comparison route is 900 mm.
Allowed range: 1–12000 · Step: 1
Allowed range: 0–12000 · Step: 1
Allowed range: 0–12000 · Step: 1
Allowed range: 0–12000 · Step: 1
Positive remainder under these assumptions. Check the actual use and product requirements before choosing a layout.
- Unoccupied cross-section
- 1,100 mm
- Remainder after the stated allowance
- 200 mm
Reference boundary — Measured cross-section: 1800 mm
Blue dashed line: comparison boundary. Red dimension: shortage.
1800 − 700 − 0 − 900 = 200 mm
Put actual cereal boxes, oil bottles and shopping bags on a mock shelf and retrieve the back row. Check door swing, shelf load and carrying turns separately; empty aisle width omits the objects in your hands.
Teaching assumptions, not a surveyed home or a construction check. Results describe this simplified geometry or budget only. Changes stay on this page and reset on reload.