Robot Vacuum-Friendly Furniture Layout: Practical Guide
Arrange furniture for reliable robot vacuum cleaning with correct clearance, accessible docking, managed cables, stable rugs, and passable thresholds.
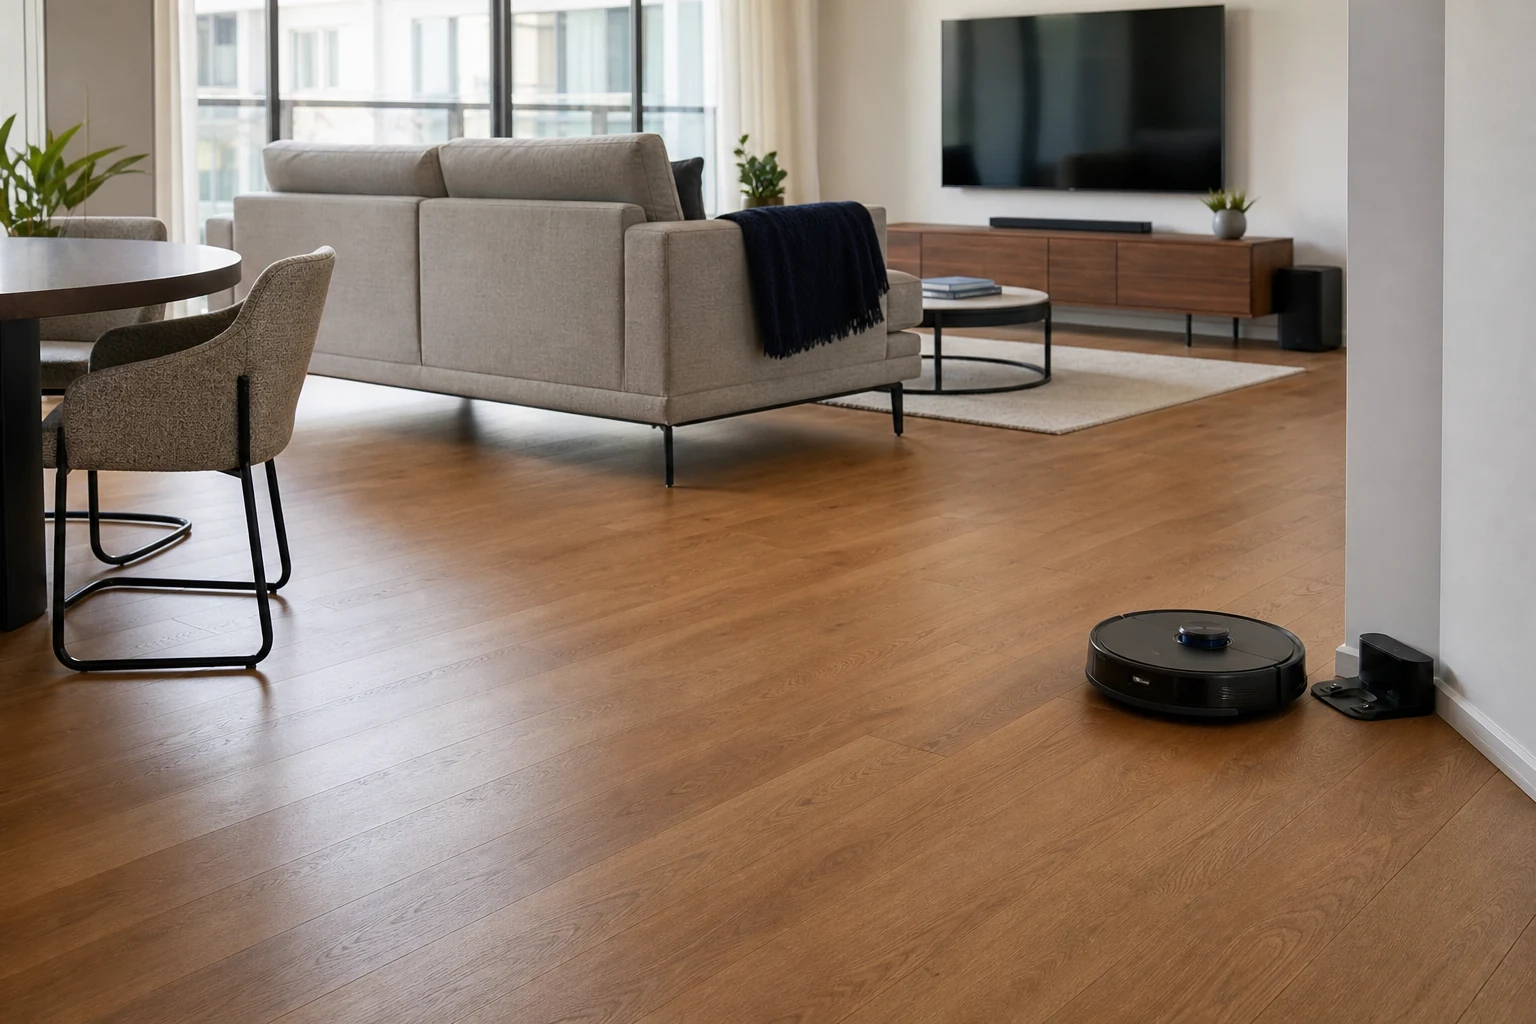
A robot vacuum cleans the floor it can reach, not the floor shown on a plan. Sofa legs that are 2 mm too low, dining-chair bases that create a cage, loose charging cables, dark fringe, and a hidden dock can turn an automated routine into daily rescue work. Design continuous routes and service access before buying furniture or assigning the dock.
Measure the Actual Robot
Record body diameter, total height including the lidar turret or camera, wheel track, brush projection, turning circle, and dock dimensions. Manufacturer specifications can change between models, so measure the unit if available. Add a small tolerance for floor variation, rug edges, and furniture sag; a clearance equal to the robot’s exact height is not reliable.
Also note the maximum threshold and rug height the manufacturer supports. Real performance depends on edge shape, traction, wheel wear, and approach angle. A rounded 15 mm transition may be easier than a sharp 12 mm lip. Test the actual floor junction rather than relying on one number.
Decide Which Furniture Should Be Cleanable Underneath
There are two stable strategies: provide generous access beneath a piece, or block it completely. The frustrating middle condition is a gap that lets the robot enter but traps the turret, brushes, or bumper. For sofas, beds, media units, and cabinets, target clear height above the complete robot plus a practical tolerance across the whole footprint.
Check the center of a long sofa or bed, not only the legs. Frames and cushions can sag, support rails may be lower, and storage drawers can project. If under-furniture cleaning is unnecessary, use a continuous plinth or barrier that prevents partial entry without creating a dust-catching narrow slot.
Keep Passing Gaps Wider Than the Body
Measure between chair legs, table bases, planters, baskets, and side tables. A robot needs more than its diameter to pass without repeated bumper contact, especially when approaching at an angle. As a practical starting point, give 5–10 cm of extra width beyond the robot body where possible, then test the exact model.
Dining sets are difficult because moving chairs change the map. Cantilever bases, closely spaced legs, and low crossbars can trap side brushes. Decide on a “cleaning position” for chairs: lifted onto the table only if safe, pulled out to marked positions, or selected with enough base clearance to remain in place.
Give the Dock an Honest Home
The dock needs flat floor, power, a stable back surface, and clear approach space. Follow the manufacturer’s side and front clearance because navigation methods differ. Do not hide it behind a door, under a cabinet with insufficient height, or beside a frequently moved bin. The robot should return even when the room is in its normal evening state.
Place the dock where the user can remove the bin, replace a bag, clean brushes, and reach the outlet. Auto-empty docks need additional vertical and front service space. Keep them away from water splashes, strong heat, and loose curtains. A central location may improve navigation across a multi-room floor, but convenience and noise also matter.
Remove Cable and Fabric Traps
Route television, lamp, charger, and speaker cables above the robot’s brush height or through fixed cable management. Do not leave a loop long enough to be pulled into a wheel. Power strips should be wall-mounted or enclosed with ventilation and access, not placed loose behind a console.
Curtains, bed valances, throws, drawstrings, and long rug fringe can be ingested. Shorten, tie, or position them beyond the cleaning path without compromising heater clearance or window operation. Keep lightweight pet toys and charging cords in a daily reset basket.
Stabilize Rugs and Transitions
Use flat, secured rug edges that the robot can approach from several angles. A compatible non-slip pad reduces bunching, but confirm it will not damage the floor. Thick shag, tassels, black borders, or reflective patterns can confuse some sensors. Check current guidance for the exact model.
At thresholds, test forward, diagonal, and return approaches. A slim transition ramp may help if it is secured, does not become a trip hazard, and is appropriate for the floor. Do not create a ramp that blocks a door, wheelchair, or emergency route simply to serve the robot.
Protect Delicate and Unstable Objects
The bumper can nudge lightweight floor lamps, plant stands, pet bowls, and decorative screens. Select stable wide bases or move fragile objects above floor level. Keep water bowls in a no-go zone or on a stable tray that the robot cannot climb. Verify that a plant saucer cannot spill when touched.
Mirrors reaching the floor, glass doors, and dark furniture may affect navigation. Virtual barriers can help, but physical layout should remain safe if a saved map is lost. Stairs, balconies, and level changes need functioning sensors plus a conservative physical environment; never rely on software as the only protection for a dangerous edge.
Plan Room-to-Room Continuity
Trace one continuous path from dock to every intended room and back. Check doors in their normal positions, not pinned fully open for the test. Narrow doorstops, bath mats, laundry, and pet gates often break the route. Decide which rooms are included in daily cleaning and which require preparation.
Open-plan layouts benefit from clear furniture clusters rather than scattered small objects. The traffic-flow furniture guide helps align human and robot paths; both need predictable circulation, though their required widths differ.
Run a Rescue-Free Test
Build the floor in Aedifex with the robot diameter, dock approach, low furniture, rugs, thresholds, cables, and door states. Then run the real robot after the home has been used for a day, not immediately after tidying. Record every rescue, repeated collision, missed strip, and inaccessible bin.
Use the room planner to compare furniture with different leg and base designs before purchase. Repeat the test after moving dining chairs, opening a recliner, and placing a laundry basket—the conditions that change most often.
Robot-Friendly Layout Checklist
- Measure body diameter, full height, turning needs, brushes, dock, and service access.
- Add tolerance above the robot across the full sofa, bed, and cabinet footprint.
- Either make under-furniture access generous or block it completely.
- Give passing gaps more width than the robot body and test angled approaches.
- Choose a repeatable dining-chair cleaning position.
- Follow dock clearances and preserve bin, bag, brush, and outlet access.
- Secure cables, curtains, throws, fringe, and lightweight toys.
- Stabilize rugs and test every threshold in both directions.
- Protect water, fragile bases, mirrors, stairs, and level changes physically.
- Test the normal lived-in room and count rescues before finalizing.
A robot-friendly home does not have to be empty. It needs deliberate edges, stable objects, and continuous floor. Once the route works, use the interior planner to compare furniture bases and register to save the tested layout.
Robot Vacuum-Friendly Furniture Layout: Practical Guide
Assume a robot vacuum is 100 mm high and a sofa’s lowest fixed underside is 105 mm above the finished floor. Add a hypothetical 10 mm vertical operating allowance to distinguish physical height from reliable access.
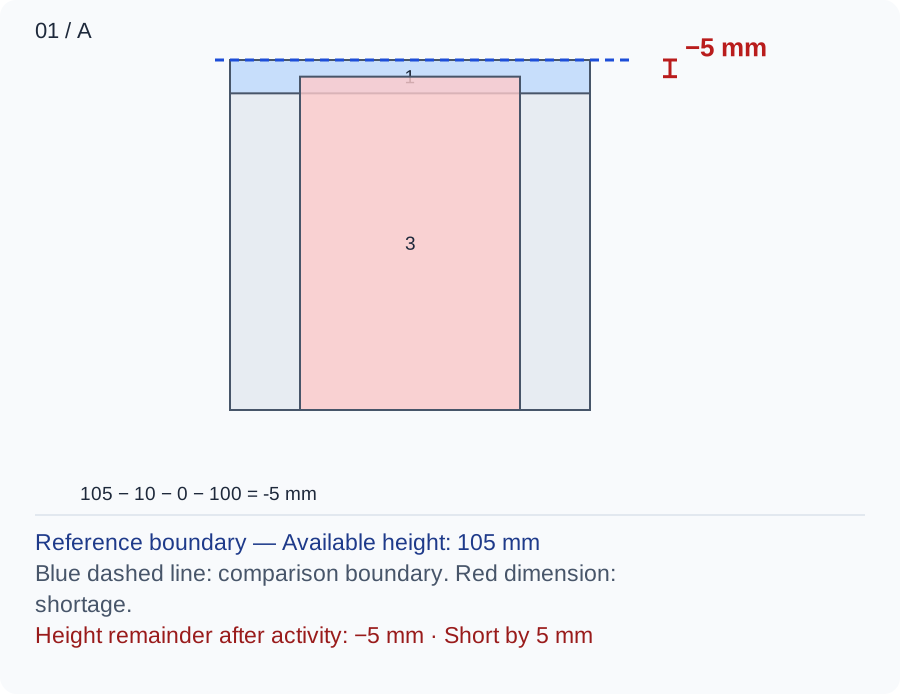
The section treats the operating allowance as a separate top loss. 105 − 10 − 0 − 100 = −5 mm, despite the robot being shorter than the advertised opening.
Numbers and marks identify the items described here; use the stated dimensions rather than measuring the screen.
1: upper fixed occupation; 2: lower fixed height; 3: activity above the lower object.
| Input | A | B |
|---|---|---|
| Available height (mm) | 105 | 125 |
| Top obstruction (mm) | 10 | 10 |
| Lower fixed assembly (mm) | 0 | 0 |
| Activity envelope height (mm) | 100 | 100 |
Changed conditions and evidence
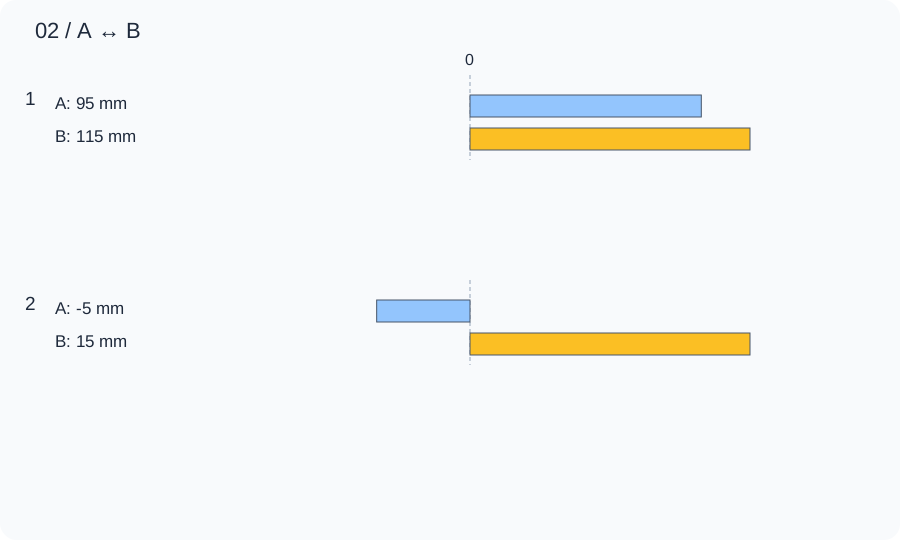
A verified 125 mm underside would change the result to 15 mm. Do not achieve this by improvised sofa risers; compare suitably designed furniture or accept a manual-cleaning zone instead.
| Calculated relationship | A | B |
|---|---|---|
| 1. Unallocated height | 95 mm | 115 mm |
| 2. Height remainder after activity | -5 mm | 15 mm |
Measure rails, dust covers and loaded sag at the lowest point, then test the exact robot under supervision as its instructions permit. Check horizontal entry, rugs and escape from beneath furniture separately; this vertical sum cannot guarantee navigation.
TRY THE EXAMPLE
Robot Vacuum-Friendly Furniture Layout: Practical Guide
Assume a robot vacuum is 100 mm high and a sofa’s lowest fixed underside is 105 mm above the finished floor. Add a hypothetical 10 mm vertical operating allowance to distinguish physical height from reliable access.
Allowed range: 1–10000 · Step: 1
Allowed range: 0–10000 · Step: 1
Allowed range: 0–10000 · Step: 1
Allowed range: 0–10000 · Step: 1
A negative remainder means the selected allocations overlap. Change the inputs or the proposal.
- Unallocated height
- 95 mm
- Height remainder after activity
- -5 mm
Reference boundary — Available height: 105 mm
Blue dashed line: comparison boundary. Red dimension: shortage.
Height remainder after activity: −5 mm · Short by 5 mm
105 − 10 − 0 − 100 = -5 mm
Measure rails, dust covers and loaded sag at the lowest point, then test the exact robot under supervision as its instructions permit. Check horizontal entry, rugs and escape from beneath furniture separately; this vertical sum cannot guarantee navigation.
Teaching assumptions, not a surveyed home or a construction check. Results describe this simplified geometry or budget only. Changes stay on this page and reset on reload.