Cleaning Closet Layout: Storage, Safety, and Access
Plan a compact cleaning closet for brooms, vacuum parts, chemicals, linens, charging, ventilation, and quick access without creating unsafe clutter.
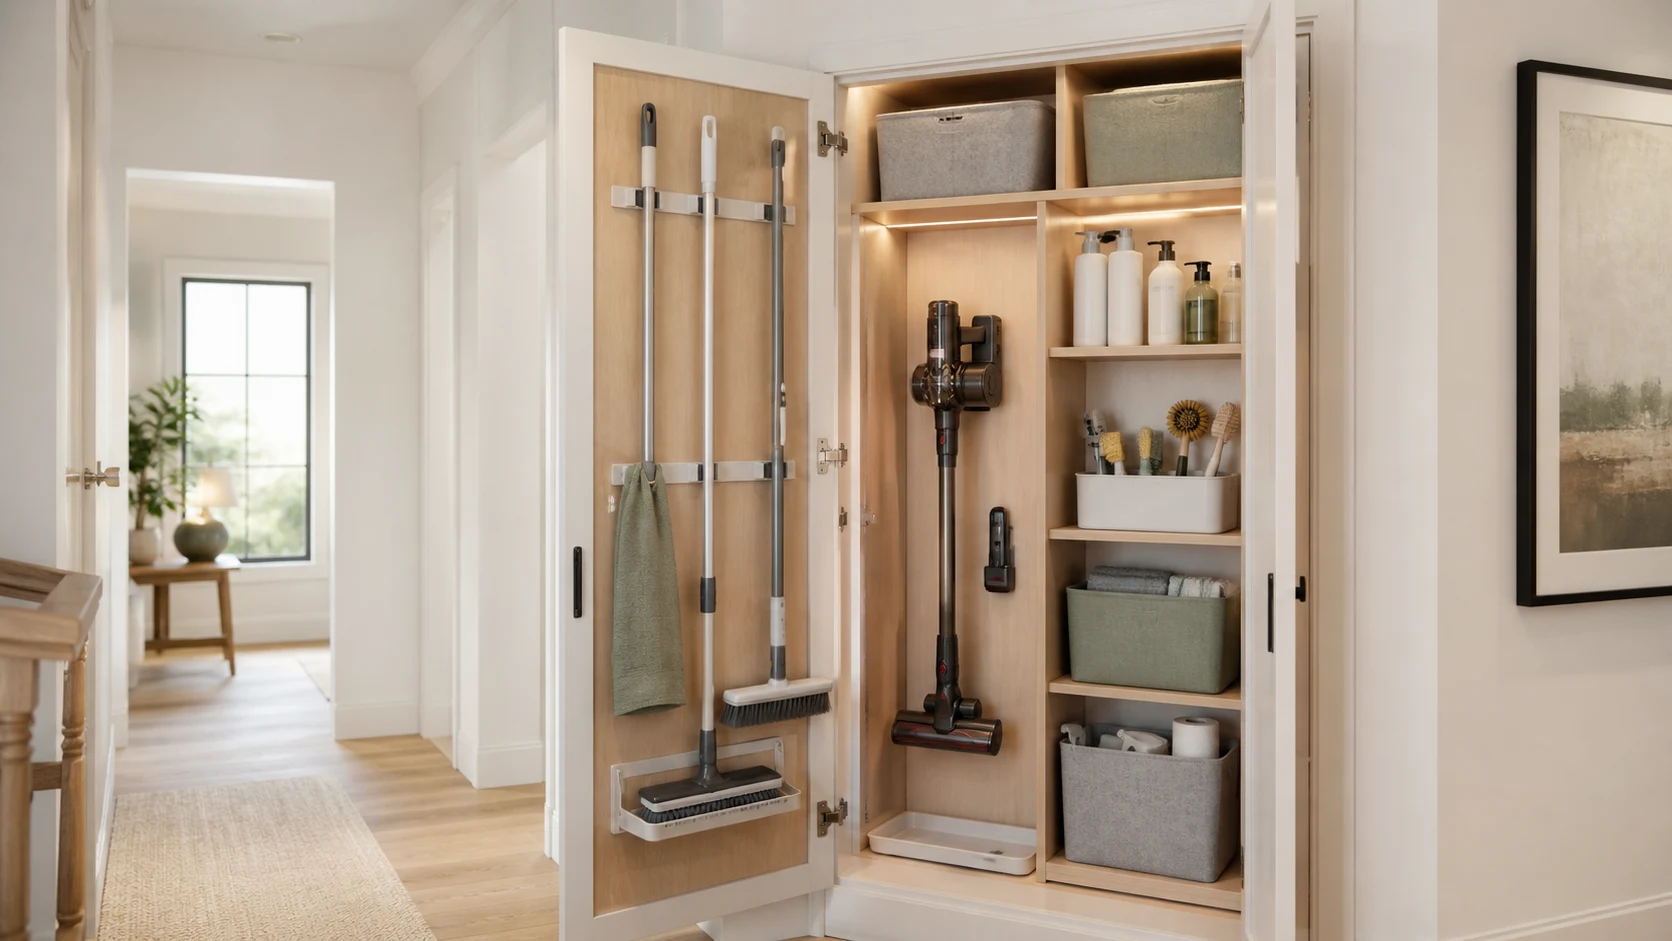
A useful cleaning closet turns scattered equipment into a short, safe routine: open one door, take the right tool, finish the task, and return it without rearranging everything else. A narrow cabinet can hold surprising capacity, but only when long tools, heavy liquids, vacuum accessories, laundry supplies, and charging devices receive distinct zones.
Inventory Tools at Their Working Size
List every item before designing shelves: broom, mop, bucket, dustpan, stick vacuum, canister vacuum, hoses, attachments, step stool, cleaning caddy, paper products, cloths, replacement filters, and bulk containers. Measure handles at full length and machines with attachments clipped on. A folded product photo is not its storage footprint.
Separate daily, weekly, and bulk stock. Frequently used items belong between knee and shoulder height or in an easy vertical bay. Refills can sit higher. Remove expired products and avoid storing incompatible chemicals together; follow each label and local poison-control guidance.
Reserve a Full-Height Tool Bay
A vertical bay about 12–18 inches (30–46 cm) wide can hold several long tools if brackets stagger handles and keep heads off the floor. Confirm the longest mop and the angle needed to insert it. A shallow closet may need door-mounted clips, but the door must close without pushing handles into shelves.
Do not pack the bay so tightly that one broom releases every tool. Individual clips or a rail let each item come out independently. Leave a washable drip tray beneath damp tools and allow them to dry before closing them into an unventilated cabinet.
Give the Vacuum a Parking and Charging Zone
Stick vacuums need wall support, charger clearance, and room to remove the battery or dust bin. Corded vacuums need cable management. Robot vacuums usually work better at an open docking station than behind a closet door; the robot-vacuum furniture guide covers its approach path.
Any outlet inside cabinetry must be properly installed for the location and equipment. Do not daisy-chain adapters or bury chargers behind flammable stock. Check heat, ventilation, cord bend radius, and manufacturer requirements. A dedicated shelf for spare batteries should remain dry and protected from impact.
Put Liquids on Contained Shelves
Store liquids upright on shelves with a raised edge or removable tray. Place heavy containers low enough to lift safely but above areas where children or pets can access them. Locking hardware may be appropriate, yet a lock is only one layer; hazardous products still need original labels, compatible separation, and suitable temperature.
Avoid shelves directly above towels or paper goods where a leak would ruin absorbent stock. Never decant chemicals into food containers. Some products must not be exposed to heat or combined with others, so read labels rather than organizing solely by bottle size.
Size Shelves by Category
Shallow shelves make small bottles visible; deep shelves encourage a second hidden row. Use bins only when the entire bin can be removed without moving a vacuum. Label by task—bathroom, floors, glass, laundry—rather than by color. A portable caddy should fit on one shelf with its handle ready to grab.
Keep cloths, gloves, brushes, filters, and trash bags in small drawers or open bins. Paper products can occupy high shelves if they remain dry. Reserve a defined zone for “in use” cloths awaiting laundry so damp materials do not mix with clean stock.
Plan the Door and Approach
The closet should open without blocking a narrow hallway or colliding with an adjacent room door. A bifold or sliding door saves swing space but can reduce clear opening and hide side shelves. A full-height hinged door provides mounting area, provided mounted items clear the interior shelves.
Stand outside with a bucket or vacuum and check the removal angle. A closet behind a coat rack may have theoretical storage but poor daily access. Put it near the center of cleaning routes, not necessarily in the laundry room if that location is far from the main floor.
Add Light, Ventilation, and Washable Surfaces
A small automatic light prevents misreading labels and helps spot leaks. Use a suitable enclosed fixture and keep controls clear of stored items. Ventilation needs depend on the closet, climate, and products; do not treat a louvered door as permission to store volatile or prohibited materials.
Choose a washable floor and wall finish. A removable floor tray protects against wet buckets and minor drips. Avoid a deep threshold that catches vacuum wheels. If a water heater, electrical panel, or mechanical equipment shares the enclosure, maintain all required service and combustion clearances; a utility room is not automatically a safe chemical closet.
Make Restocking Visible
Keep one open position per consumable rather than multiple half-used containers. Mark a reorder level on the bin or use a simple list inside the door. Put unopened bulk stock behind or above the active item so the oldest is used first.
A small hook for a shopping list is more useful than overfilling every centimeter. The closet should show what is missing at a glance and leave enough working space to wipe shelves.
Test the Retrieval Sequence in 3D
Model the closet depth, clear opening, shelf projections, vacuum, full-length handles, buckets, bins, and hallway doors in the Aedifex room planner. Use the 3D demo to verify that the longest tool can turn through the opening without striking the ceiling or opposite wall.
Coordinate nearby laundry storage with the laundry closet guide, then use the interior planner to choose durable, light-reflective finishes.
Cleaning Closet Checklist
- Measure every tool in stored and removal positions.
- Reserve an independently accessible bay for full-length handles.
- Provide safe vacuum parking, cable control, and approved charging.
- Contain liquids and separate hazardous or incompatible products.
- Keep frequent items visible between comfortable reach heights.
- Test door swing, clear opening, hallway conflicts, and carrying angles.
- Add suitable light, ventilation, and washable leak-resistant surfaces.
- Preserve child safety, labels, mechanical clearances, and service access.
A successful closet is not the one that holds the most; it is the one that lets every tool leave and return safely. After testing the cabinet and approach, register to save the measured storage plan before ordering shelves and doors.